King Lion Photoshop Tutorial

King Lion Photoshop Tutorial

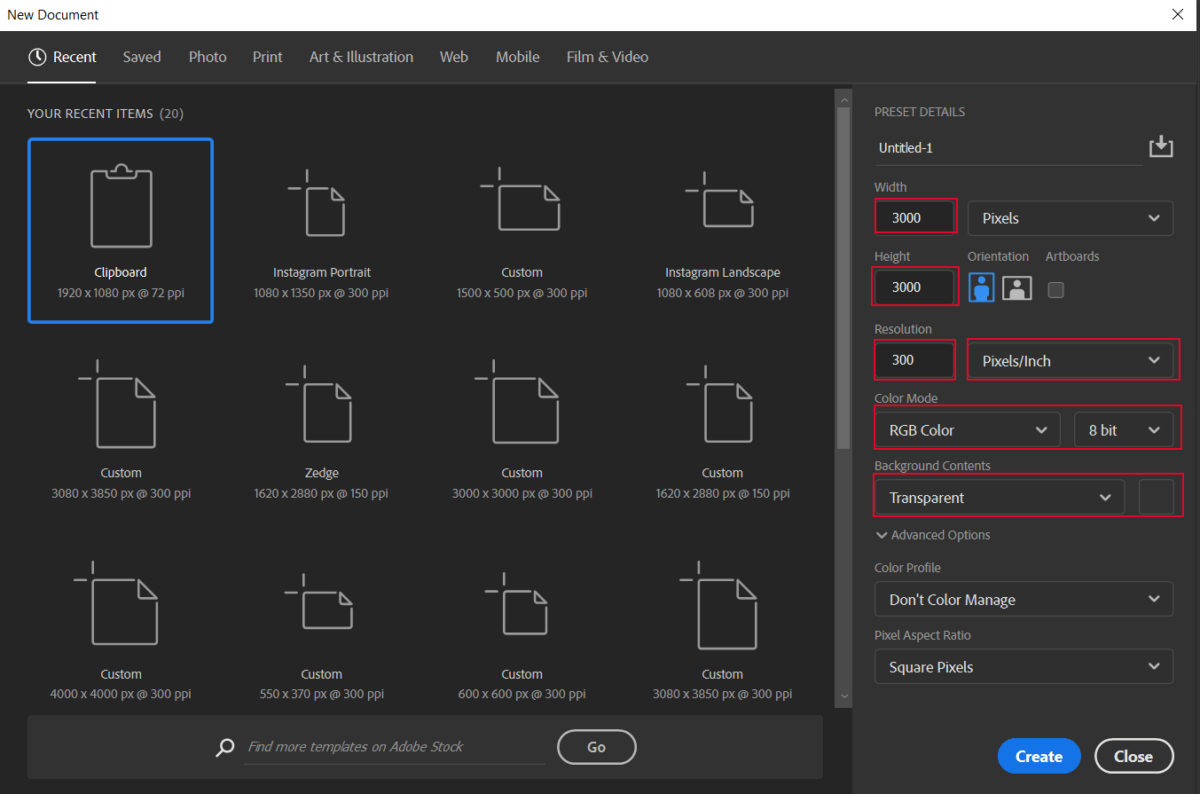
Everything you see exists together in a delicate balance. As king, you need to understand that balance and respect all the creatures, from the crawling ant to the leaping antelope. In this Photoshop tutorial, we will learn how to create a King Lion photoshop tutorial. First, we created a background Sky, Moon, Stars, Clouds then added Lion. Next, blended lion with background and add shadow and light. Also for the final touch added some Gradient maps and apply Camera Raw Filter.

Preview of Final Image
Tutorial Resources

Step 1

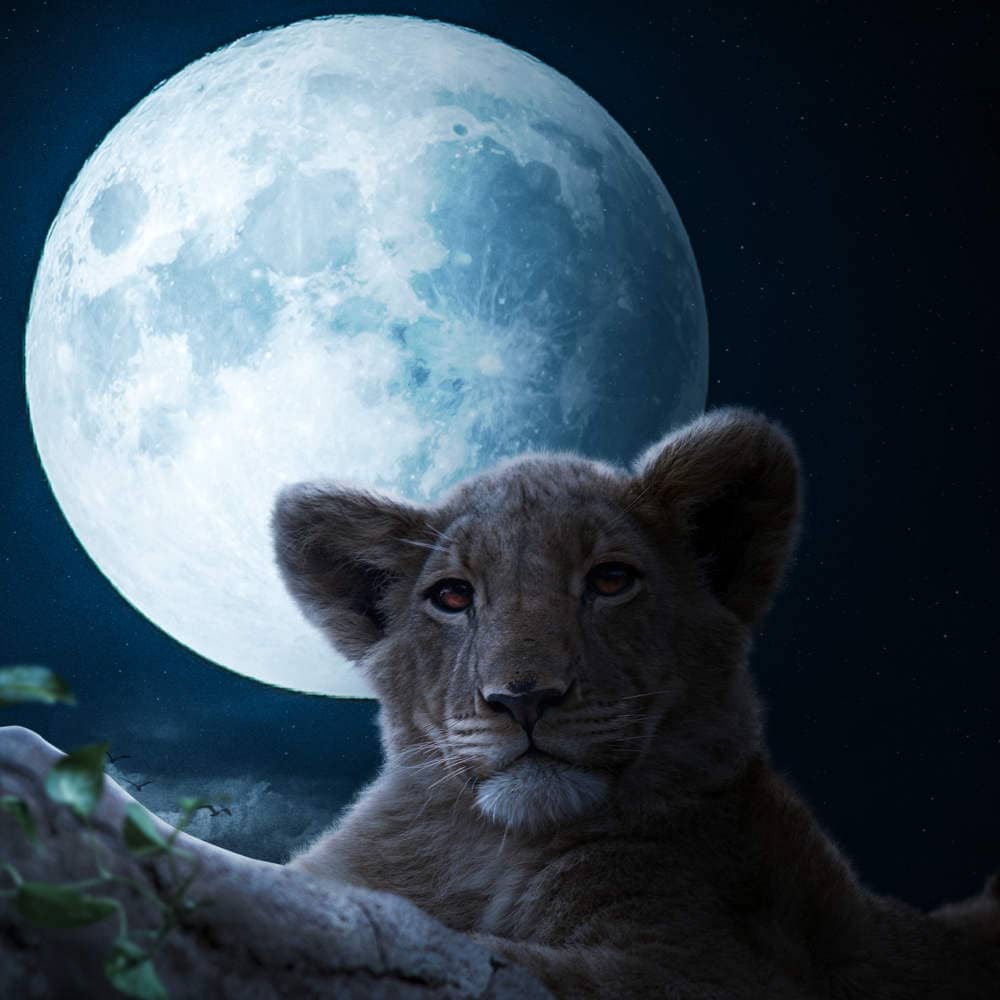
Now, let’s start by creating a new image file, go to the Menu bar and click File > New, and then input the following values on their respective fields

  • Preset: Custom
  • Width: 3000px
  • Height: 3000px
  • Resolution: 300px
  • Color Mode: RGB Color 8 bit
  • Background Contents: Transparent

Step 2

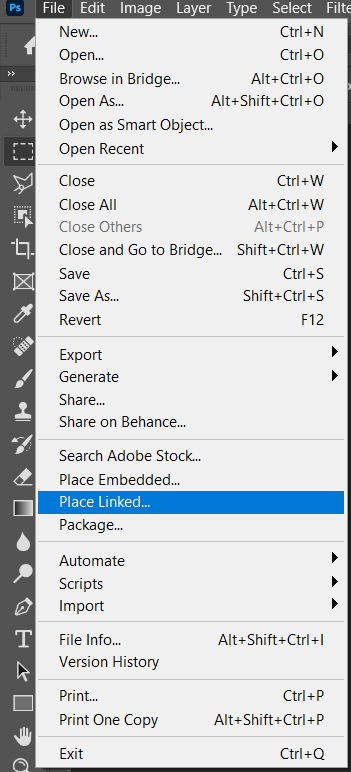
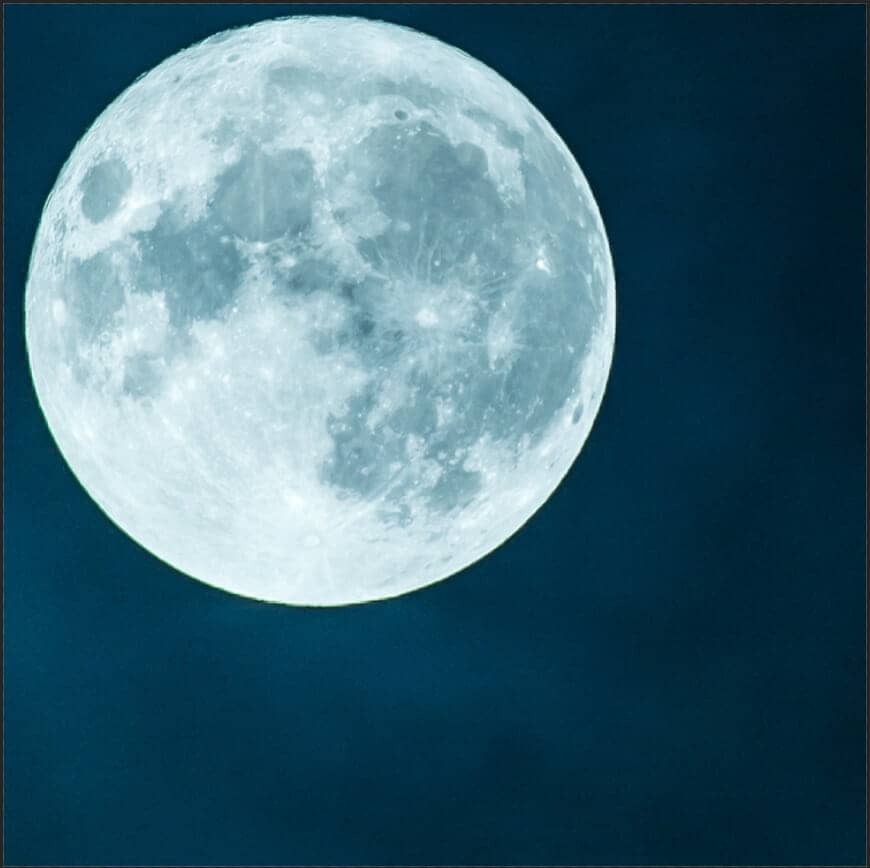
Now, place Moon Go to File > Place and select Moon, then place it to our work canvas and position the image with the transform tool (Ctrl / Cmd + T). Hold Alt + Shift and rasterize like the image below. In Photoshop CC only hold Alt to rasterize all sides together.
Step 3

Add Adjustment Layer "Hue/Saturation" Blend mode change to Hue with Opacity 30%.
Step 4

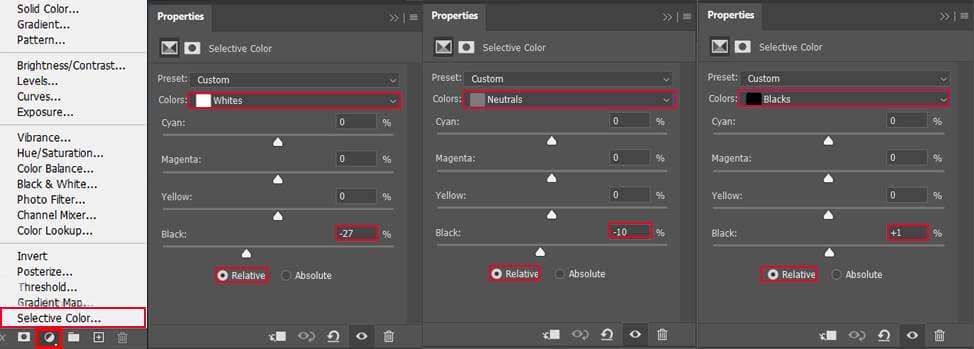
Add Adjustment Layer "Selective Color"
Step 5

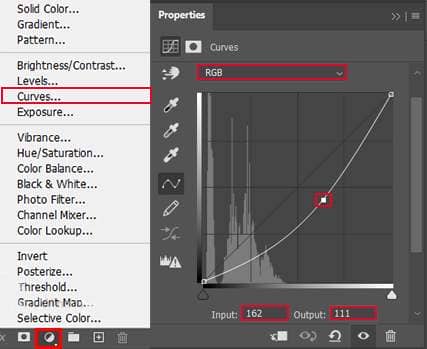
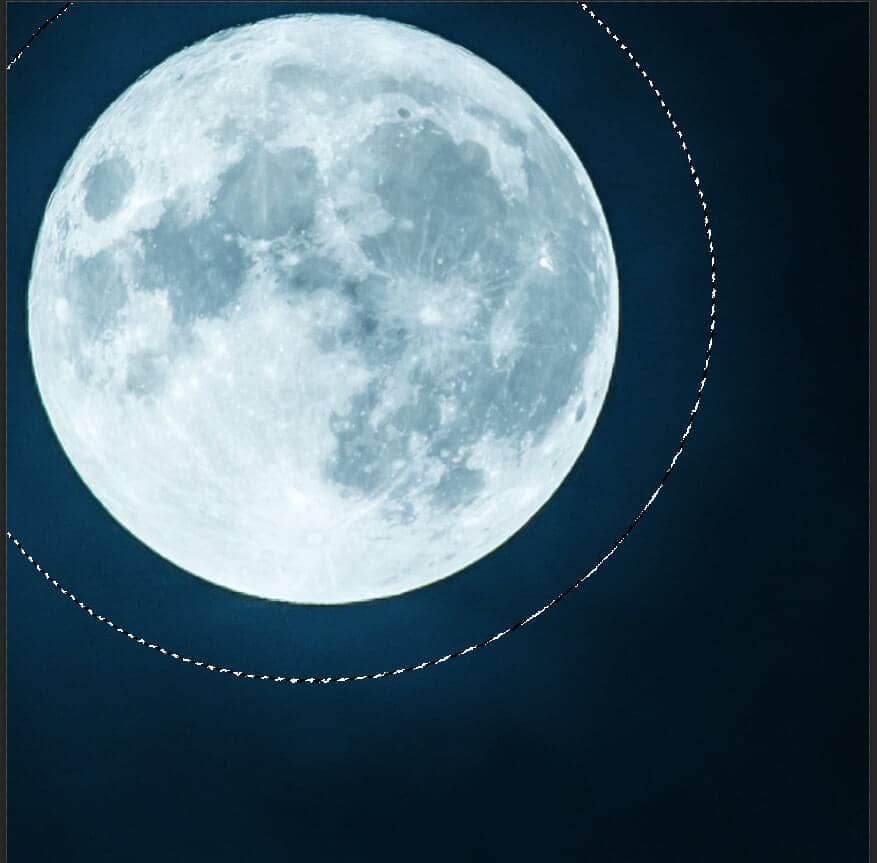
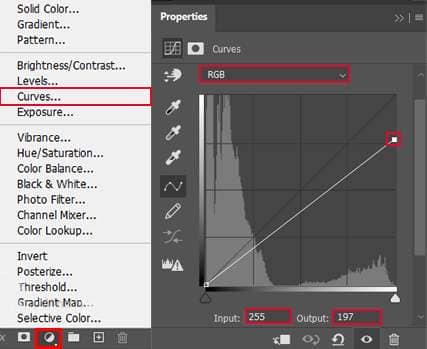
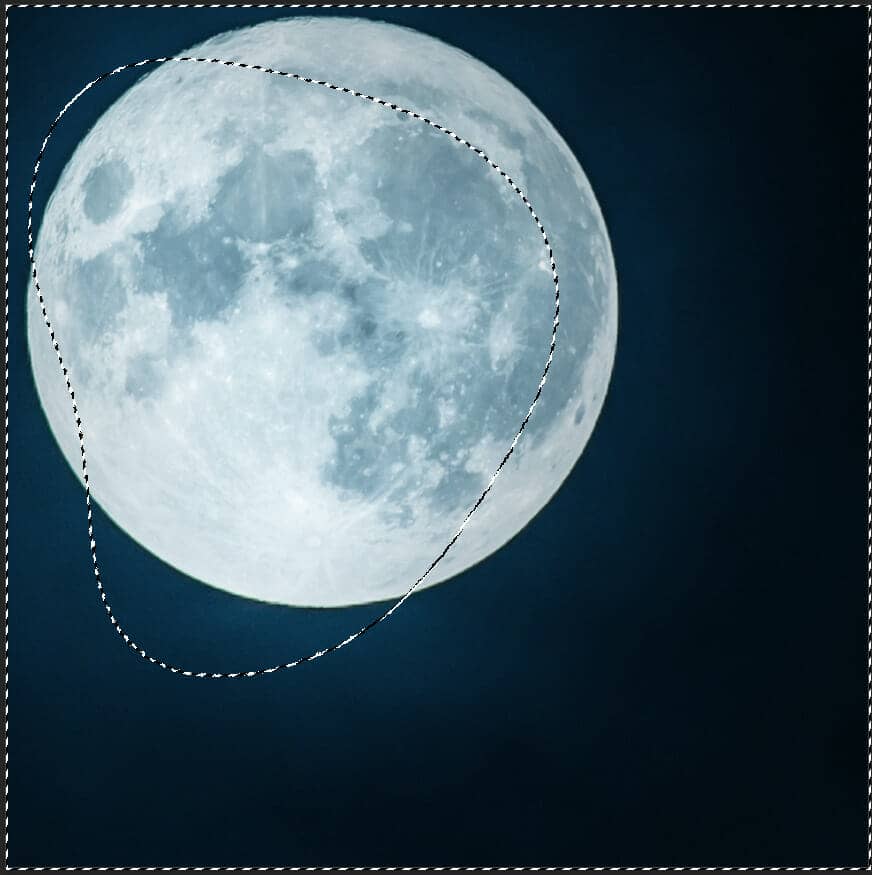
Add Adjustment Layer "Curves" and use Soft Round brush tool with the foreground color black and paint on Moon.
Step 6

Add Adjustment Layer "Curves" and again use Soft Round brush tool with the foreground color black and paint on Moon.
Step 7

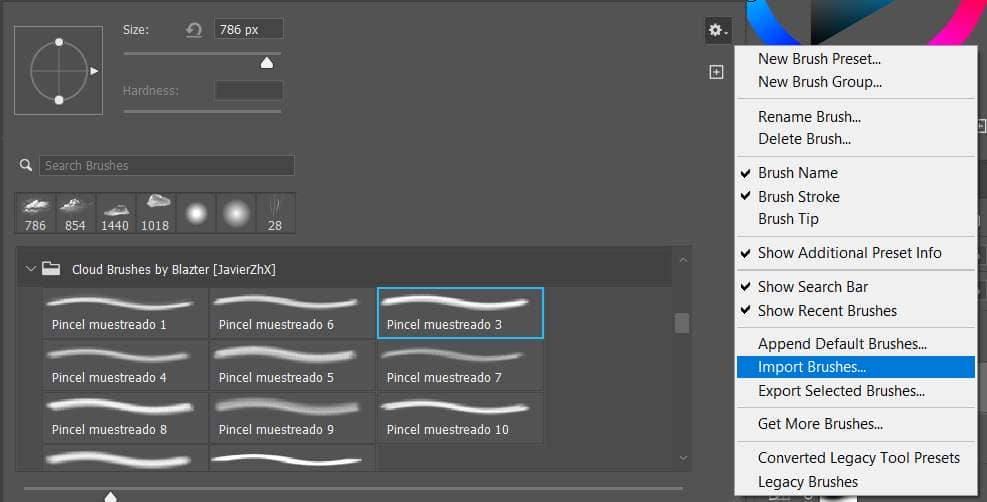
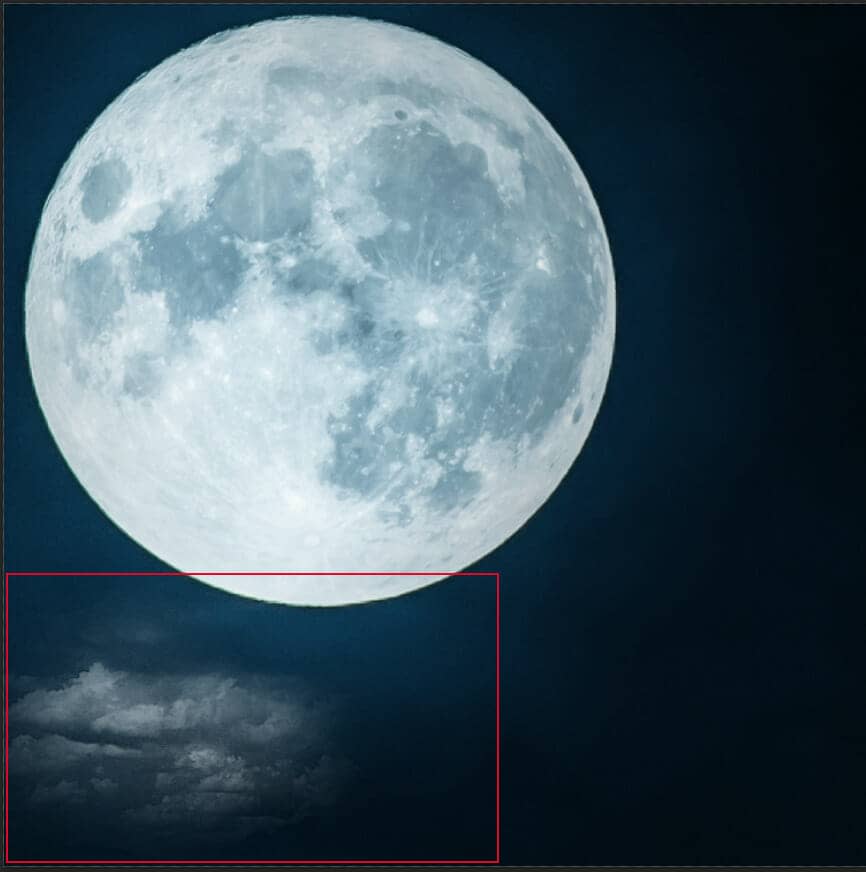
Next, we add Clouds but first, we need to import brushes. Select a Brush Tool(B) and right-click on the background. Now click on the gear icon and Import Brushes (Select a downloaded brush).
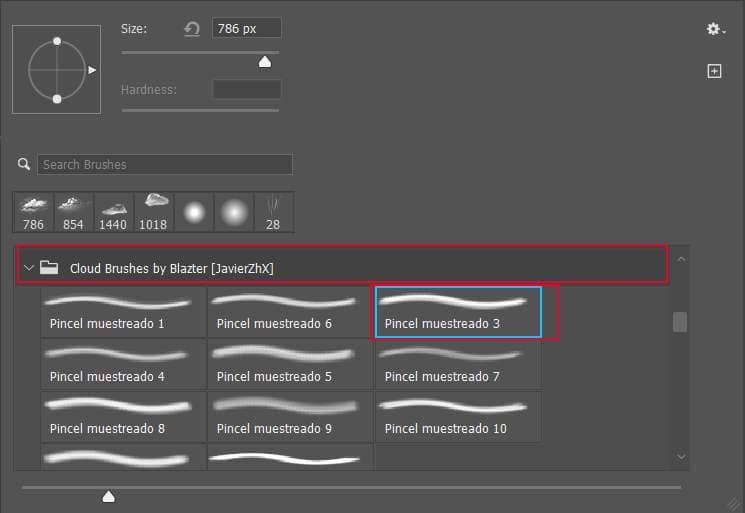
Now we can paint Clouds. Create a new layer and Foreground color use White.
Step 8

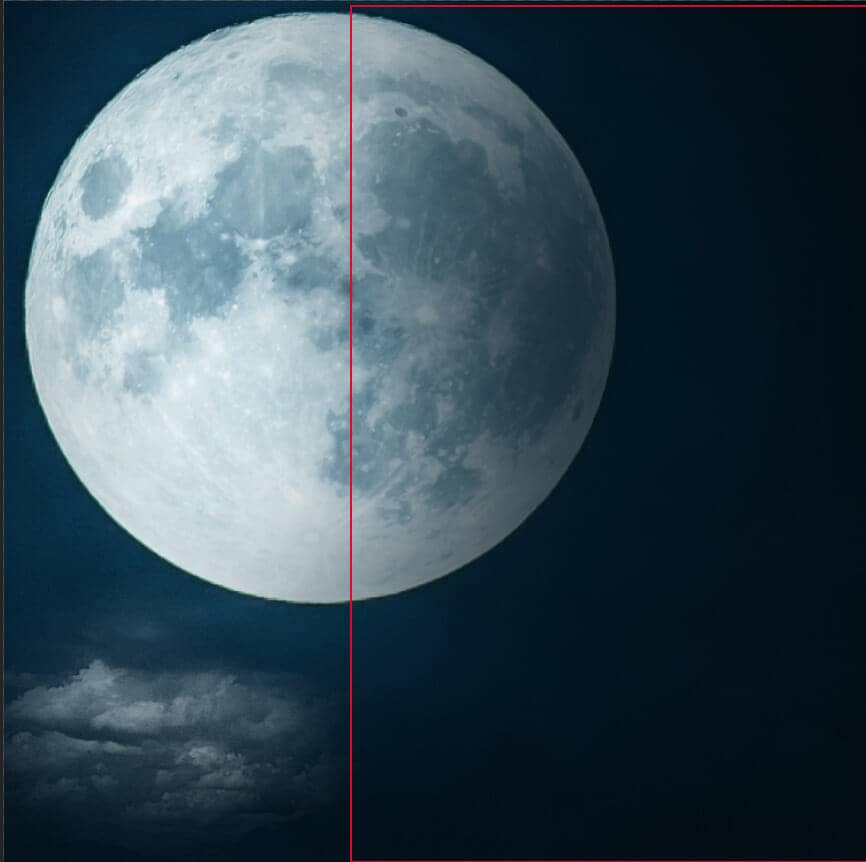
Next, create a new layer and use the Soft Round brush tool with the foreground color black and paint on right side. Opacity reduce to 90%.
Step 9

Go to File > Open and select Birds, then hold Ctrl/Cmd and click on the layer and after the selection area has been created, simply copy (Ctrl / Cmd + C) and Paste (Ctrl / Cmd + V)  it to our work canvas. Then position the image with the transform tool (Ctrl / Cmd + T). Hold Alt + Shift and resterize like the image below. In Photoshop CC only hold Alt to resterize al sides together.

Step 10

Add Adjustment layer "Color Balance"

Step 11

Add Adjustment Layer "Curves" and press Ctrl/Cmd + I to invert and use Brush Tool(B) Soft Round with foreground color white and paint the highlights(top parts on birds). Blend mode change to Luminosity.

Step 12

Create a new layer and select a Brush Tool(B) and right-click on the background. Now click on the gear icon and Import Brushes (Select a downloaded brush). Next, select Starrysky and paint on sky background. Foreground color set to white and opacity set to 40%.

Step 13

Next, add more glow to the moon. Create a new layer and use Brush Tool(B) Soft Round with foreground color gray (#505050) and paint on the moon. Blend mode change to Color Dodge with opacity 50%.

Step 14

Next, we will open Lion. After you open the image, use the Quick Selection Tool(W) and start selecting the animal. After the selection area has been created, simply copy (Ctrl / Cmd + C) and Paste (Ctrl / Cmd + V)  it to our work canvas. Then position the image with the transform tool (Ctrl / Cmd + T). Hold Alt + Shift and resterize like the image below. In Photoshop CC only hold Alt to resterize all sides together.

Step 15

Create a new layer below this Lion layer and select a Brush Tool(B) and right-click on the background. Now click on the gear icon and Import Brushes (Select a downloaded brush). Now use a hair brush and paint on a lion.

Step 16

Now select Lion and hair layer and put them into a folder(Ctrl/Cmd + G). Then add Adjustment Layer "Brightness/Contrast"

Step 17

Add Adjustment Layer "Exposure"

Step 18

Add Adjustment Layer "Curves" and press Ctrl/Cmd + I to invert and use Brush Tool(B) Soft Round with foreground color white and paint the highlights. Blend mode change to Luminosity.

Step 19

Add Adjustment Layer "Curves" and press Ctrl/Cmd + I to invert and use Brush Tool(B) Soft Round with foreground color white and paint the left side. Blend mode change to Luminosity.

Step 20

Add Adjustment Layer "Curves" and press Ctrl/Cmd + I to invert and use Brush Tool(B) Soft Round with foreground color white and paint the right side.

Step 21

Add Adjustment Layer "Color Balance"

Step 22

Add Adjustment Layer "Hue/Saturation" Opacity reduce to 20%.

Step 23

Add Adjustment Layer "Curves" and press Ctrl/Cmd + I to invert and use Brush Tool(B) Soft Round with foreground color white and paint highlight parts.

Step 24

Create a new layer and use Brush Tool(B) Soft Round with foreground color gray (#505050) and paint on highlight parts on Lion. Blend mode change to Color Dodge.

Step 25

Create another layer and use the Soft Round brush tool with foreground color white and paint on the lion. Blend mode change to Overlay.

Step 26

Next, add some colors to the eyes. First, create a new layer and use a soft round brush tool with the foreground color orange (#642e1c) and paint eyes. Blend mode change to Color Dodge.

Step 27

Go to File > Open and select Plant, then hold Ctrl/Cmd and click on the layer and after the selection area has been created, simply copy (Ctrl / Cmd + C) and Paste (Ctrl / Cmd + V)  it to our work canvas. Then position the image with the transform tool (Ctrl / Cmd + T). Hold Alt + Shift and resterize like the image below. In Photoshop CC only hold Alt to resterize al sides together. Then, add some blur Go to Filter > Blur > Gaussian blur and set radius to 8px.

Step 28

Add Adjustment Layer "Color Balance"

Step 29

Add Adjustment Layer "Hue/Saturation" and set the opacity to 59%.

Step 30

Add Adjustment Layer "Curves"

Step 31

Add Adjustment Layer "Curves" and press Ctrl/Cmd + I to invert and use Brush Tool(B) Soft Round with foreground color white and paint highlight parts.

Step 32

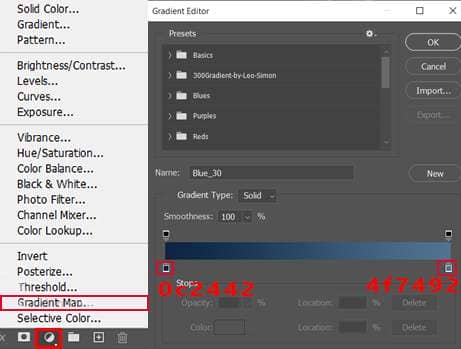
Add Adjustment layer "Gradient Map" Blend mode Soft Light/ Opacity 45%.

Step 33

When we finished all this, now merge all layers into one. Select the last layer and hold CTRL/CMD + SHIFT + ALT + E. Now we have a final layer, right-click on mouse and select Convert to Smart Object. Then go to Filter > Camera RAW Filter. At its most basic, the Photoshop Camera Raw filter allows you to use the functions of the ACR interface at any time within Photoshop.

Step 34

Now in Camera Raw Filter, set the Value: Basic

  • Temp: -7
  • Exposure: -0.10
  • Contrast: +5
  • Highlights: +4
  • Shadows: -2
  • Blacks: +1
  • Texture: +15
  • Clarity: +10
  • Vibrance: +18
  • Saturation: -7

HSL Adjustments Hue

  • Reds: -2

Saturation

  • Reds: +19
  • Oranges: +7
  • Greens: -4
  • Blues: +2

Luminance

  • Reds: +7
  • Greens: -2
  • Blues: -1

Radial Filter

  • Exposure: +0.15
  • Highlights: +7
  • Shadows: +7
  • Blacks: +5

And finally, everything should look like this.

Final Results

Download the PSD

King Lion Photoshop Tutorial.zip

One comment on “King Lion Photoshop Tutorial”

  1. Suggestion.... Use "Place Embedded" because your PSD will have issues if you "Place Linked" and you delete the JPG file.

    Also, why do you rasterize the layers? It is better to keep as smart layer.

Leave a Reply

Your email address will not be published. Required fields are marked *

cross