Make your artwork look like they're from an alternate universe. These Cyberpunk presets work with Photoshop (via the Camera Raw filter) and Lightroom. Download all 788 presets for 90% off.
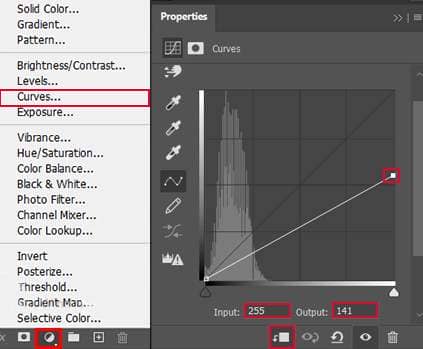
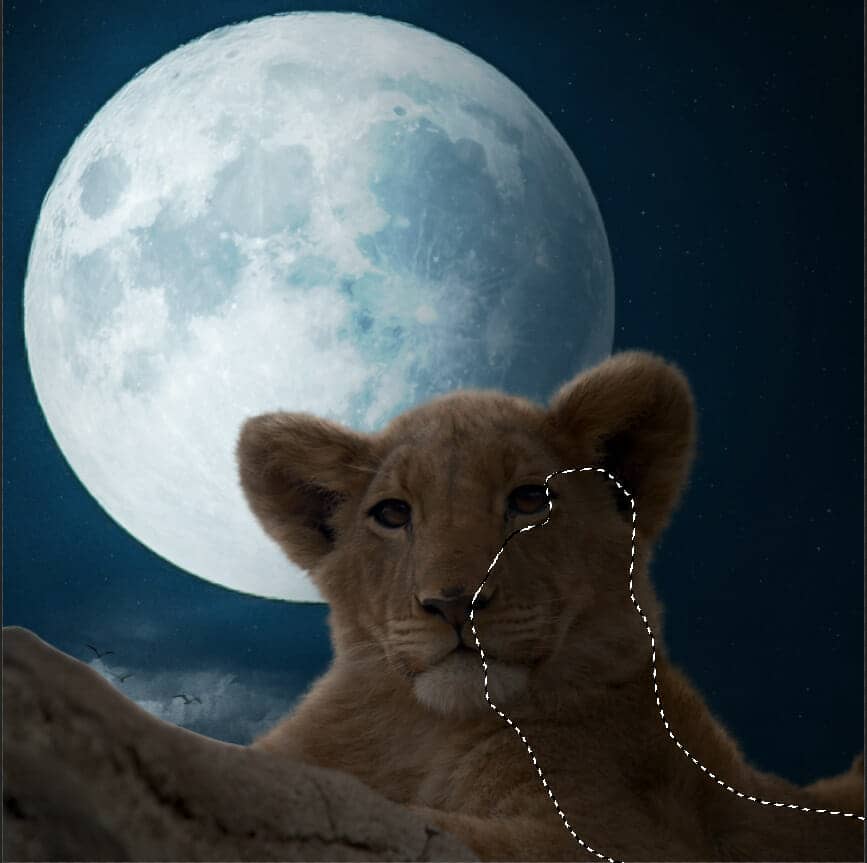
Step 21
Add Adjustment Layer "Color Balance"
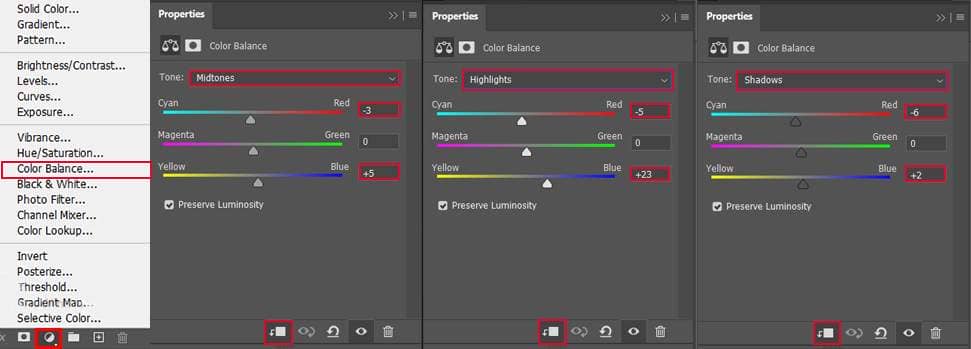
Step 22
Add Adjustment Layer "Hue/Saturation" Opacity reduce to 20%.
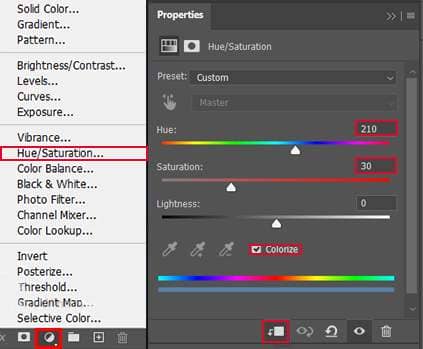
Step 23
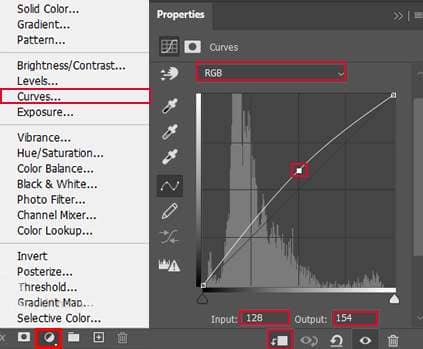
Add Adjustment Layer "Curves" and press Ctrl/Cmd + I to invert and use Brush Tool(B) Soft Round with foreground color white and paint highlight parts.
Step 24
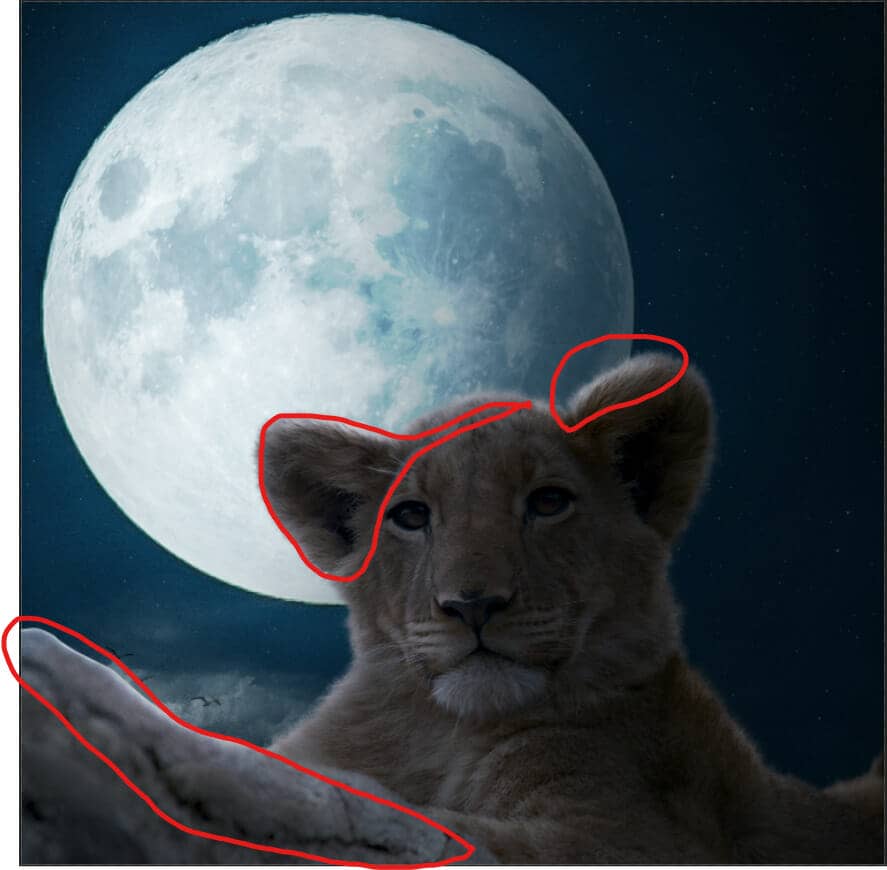
Create a new layer and use Brush Tool(B) Soft Round with foreground color gray (#505050) and paint on highlight parts on Lion. Blend mode change to Color Dodge.
Step 25
Create another layer and use the Soft Round brush tool with foreground color white and paint on the lion. Blend mode change to Overlay.

Step 26
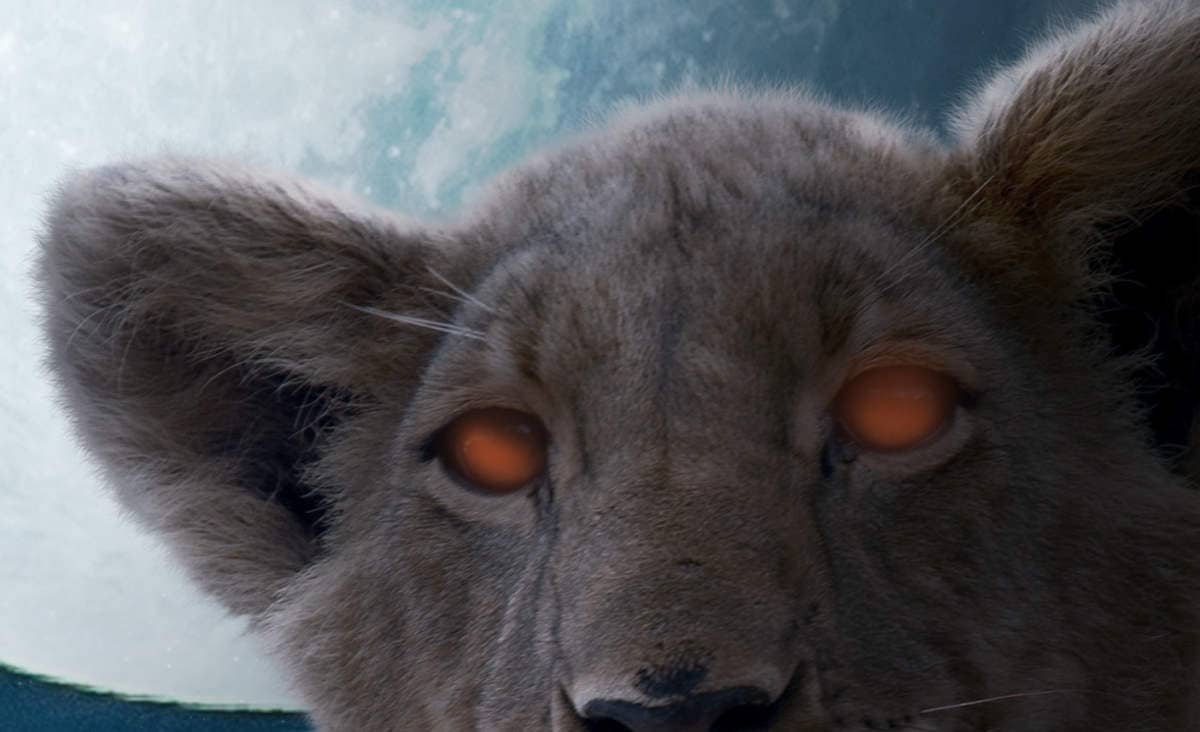
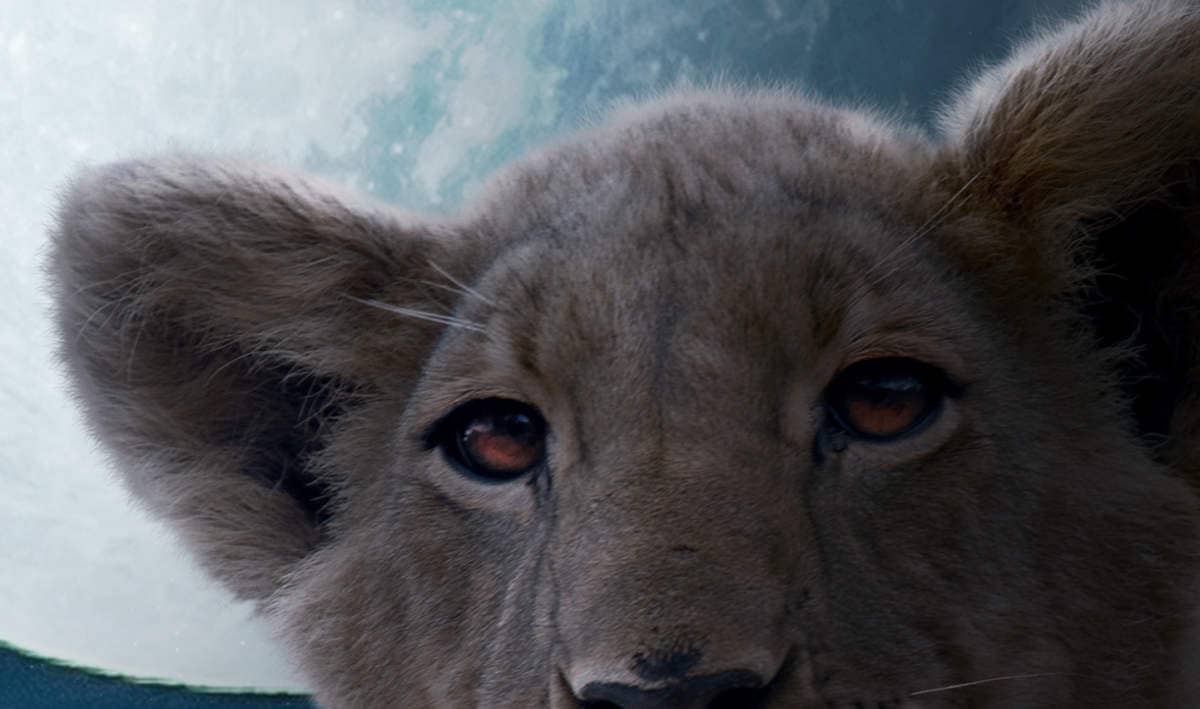
Next, add some colors to the eyes. First, create a new layer and use a soft round brush tool with the foreground color orange (#642e1c) and paint eyes. Blend mode change to Color Dodge.
Step 27
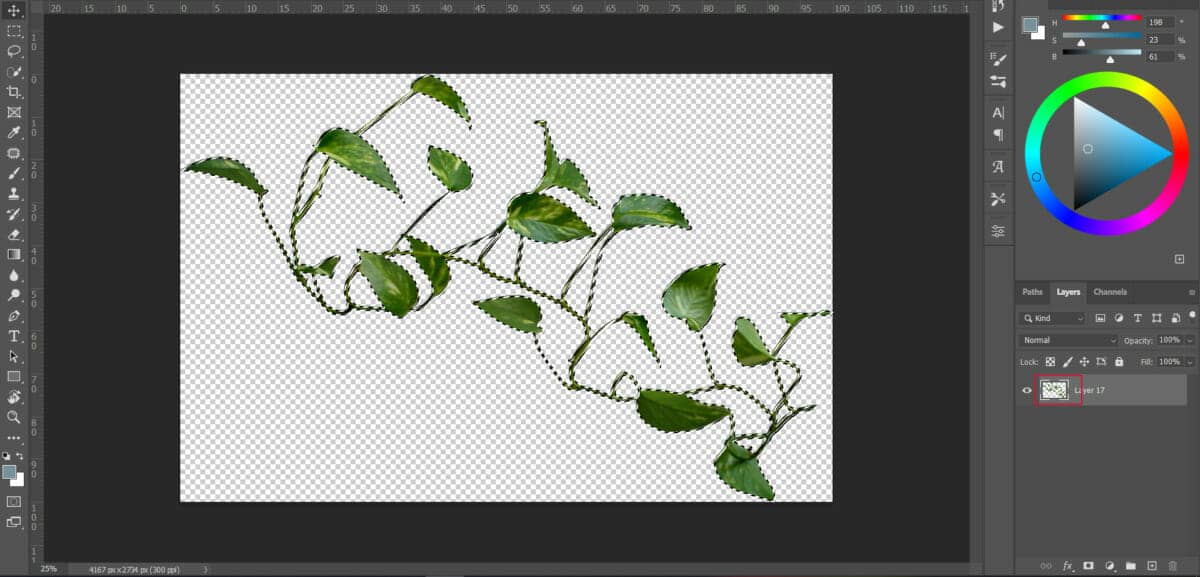
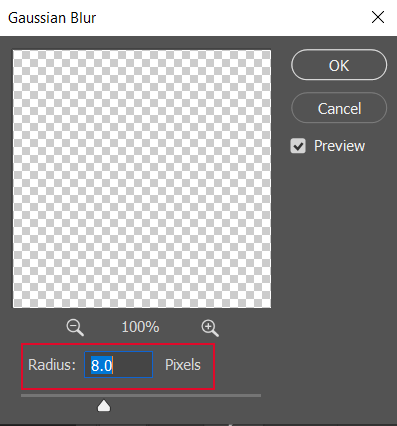
Go to File > Open and select Plant, then hold Ctrl/Cmd and click on the layer and after the selection area has been created, simply copy (Ctrl / Cmd + C) and Paste (Ctrl / Cmd + V) it to our work canvas. Then position the image with the transform tool (Ctrl / Cmd + T). Hold Alt + Shift and resterize like the image below. In Photoshop CC only hold Alt to resterize al sides together. Then, add some blur Go to Filter > Blur > Gaussian blur and set radius to 8px.


Step 28
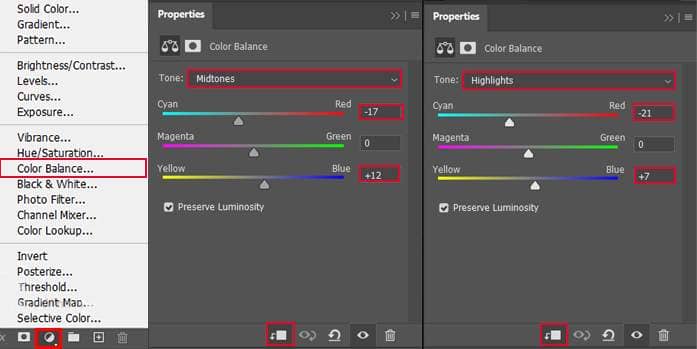
Add Adjustment Layer "Color Balance"
Step 29
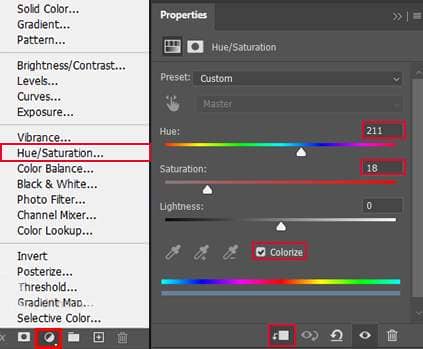
Add Adjustment Layer "Hue/Saturation" and set the opacity to 59%.
Step 30
Add Adjustment Layer "Curves"
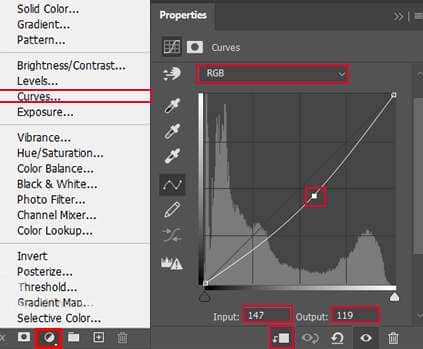
Step 31
Add Adjustment Layer "Curves" and press Ctrl/Cmd + I to invert and use Brush Tool(B) Soft Round with foreground color white and paint highlight parts.
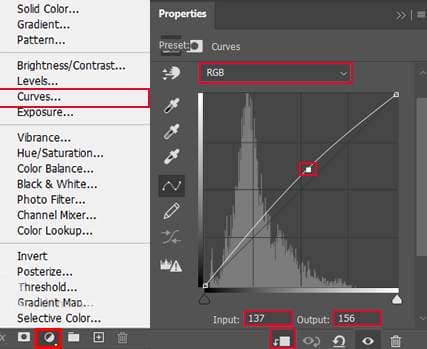

Step 32
Add Adjustment layer "Gradient Map" Blend mode Soft Light/ Opacity 45%.
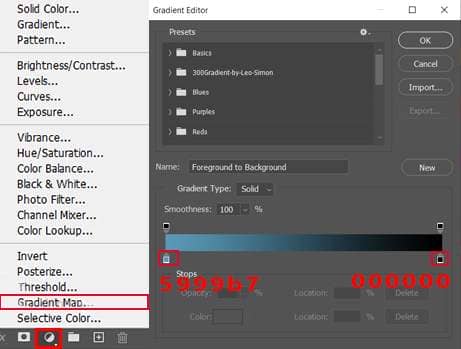
Step 33
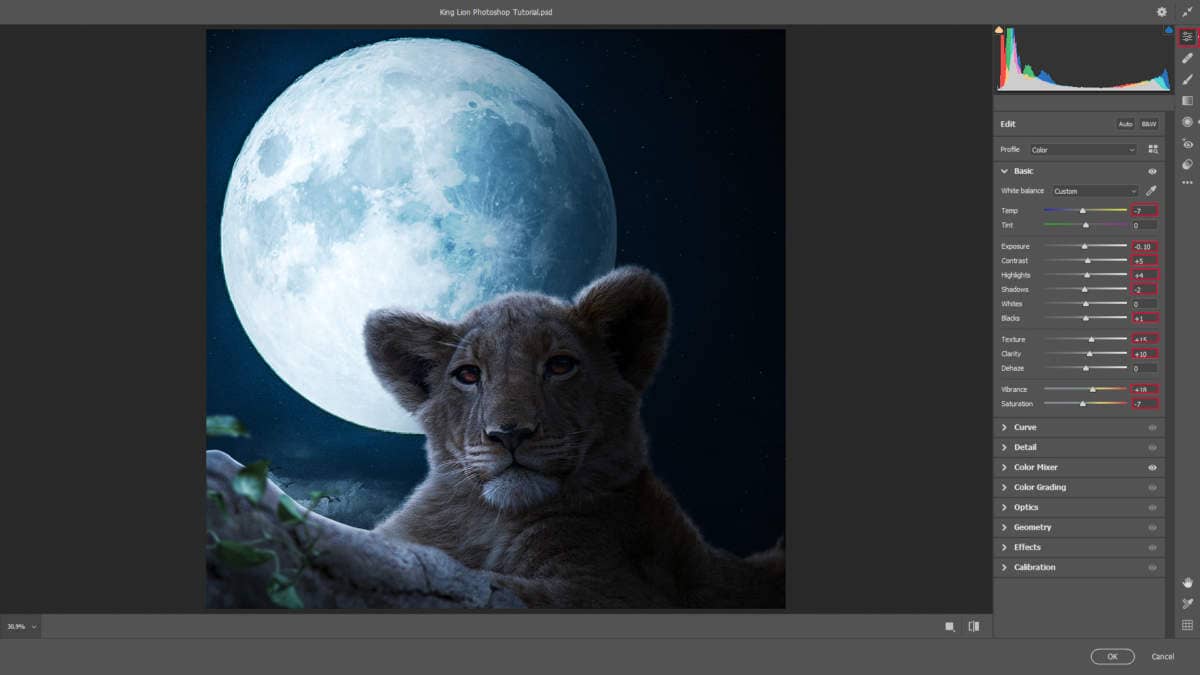
When we finished all this, now merge all layers into one. Select the last layer and hold CTRL/CMD + SHIFT + ALT + E. Now we have a final layer, right-click on mouse and select Convert to Smart Object. Then go to Filter > Camera RAW Filter. At its most basic, the Photoshop Camera Raw filter allows you to use the functions of the ACR interface at any time within Photoshop.
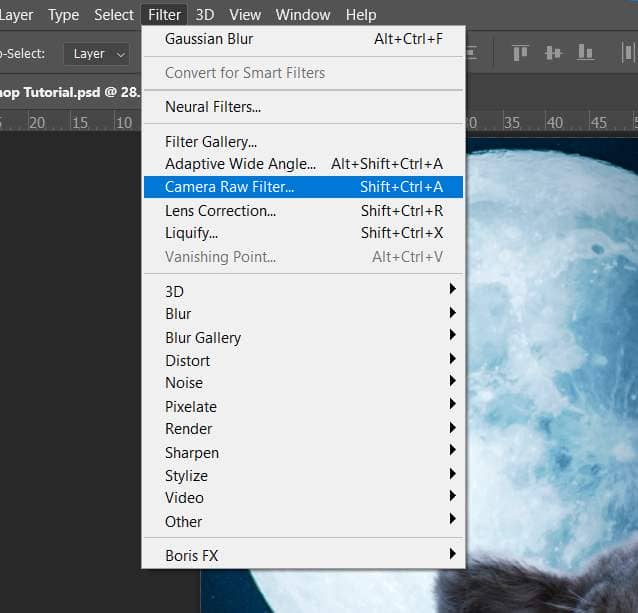
Step 34
Now in Camera Raw Filter, set the Value: Basic
- Temp: -7
- Exposure: -0.10
- Contrast: +5
- Highlights: +4
- Shadows: -2
- Blacks: +1
- Texture: +15
- Clarity: +10
- Vibrance: +18
- Saturation: -7
HSL Adjustments Hue
- Reds: -2
Saturation


One comment on “King Lion Photoshop Tutorial”
Suggestion.... Use "Place Embedded" because your PSD will have issues if you "Place Linked" and you delete the JPG file.
Also, why do you rasterize the layers? It is better to keep as smart layer.