Lightroom presets are a common way to color grade and add styles to your photos. Using them in Photoshop allows you to combine them with other Photoshop editing tools for greater flexibility and creativity. In this tutorial, you’ll learn how to load Lightroom presets in Photoshop, use them non-destructively, and get creative with masking and using multiple Lightroom presets in one photo.
Tutorial Resources
You can use any image you like, but if you would like to follow along with the same image, you can download the free image from Unsplash.

We’ll also be using these Mixtape presets (free version) that you can also download to follow along with this tutorial. Don’t worry about loading them yet, we will show you how to do this later.
Using Lightroom Presets in Photoshop
First, you’ll learn how to load and apply Lightroom presets in Photoshop. We’ll show you how to do this non-destructively which means that you can readjust the settings anytime.
Step 1 – Open an image
Open any image in Photoshop (File > Open…). For this tutorial, we’ll be using this photo.
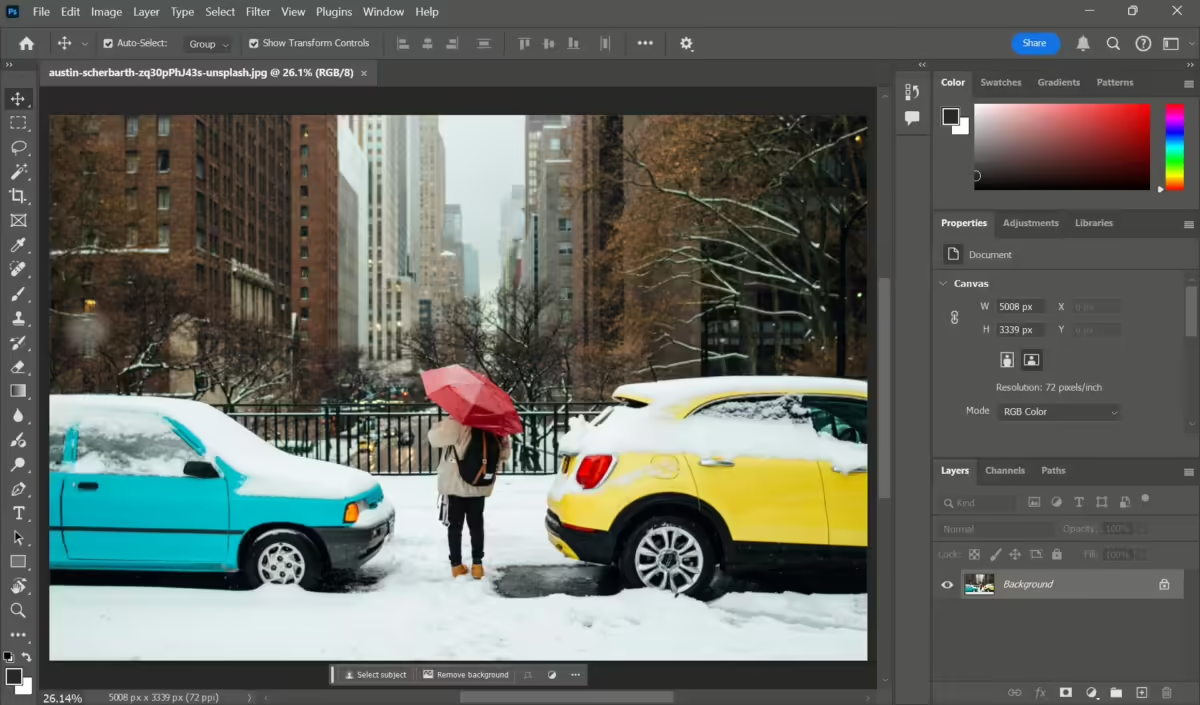
Step 2 – Convert to Smart Object
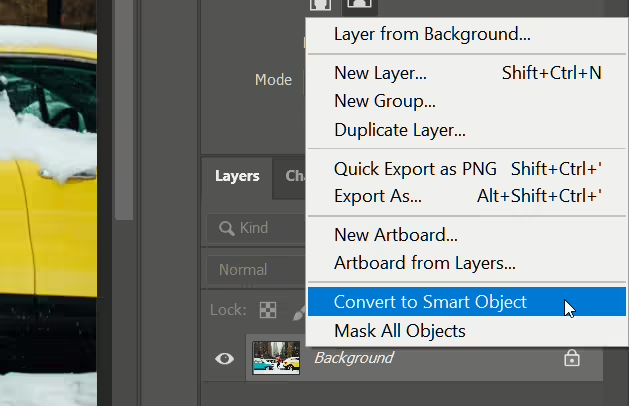
Before we do anything, convert the layer into a Smart Object. In the Layers panel (Window > Layers), right-click on the layer and select “Convert to Smart Object”. You can also do this by going to Layer > Smart Objects > Convert to Smart Object.
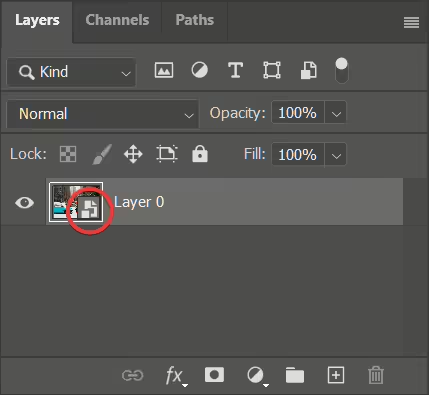
You’ll now notice that the layer thumbnail now has an icon to indicate that it’s a Smart Object. This will allow us to apply the Lightroom preset as a Smart Filter, which means that it is non-destructive and can be changed any time.
Step 3 – Load the Lightroom presets
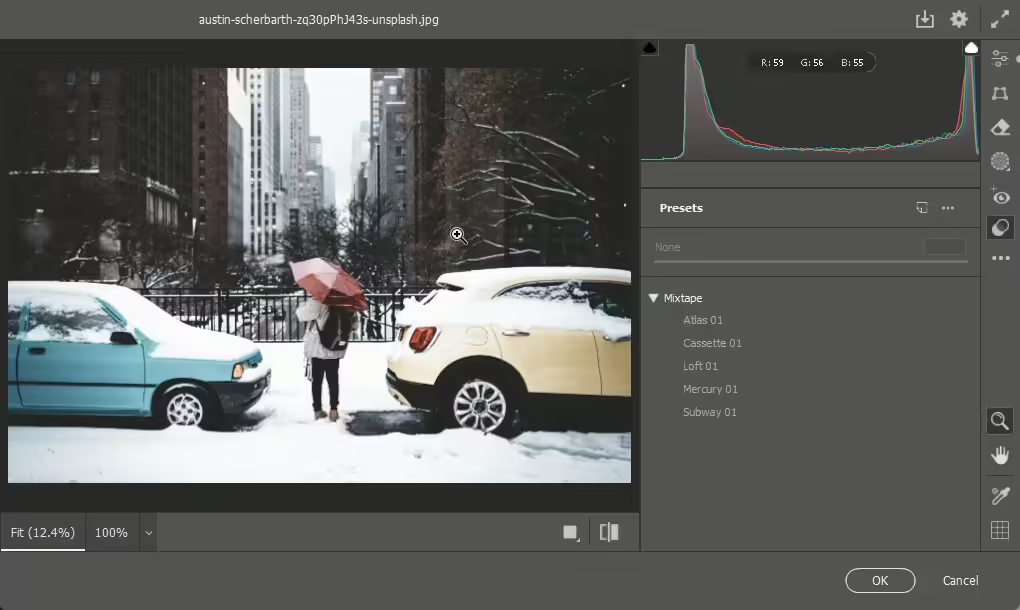
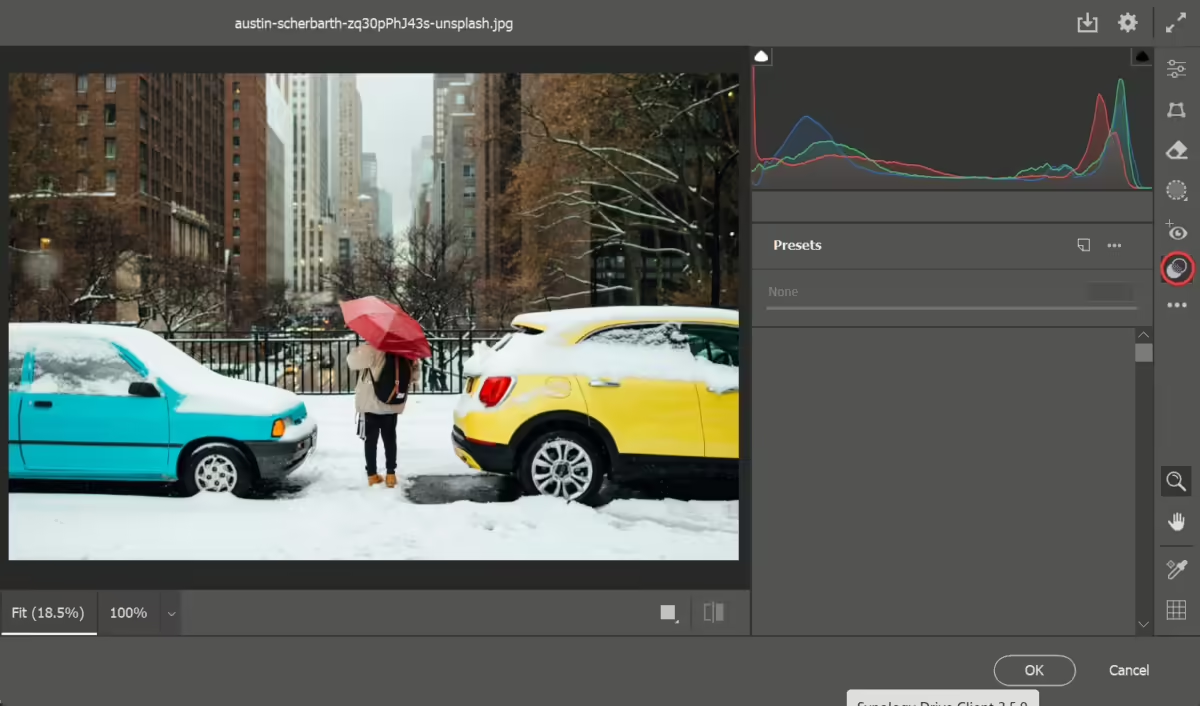
To apply the Lightroom preset, we’ll be using the Camera Raw Filter. This filter lets you apply the same tools found in Lightroom on your Photoshop document.
Go to Filter > Camera Raw Filter…. Go to the Presets panel (Shift+P).
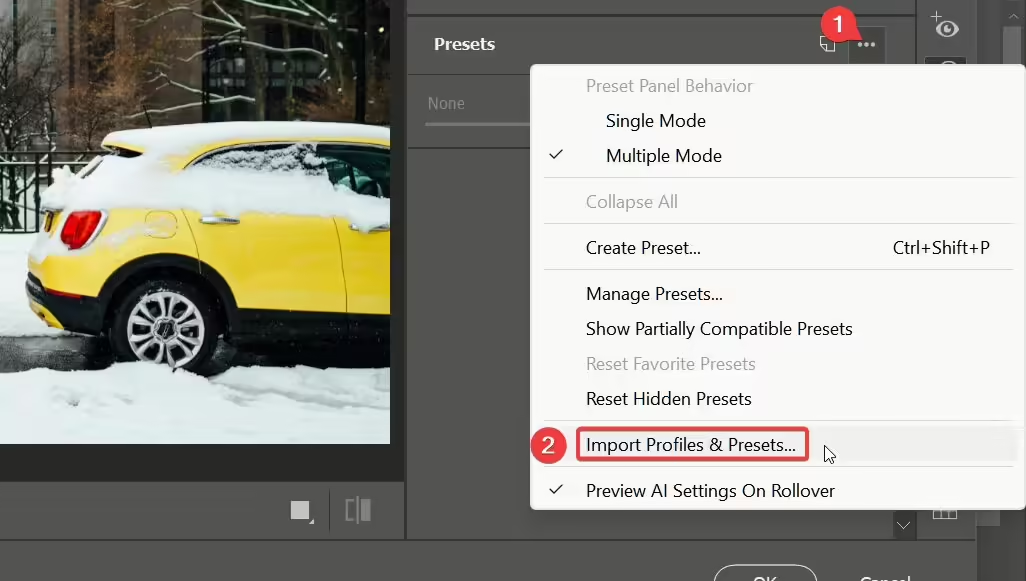
Click on the Presets menu and select “Import Profiles & Presets…“.
Browse for the .zip file containing the Lightroom presets and load them. If you don’t have any presets, you can browse our Lightroom presets page or download the presets that we’re using for this tutorial.
Step 4 – Apply a Lightroom preset
You’ll now see the Lightroom presets listed. Select any preset that you’d like to apply then click OK.
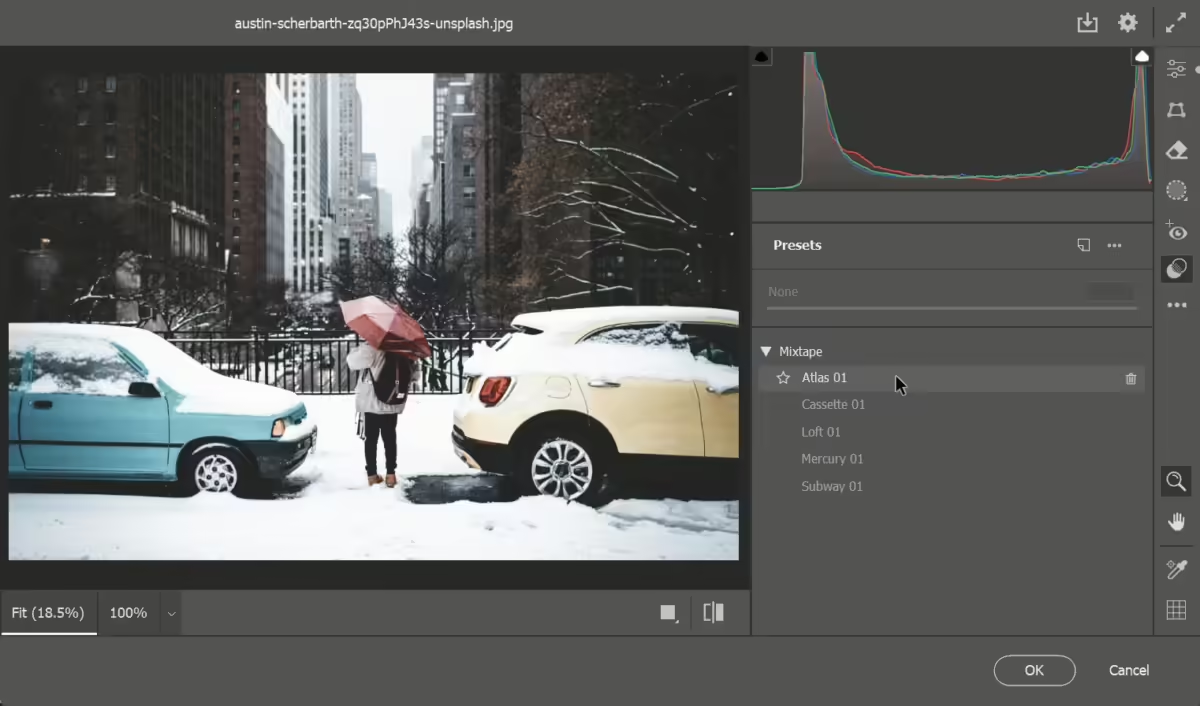
Congratulations, you just used a Lightroom preset in Photoshop!
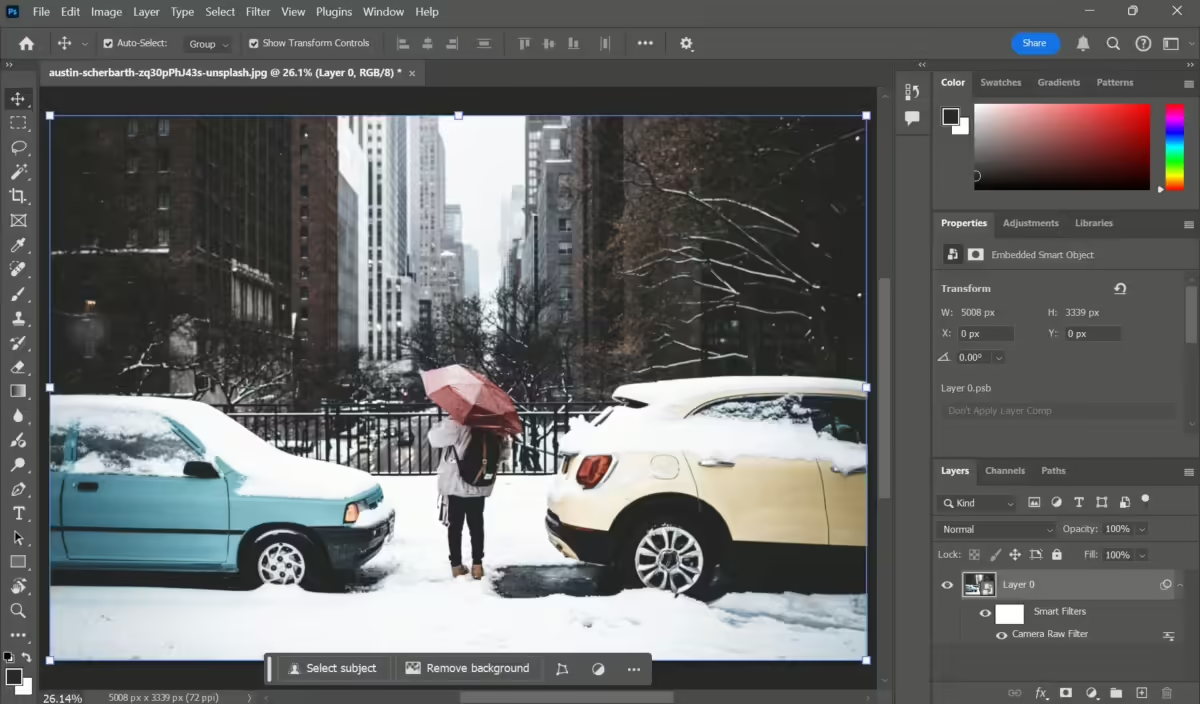
The Benefits of Smart Filters
You’ll notice in the Layers panel that your layer now has a “Camera Raw Filter” adjustment. This is a Smart Filter that you can double-click on to change the settings.
If you don’t see this, make sure that you converted your layer into a Smart Object before using the Camera Raw Filter.
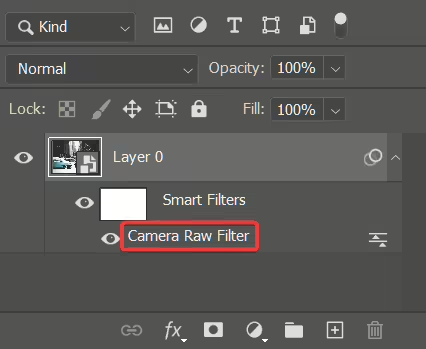
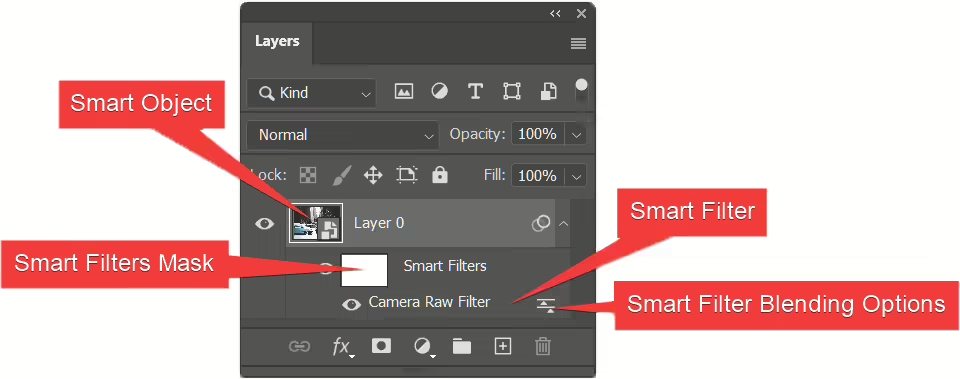
By applying Lightroom to a Smart Object instead of a regular layer, you’ll unlock advanced non-destructive features.
- Smart Object – An advanced layer that enables non-destructive features including Smart Filters.
- Smart Filter – Double-click this to choose another Lightroom preset or to readjust the settings.
- Smart Filters Mask – Paint this mask to selectively choose where to show/hide the Smart Filters.
- Smart Filter Blending Options – Use this tool to change the Smart Filter opacity and blending mode.
We’ll show you why these are useful in the next part; Creative Editing Techniques
Creative Editing Techniques
Using Lightroom presets in Photoshop lets you get creative, such as:
- changing the preset blending mode
- masking Lightroom presets,
- combining multiple Lightroom presets,
- and adding text and other elements
In this section, we’ll show you how to do all of these. If you’ve skipped to this section, please remember that these techniques require you to have your presets applied as Smart Filters.
Changing the Preset Blending Mode
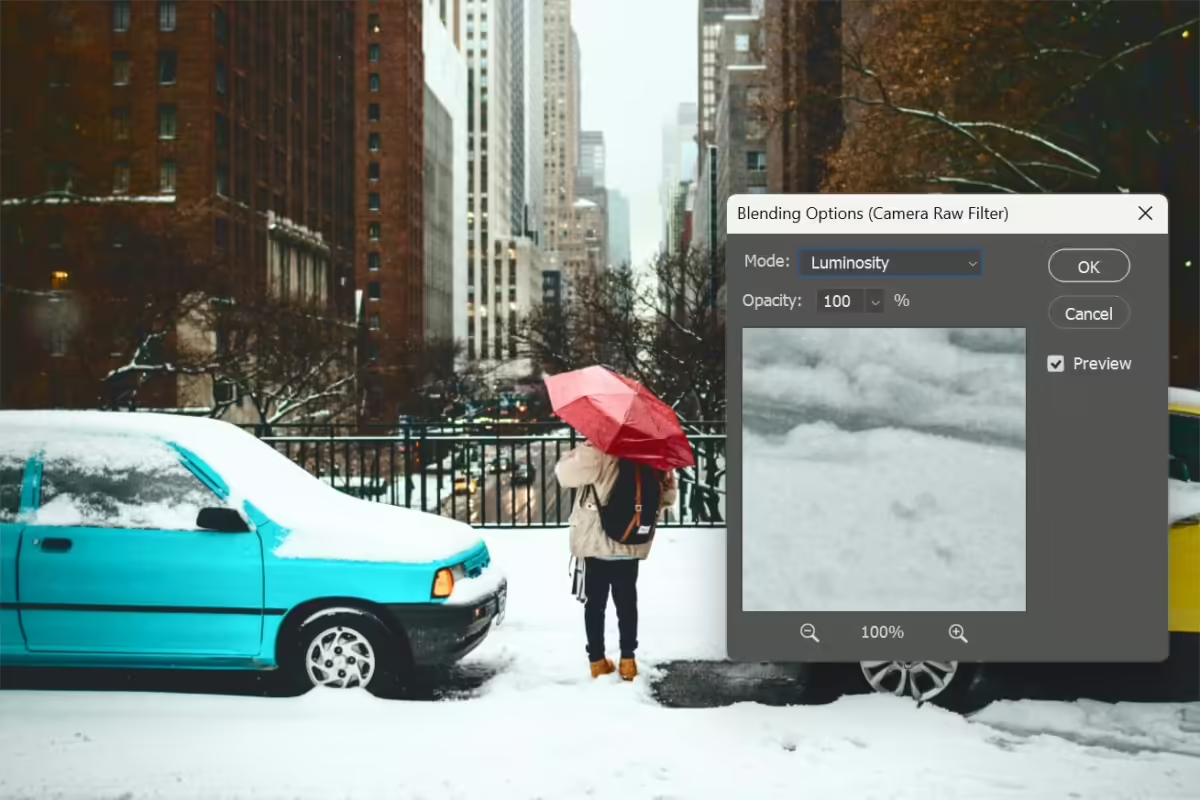
You can apply a blending mode to the Lightroom preset. In the Layers panel (Window > Layers), double-click on the blending mode icon to the right of the Camera Raw Filter.
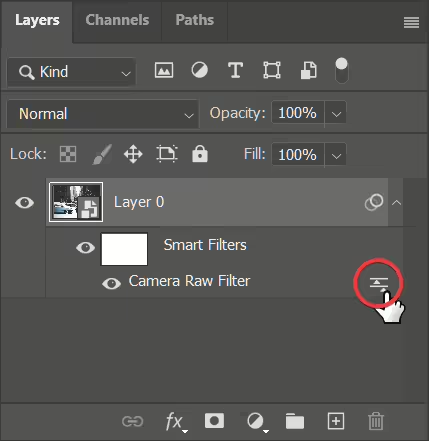
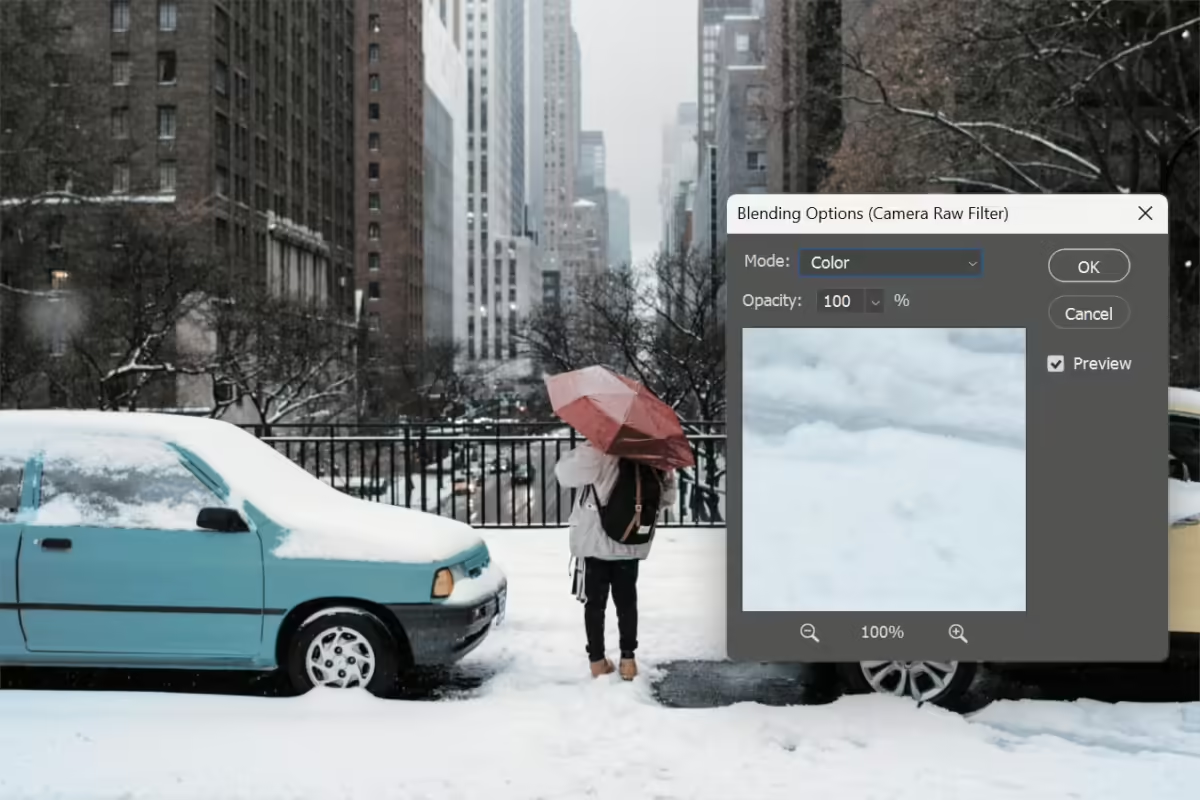
Adjust the opacity and choose any blending mode. The most useful blending modes for Camera Raw Filters/Lightroom presets are:
- Color – Only apply the color portion of the Lightroom preset
- Luminosity – Only apply the tonal portion of the Lightroom preset, preserving the original colors
Masking Lightroom Presets
You can choose where to show or hide Lightroom presets using the Smart Filters Layer Mask. In the Layers panel, click on the thumbnail of the Smart Filters.
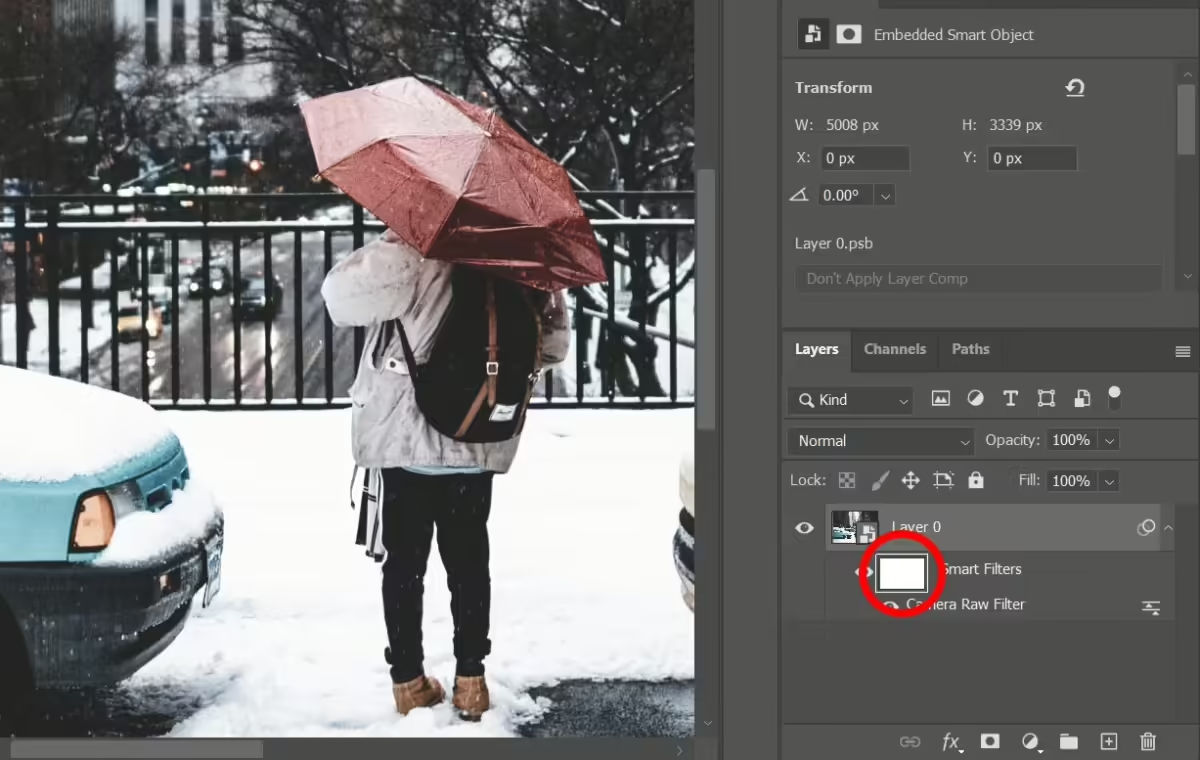
Let’s get ready to paint the mask.
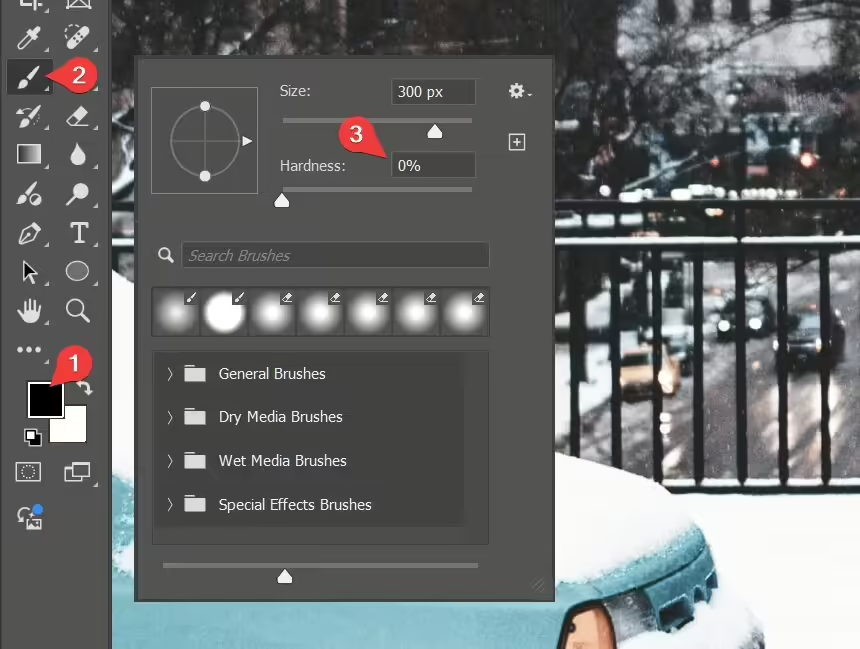
- Set your foreground color to black. You can do this quickly by pressing d followed by x.
- Select the Brush tool (B).
- Right-click anywhere on the image to bring up the Brush settings. We recommend setting the hardness to 0% for smoother, feathered results.
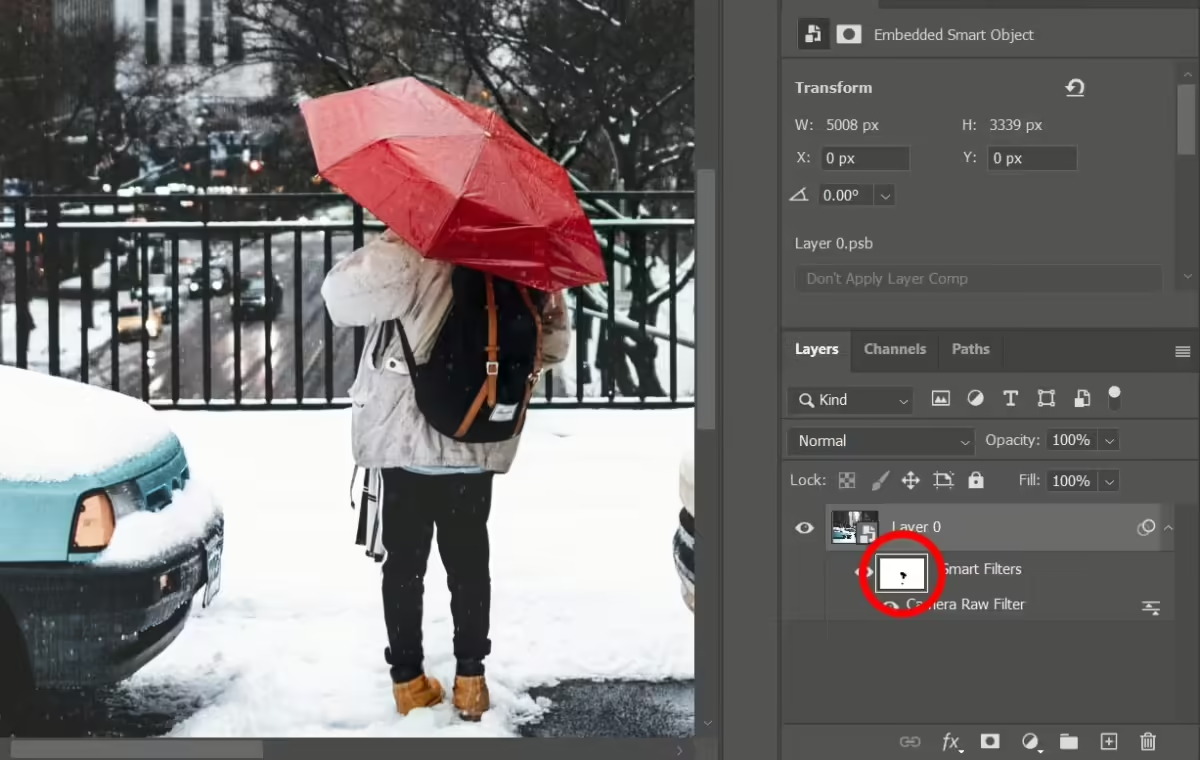
Paint over the areas that you want to hide the Lightroom preset from. For my image, I painted over the umbrella, backpack, and boots to make them more prominent.
Tip: To adjust the brush size, press left bracket ( [ ) to make it smaller or right bracket ( ] ) to make it larger.
Combining Multiple Lightroom Presets
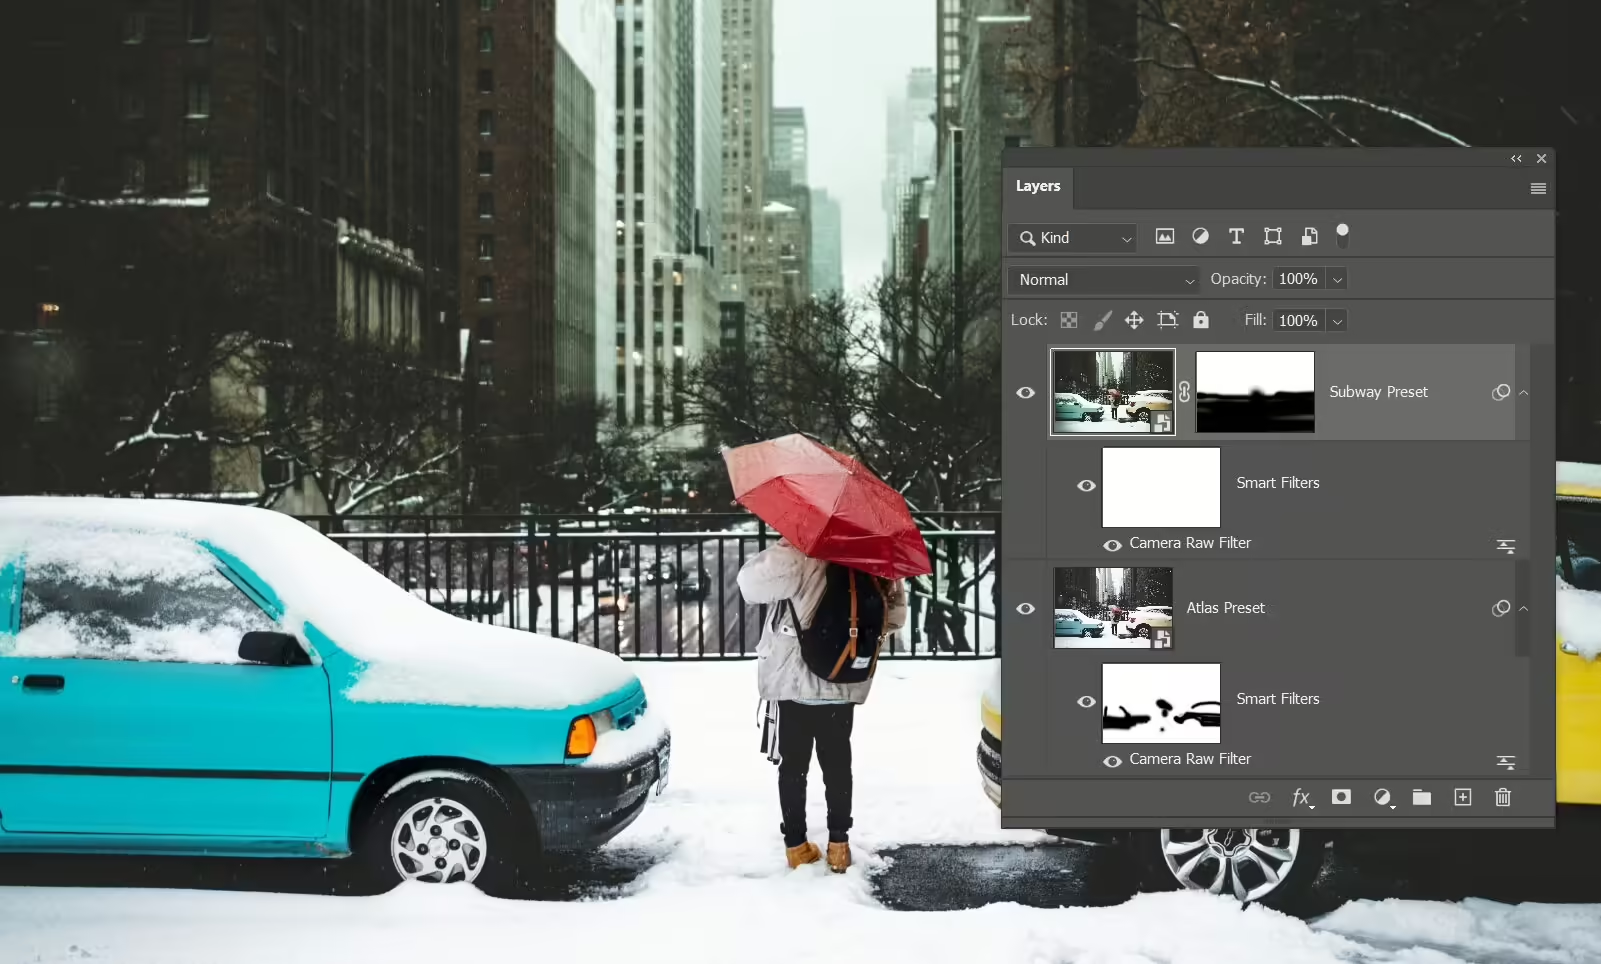
You can apply different Lightroom presets to specific parts of your photos. For example, I’m using the “Atlas” preset on the entire image, but I want to keep it in the foreground and use the “Subway” preset for the background. We can do this with Photoshop layers.
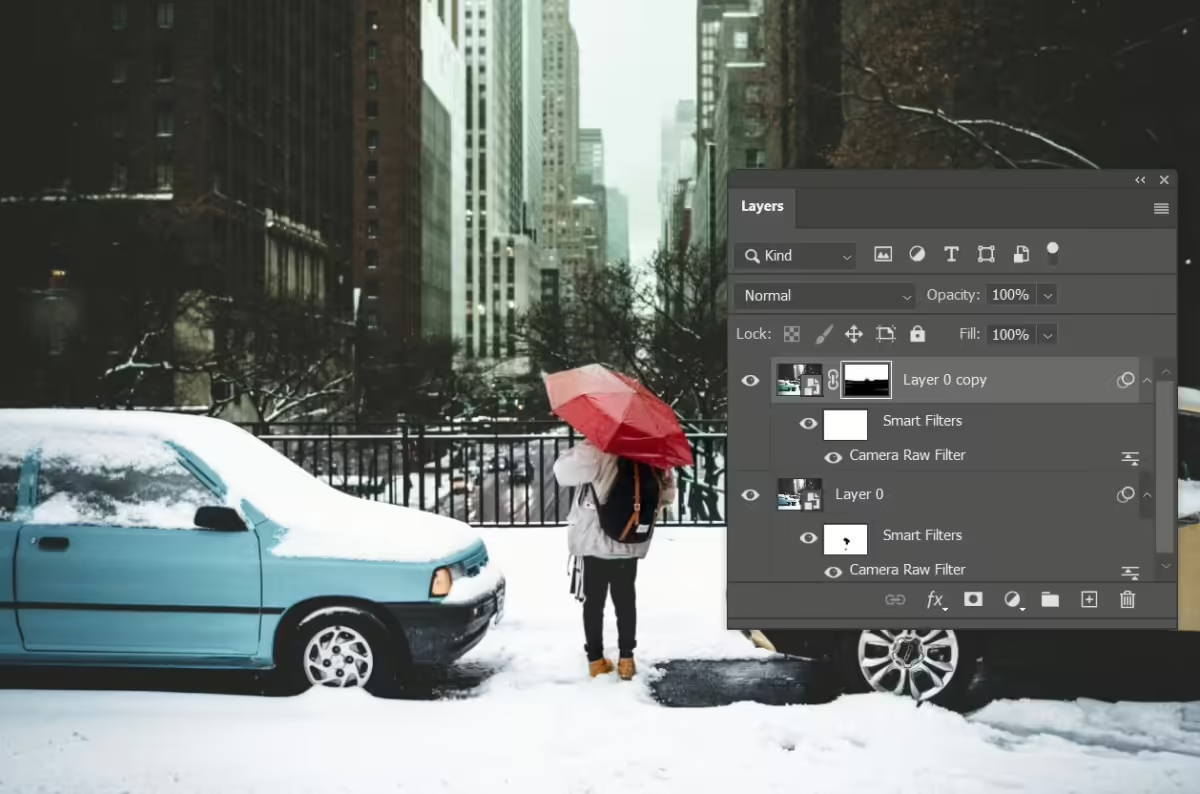
To do this, duplicate the existing Smart Object by pressing Ctrl/Cmd + J. For the duplicated layer, right-click on the “Smart Filters” text and select “Clear Smart Filters.”
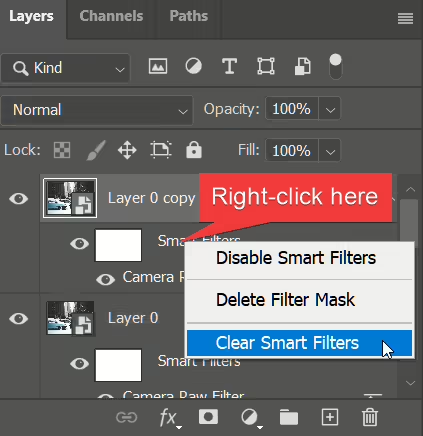
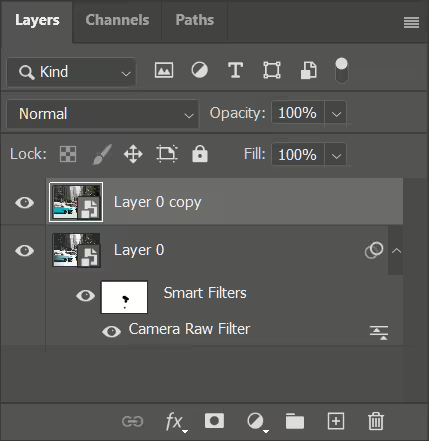
Your Layers panel should look similar to this, where the top layer has no Smart Filters applied.
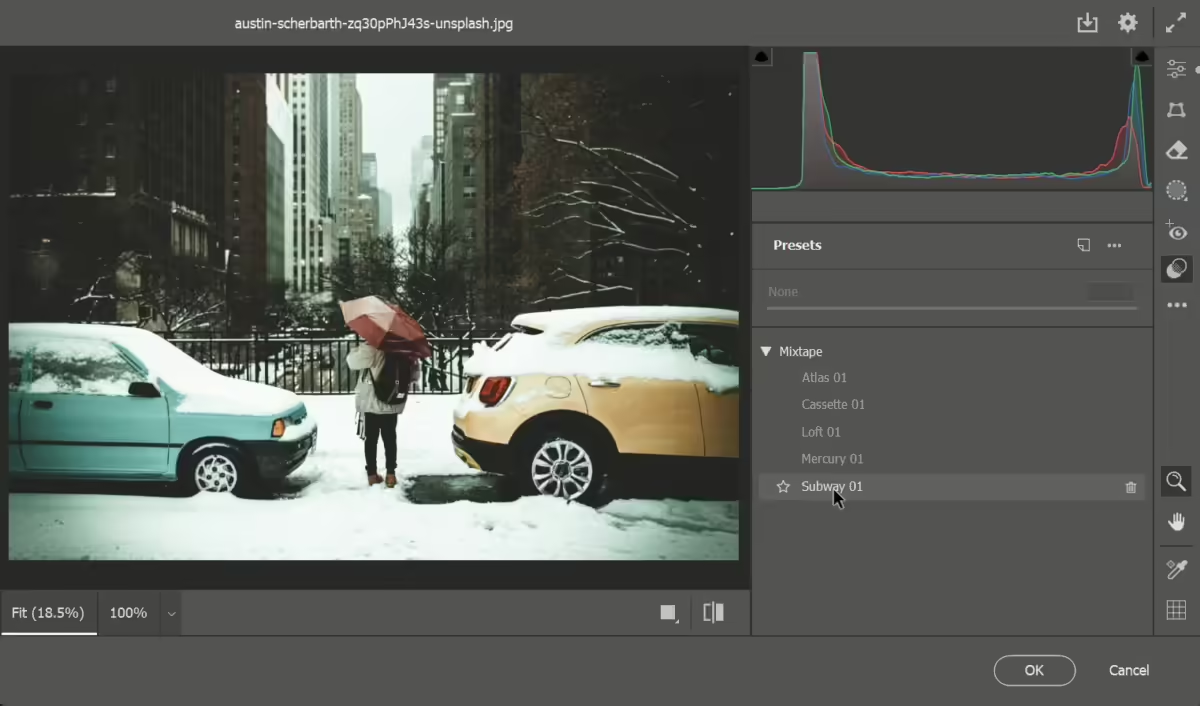
Go to “Filter > Camera Raw Filter…” and apply another preset. For my image, I’ll use the “Subway” preset. Click OK when you’re done.
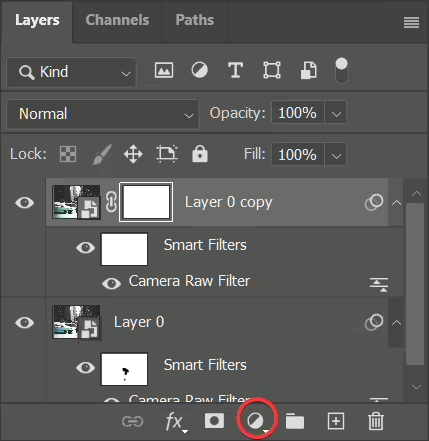
After the filter is applied, add a layer mask by clicking on the “Add Layer Mask” button near the bottom of the Layers panel.
With your foreground color set to black, paint over the areas where you want to hide the layer. For my image, I painted over the bottom area. Now, I have two presets applied: the “Atlas” preset on the foreground and the greenish “Subway” preset for the background.
Get Creative
You just learned how to use multiple Lightroom presets and choose where they appear. But there’s a lot more you can do when you use Lightroom presets inside of Photoshop. Use your imagination and experiment with different Photoshop tools to create artwork that’s compelling.

Download the PSD
Thank you for reading this tutorial! Download the Photoshop document for this tutorial to explore the layers and filters.

Leave a Reply