Roman House Part III - Finishing

Roman House Part III - Finishing

This is the third and last part of the Roman Life tutorial! This tutorial will show you how to draw the female character and finish the drawing.


Preview of Final Results
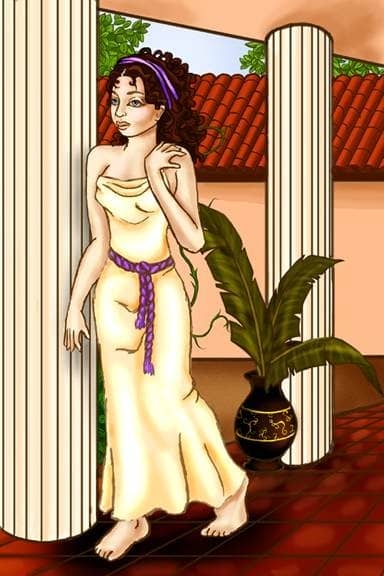

clip_image002

Roman House Part III – Finishing Photoshop Tutorial

  • Program: Photoshop 7
  • Difficulty: Intermediate
  • Estimated Completion Time: 45 minutes

This is the final part of a three part drawing series. Roman House Painting Part I - The Drawing shows now to create the initial outline sketch. Roman House Part II - The Drawing shows how to draw the scene and finish the background.

I recommend that you use a drawing tablet during this portion of the tutorial. Otherwise, all brush sizes given will be much too large. As a general rule of thumb, if you are using a mouse the brush should be approximately 1/3 the size of the suggested brush size.


Step 1

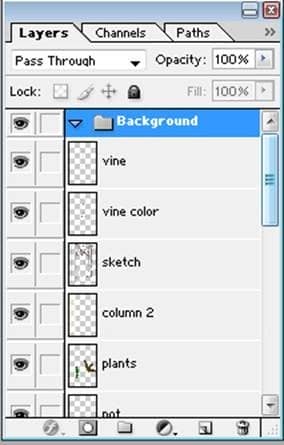
Make a new folder (Layer ? New Layer ? Layer set) and call it the “Background”
clip_image004

Step 2

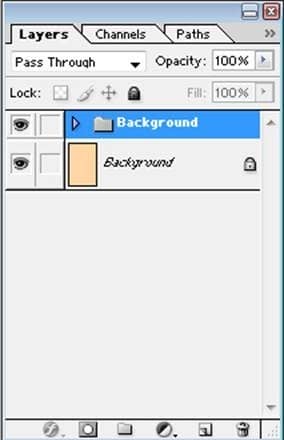
Drag and drop all of the layers (except the background) into this folder. It is important that you drag them in the same order, top to bottom, so that they won't get all jumbled. It helps if you collapse the folder while you work (it will also make drawing the Roman woman easier).
clip_image006

Step 3

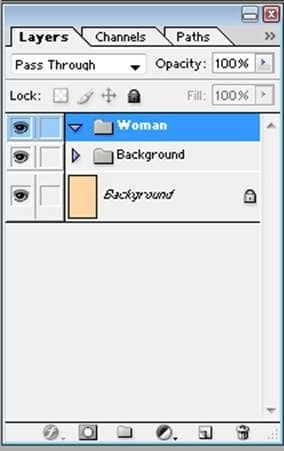
Make another folder above the “Background” folder and name it “Woman”.
clip_image008

Step 4

Make a new layer in the “Woman” folder titled “skeleton”.
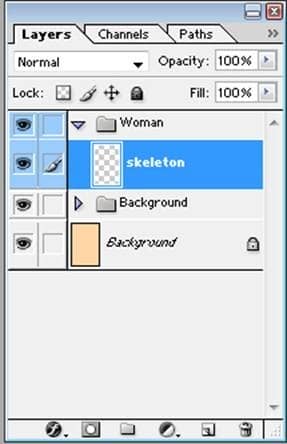
clip_image010

Step 5

Sketch in a head-shape that it turned slightly away at a ¾ angle.
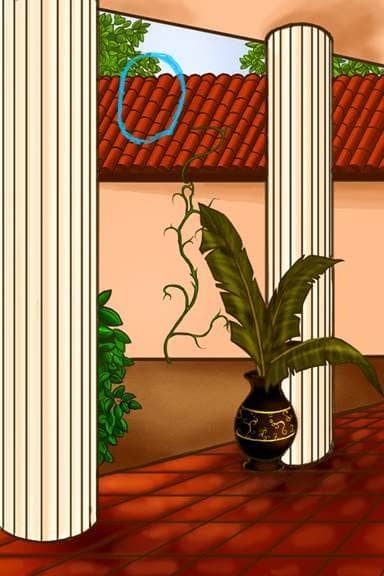
clip_image012

Step 6

Sketch in the shoulders, and make sure that they aren't too wide, but don't give her weeny shoulders either. I usually think that shoulders are about two-heads wide.
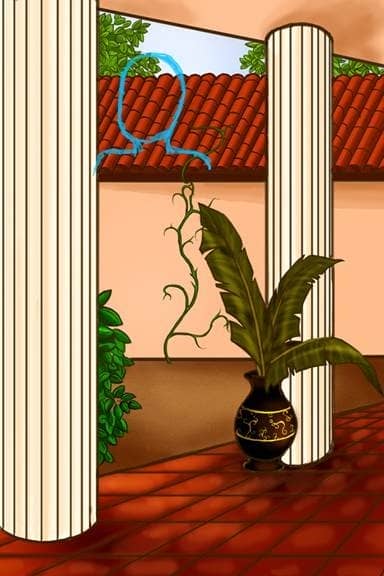
clip_image014

Step 7

Begin the torso by drawing an elongated “U” shape beneath the shoulders.
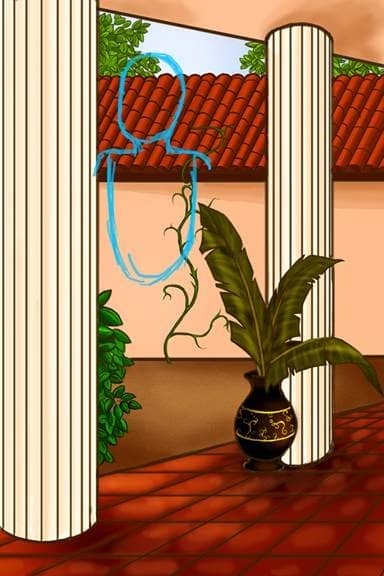
clip_image016

Step 8

Draw a round “U” pelvis area, and add more shape to her waist by taking it in on both sides.
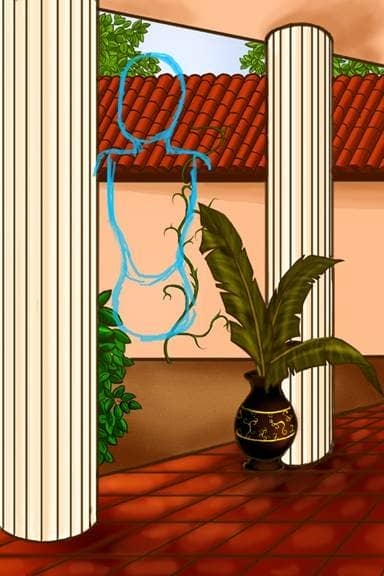
clip_image018

Step 9

I realized that the woman was too large, but that fine. I simply select the entire area, and then press Ctrl+T to activate transform mode. Then I Shift+Click and drag to make the body slightly smaller and higher up.
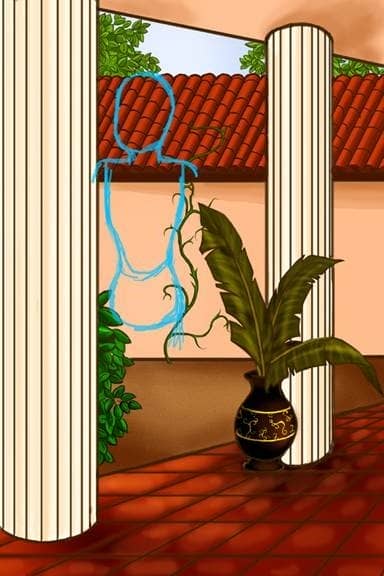
clip_image020

Step 10

Sketch in the thighs with just a few lines and circles where the knees are. I find it handy to draw two circles in the pelvis area, to dictate where the two legs attach.
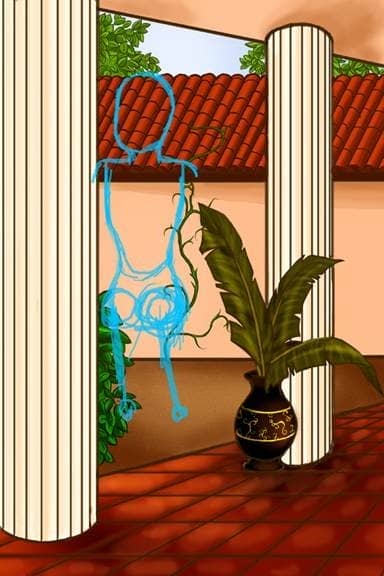
clip_image022

Step 11

I accidentally made the top half of the legs too short, but there is an easy way to fix this! Select the legs and press Ctrl+T. Then drag the bottom of the box down, this will elongate the legs!
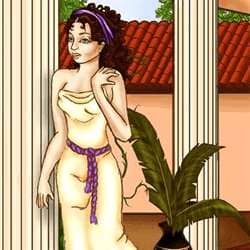
clip_image024
clip_image026

Step 12

Sketch out the bottom half of the legs, and add triangles for the feet.

clip_image028

Step 13

Fill out the legs.

clip_image030

Step 14

Draw two little circle where the arms connect to the torso.

clip_image032

Step 15

Sketch in the right arm so that it goes back a little at the elbow, and comes up to rest on her shoulder.

clip_image034

Step 16

Draw the other arm frame using lines for the arm, triangles for the hands, and circles for joints

clip_image036

Step 17

Fill out the arms.

clip_image038

Step 18

Clean it up by erasing all the lines inside the outline.

clip_image040

Step 19

Make a new later for the dress outline.

clip_image042

Step 20

Start the dress with a single bejeweled strap. This dress is going to be a one-shoulder dress, with gold medallions on the shoulder strap.

clip_image044

Step 21

When drawing the neckline, remember that the dress is very “drapey”. It should drape several times across the chest.

clip_image046

Step 22

Draw in the midsection of the dress. This is where it is tightest, but you still want to add a fold or two along the outside of the dress.

clip_image048

Step 23

The bottom of the dress is loose, so their will be several “pleat” type folds.

Mae sure that the dress follows along with the right leg's outline. This will make the dress look flowing.

clip_image050

Step 24

Outline a rope encircling her waist. To make the knot in the middle, make a kind of “ying-yang” shape, as though they are tied together.

clip_image052

Step 25

Make the lines look like a twisted rope by drawing little “seed” shapes back to back between the lines. These little seeds are elongated ovals with a slightly pointed side, and a rounded side opposite.

clip_image054

Step 26

Draw two dangling ropes hanging from the knot we drew before.

clip_image056

Step 27

Using a 3 pixel opaque brush, add swirling patterns to the medallions.

clip_image058

Step 28

New layer beneath the dress outline.

clip_image060

Step 29

Block in the dress with color #FFEBBF.

clip_image062

Step 30

Fill the little shoulder medallions with color #FFAE00.

clip_image064

Step 31

Use the burn tool on midtones mode (46% exposure) to add shadows to the medallion.

clip_image066

Step 32

Using the same settings as before, add shadows to the dress with the burn tool.

clip_image068

Step 33

Use dodge tool (highlights mode, 16% exposure) to highlight the dress.

clip_image070

Step 34

Block in the rope with color #9F58C4.

clip_image072

Step 35

Use the dodge tool and burn tool (like before) to add highlights and shadow to the rope that ties around her waist.

clip_image074

Step 36

Make a new layer above the “dress” layer.

clip_image076

Step 37

Outline the body with color #592C00 (opaque, 9 pixel brush).

clip_image078
clip_image080
clip_image082

Step 38

Outline the individual toes and fingers.

clip_image084

Step 39

Delete the “skeleton” layer.

clip_image086
clip_image088

Step 40

Make a new layer above the outline, “face outline”.

clip_image090

Step 41

Draw the nose to the left of the head-shape. The nose is a lot like a curving “L “.

clip_image092

Step 42

Draw the nostrils. The right one looks like a “ ) “ parentheses, the other is only slightly showing.

clip_image094

Step 43

Draw the mouth. Draw the top lip connecting to the middle line, and the bottom lip connected too at the left side (where the lips round off), but leave the right corner open. Also, you can add a little line under the nose if you wish (only as indication, it will be added as a shadow later).

clip_image096

Step 44

Draw the eyes as a sort of elongated almond shape. The left eye will be rounded on the far left side.

clip_image098

Step 45

Draw iris's in the eyes and eyelashes to their outer corners.

clip_image100

Step 46

Sketch in the eyebrows using short thin strokes.

clip_image102

Step 47

Fix the jaw by erasing the right half and making it less square by raising the point where the jaw meets the back of the head.

clip_image104

Step 48

Draw the ear right where the skull meets the jaw. The top of the ear should be in line with the eyes. A little tip in the shape of the ear, it is kind of shaped like half a peanut.

clip_image106

Step 49

Make a little “U” shape to indicate her right cheek.

clip_image108

Step 50

Make a new layer above the “dress” layer.

clip_image110

Step 51

Fill in the entire figure with color #FFE8C3 (opaque).

clip_image112

Step 52

Block in the dark shadows with color #E4AF84 (49% opacity)

clip_image114

Step 53

Soften the darks with color #F4CFAA (49% opacity) on their edges.

clip_image116

Step 54

Highlight the skin with color #FFF6DF.

clip_image118

Step 55

Use the burn tool (midtones mode, 46% exposure) to darken the darkest area of the skin (between toes and fingers, and under the chin).

clip_image120

Step 56

Add a streak of pink right on the cheekbone with color #F4BCA1.

clip_image122

Step 57

Highlight the cheeks with color #FFE6D9.

clip_image124

Step 58

Fill in lips with color #E4AF84.

clip_image126

Step 59

Add some color to the lips with color #FFB594 set to 41% opacity.

clip_image128

Step 60

Darken the bottom of both the top and bottom lips with the burn tool on its previous settings.

clip_image130

Step 61

Highlight the top and bottom lip with color #FFEACA (41% opacity).

clip_image132

Step 62

Fill in the whites of the eyes with color #F&F3ED.

clip_image134

Step 63

Fill in the eyes with color #4D46A9 (opaque).

clip_image136

Step 64

Color in the bottom half of the eye with color #7095FF.

clip_image138

Step 65

Use the dodge tool on the bottom third of the iris.

clip_image140

Step 66

Make the eye's pupils with black (color #000000).

clip_image142

Step 67

Use the burn tool on the rims of the eyes, in the middle around the pupil, and in the top third of the iris.

clip_image144

Step 68

Use color #FFFDFC (80% opacity) to add a shine to the eyes.

clip_image146

Step 69

Add a shadow to the right corner of the eyelid with color #CB9269 (54% opacity).

clip_image148

Step 70

Fill in the eyebrows on the “skin” layer with color #5A2600 at 54% opacity (soft edged brush).

clip_image150

Step 71

Make a new layer, “hair”.

clip_image152

Step 72

Using a hard edged brush, outline the hair with color #130800 (opaque). I decided to go with a classic Roman/Greek look, curly hair with multiple ribbons in the hair.

clip_image154

Step 73

Make a new layer “hair color”.

clip_image156

Step 74

Block in the hair with color #471400.

clip_image158

Step 75

It's not too late to make changes! I decided that the left eye was too big, so I selected it with the selection tool and transformed it (Ctrl+T), making it more almond shaped.

clip_image160

Step 76

Erase the line that indicates the cheek, and the little line under the nose.

clip_image162

Step 77

Make a new little curved line under the nose with color #B27044 (9% opacity).

clip_image164

Step 78

Use the burn tool (midtones mode, 46% exposure) on the “skin” layer around the hairline, under the cheek, and underneath the chin.

clip_image166

Step 79

Block in the two hair bands with color #9243C3.

clip_image168

Step 80

Use the burn tool (same settings) and the dodge tool (highlight mode, 20% exposure) to add highlights and shadows to the ribbons.

clip_image170

Step 81

Add shadows to her hair with color #1F0900 set to 61% opacity.

clip_image172

Step 82

Highlight her hair with color #912800 at 21% opacity.

clip_image174

Step 83

To add shadows around the woman, use the burn tool on the floor using the same settings as before, and then on the front column (layer “column 2”) with the burn tool set to highlight mode.

clip_image175

Final Results

And you're done with the background! The third part shows how to draw and color a roman woman.

clip_image175

Create Dot Grid Art in 1 Click
Sponsored

Turn any photo into a dot grid artwork with these Photoshop actions. You'll get great results with dots that change size. They get larger in brighter areas and smaller in darker areas. Free download available.

Leave a Reply

Your email address will not be published. Required fields are marked *

cross