Luminar AI lets you turn your ideas into reality with powerful, intelligent AI. Download the photo editor and see how you can completely transform your photos in a few clicks.
Step 29
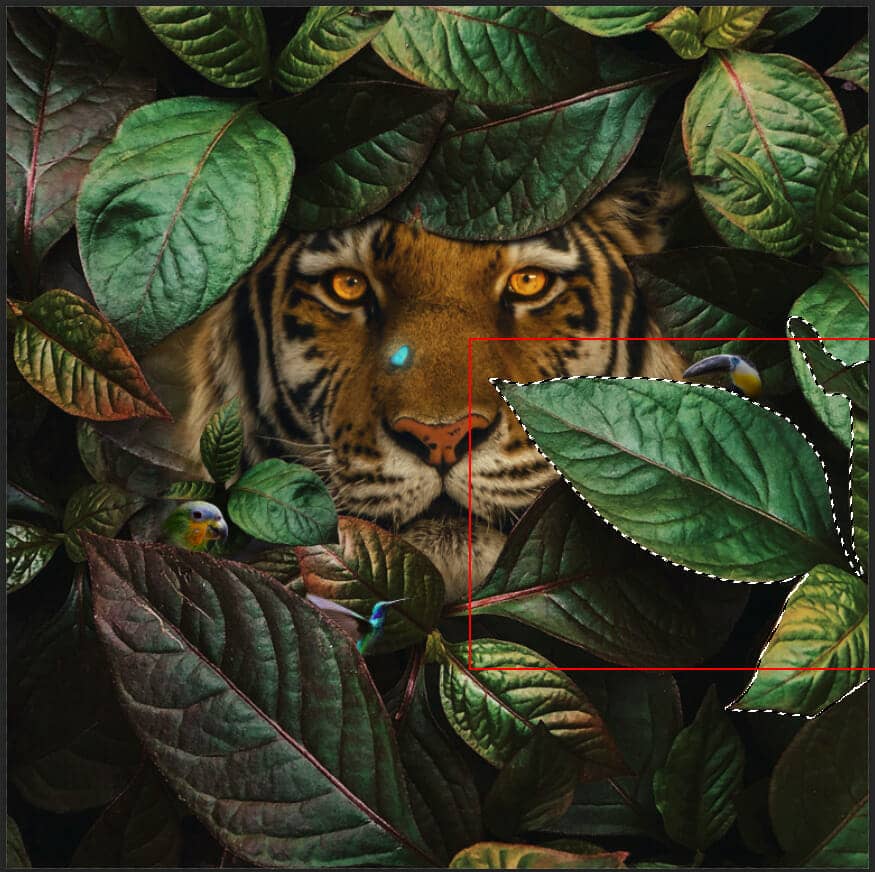
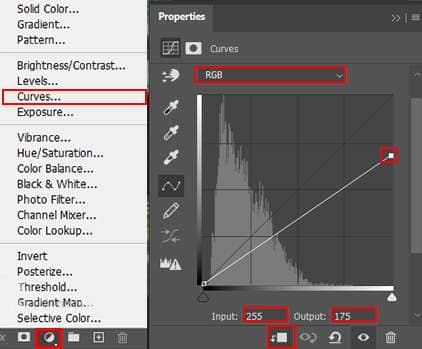
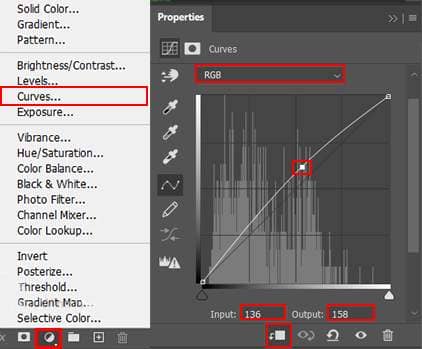
Add Adjustment Layer "Curves" and press Ctrl/Cmd + I to invert and use Brush Tool(B) Soft Round with foreground color white and paint bottom part of leaf.
Step 30
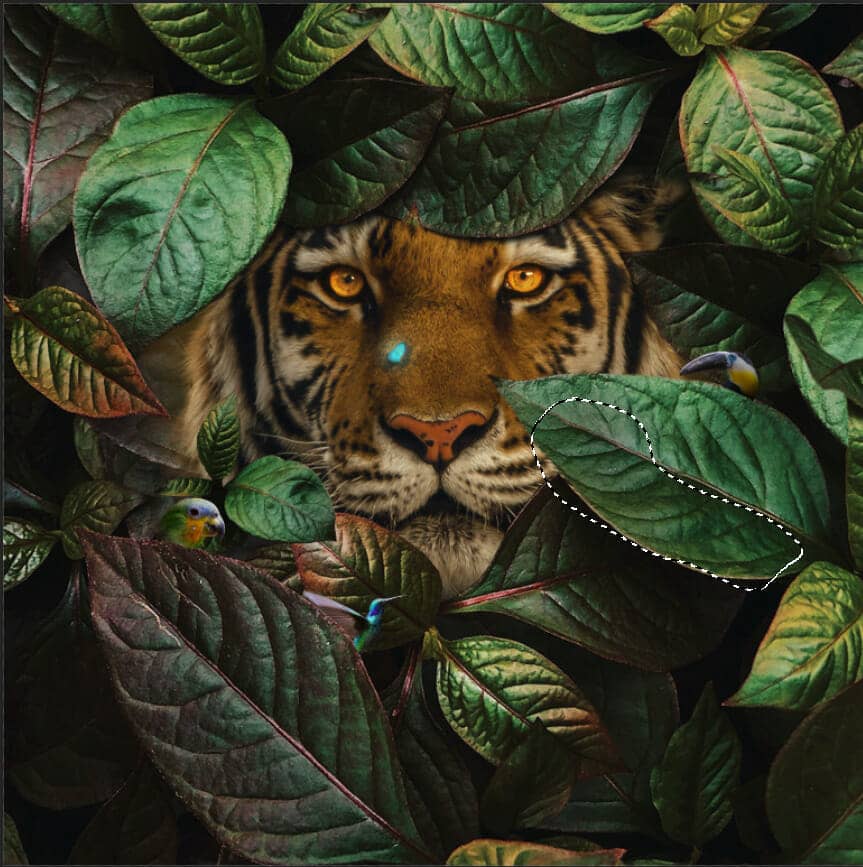
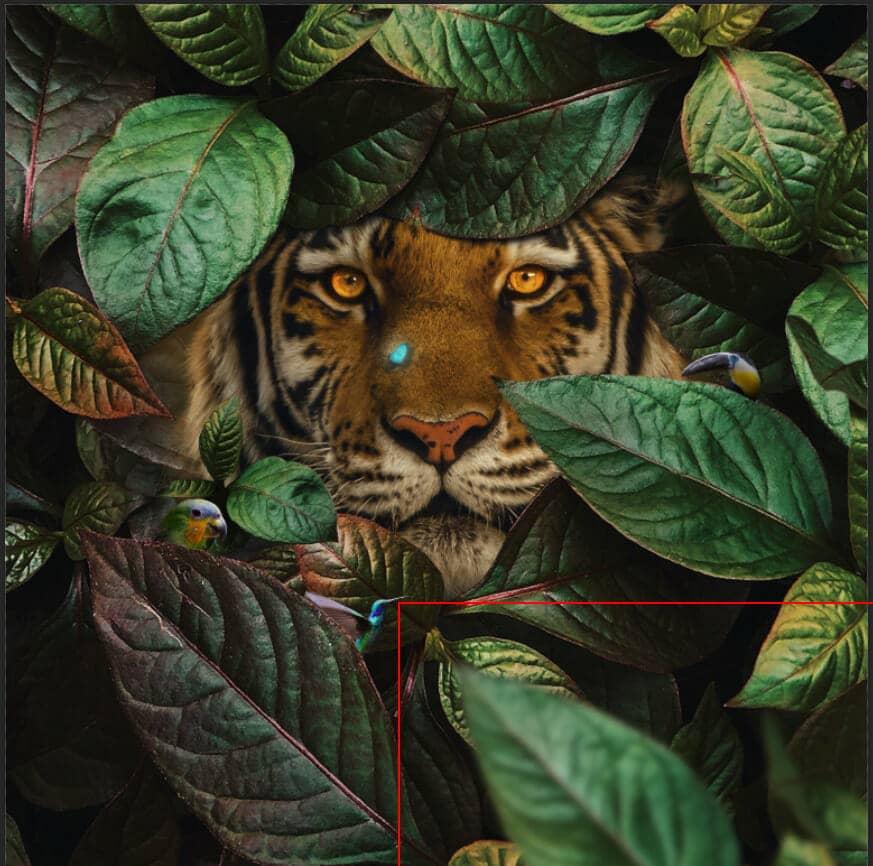
Now duplicate Leaf 5 (Ctrl/Cmd + J) and Convert to Smart Object. Then go to > Filter > Blur > Gaussian Blur and set radius to 12.5px.
Step 31
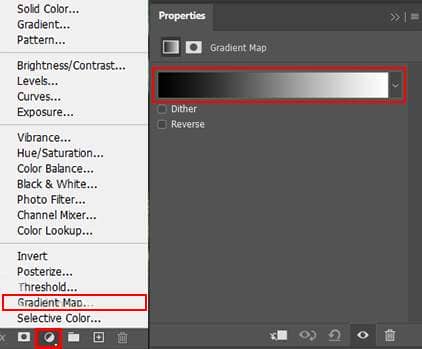
Add Adjustment Layer "Gradient Map" Black and White. Blend mode change to Soft Light with Opacity of 25%.
Step 32
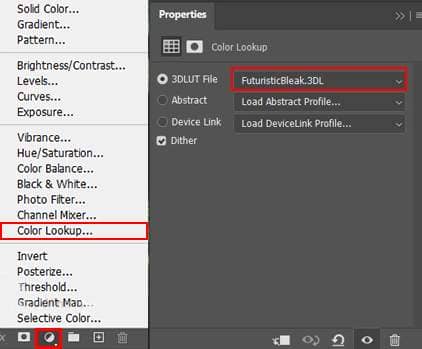
Add Adjustment Layer "Color Lookup" and set 3DLut File to FuturisticBleak.3DL Opacity set to 25%.
Step 33
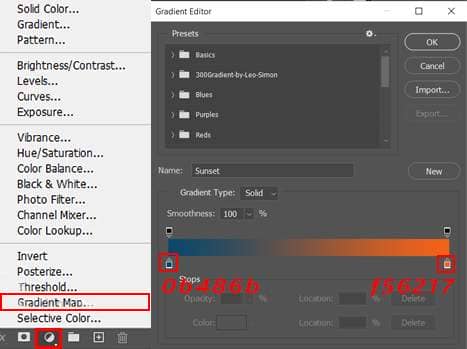
Add Adjustment Layer "Gradient Map" and set blend mode to Soft Light With Opacity of 16%.
Step 34
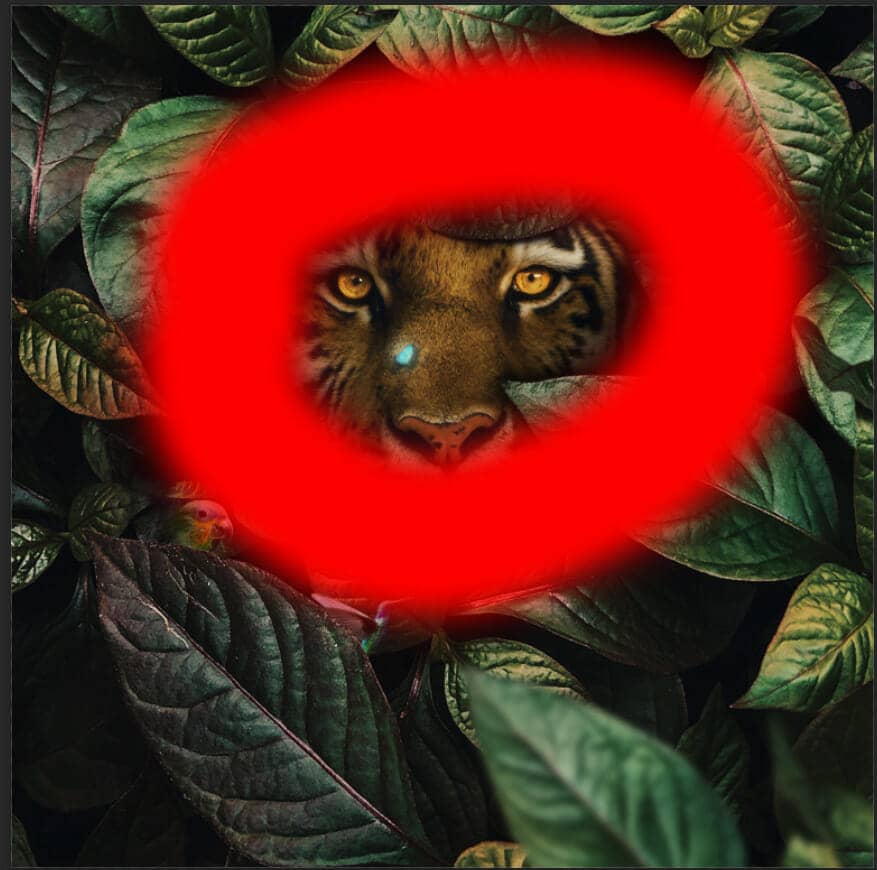
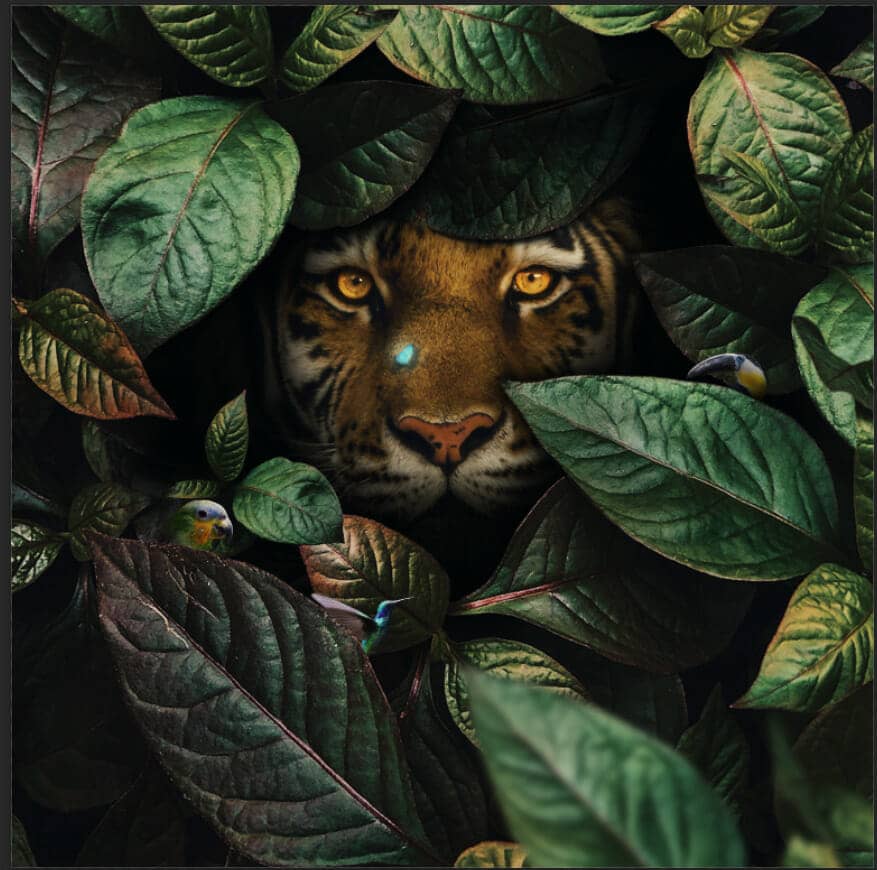
Now go back to "Color Eye" layer and select it. Next, create a new layer and use Brush Tool(B) Soft Round with foreground color black. Blend mode of layer change to Multiply and start painting with a black brush over the Tiger.
Step 35
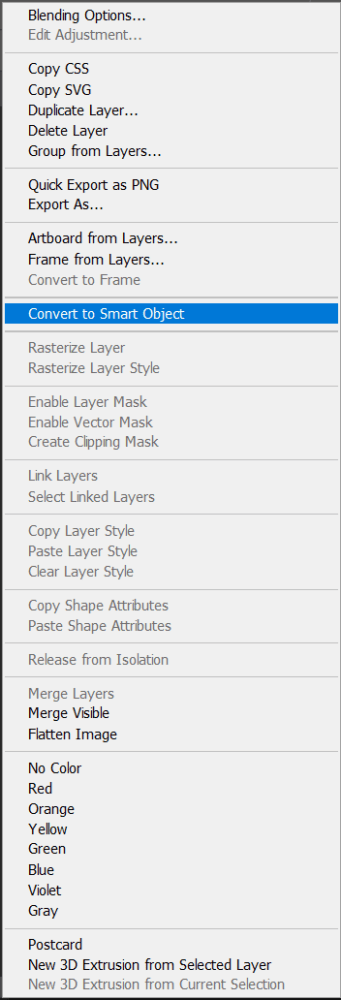
When we finished all this, now merge all layers to one. Select the last layer and hold CTRL/CMD + SHIFT + ALT + E. Now we have a final layer, right click on mouse and select Convert to Smart Object. Then go to Filter > Camera RAW Filter. At its most basic, the Photoshop Camera Raw filter allows you to use the functions of the ACR interface at any time within Photoshop.
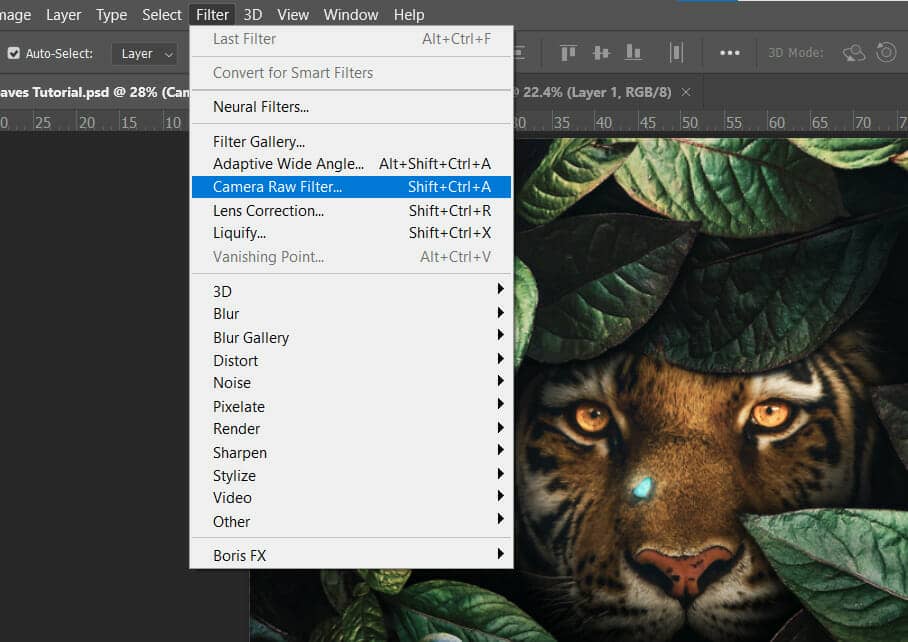
Step 36
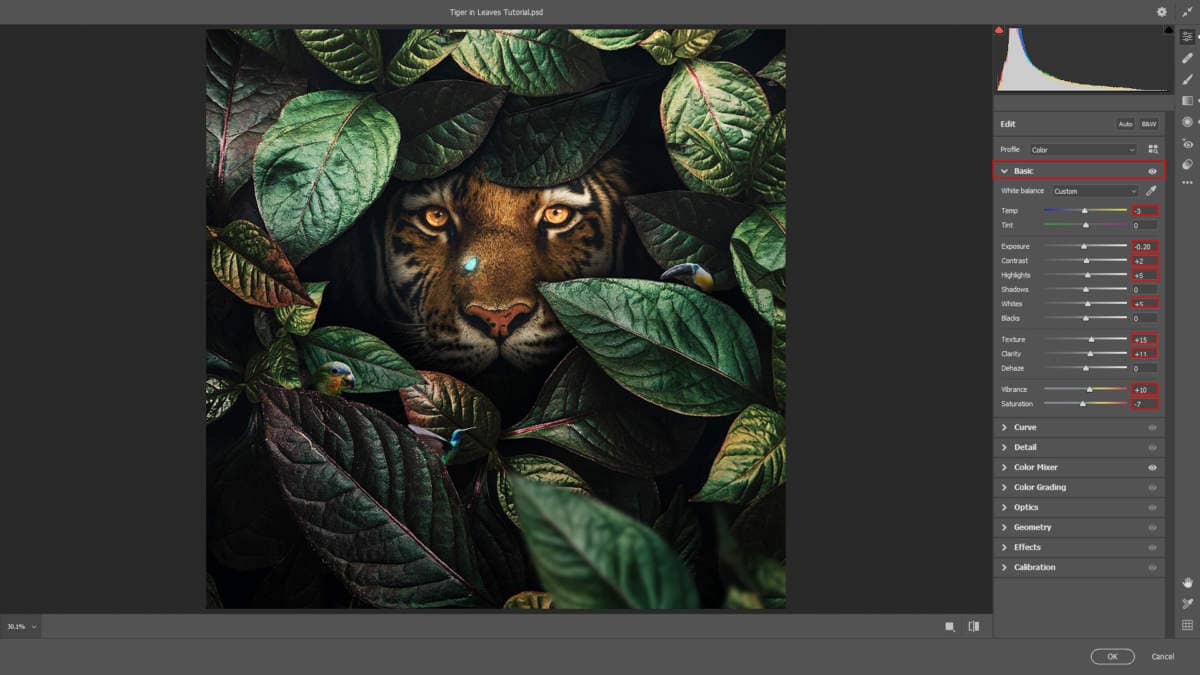
Now in Camera Raw Filter, set the Value: Basic
- Temp: -3
- Exposure: -0.20
- Contrast: +2
- Highlights: +5
- Whites: +5
- Texture: +15
- Clarity: +11
- Vibrance: +10
- Saturation: -7
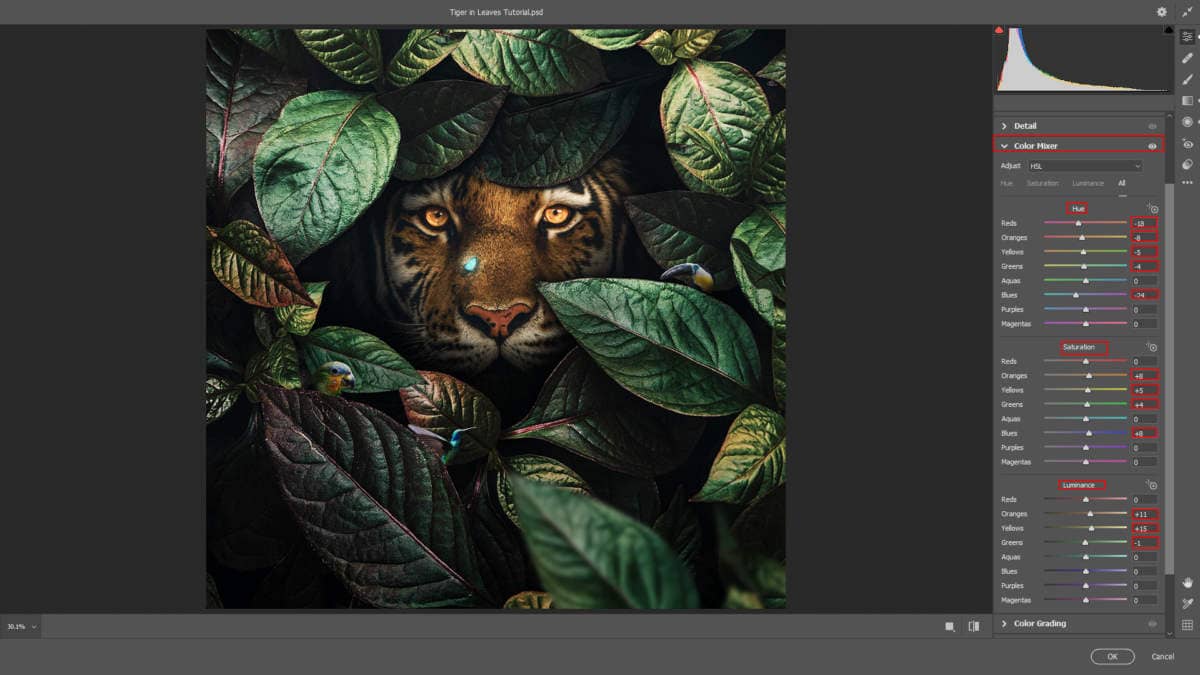
Color Mixer Hue
- Reds: -18
- Oranges: -8
- Yellows: -5
- Greens: -4
- Blues: -24
Saturation
- Oranges: +8
- Yellows: +5
- Greens: +4
- Blues: +8
Luminance
- Oranges: +11
- Yellows: +15
- Greens: -1
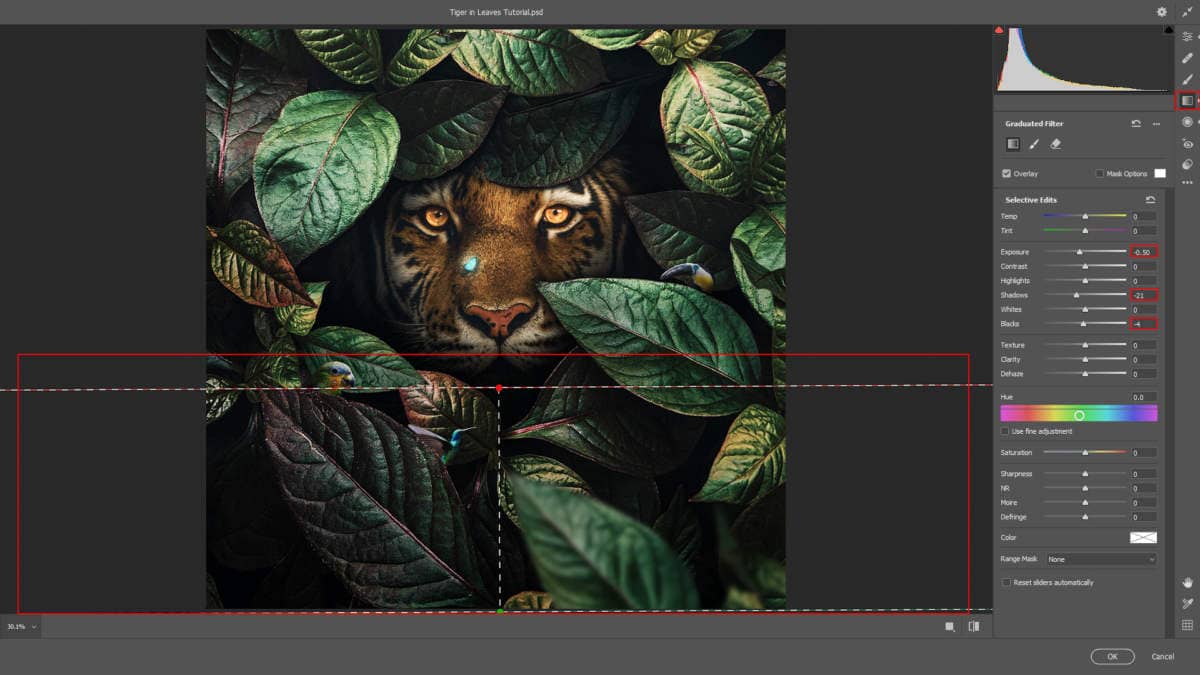
Gradulated Filter
- Exposure: -0.50
- Shadows: -21
- Blacks: -4
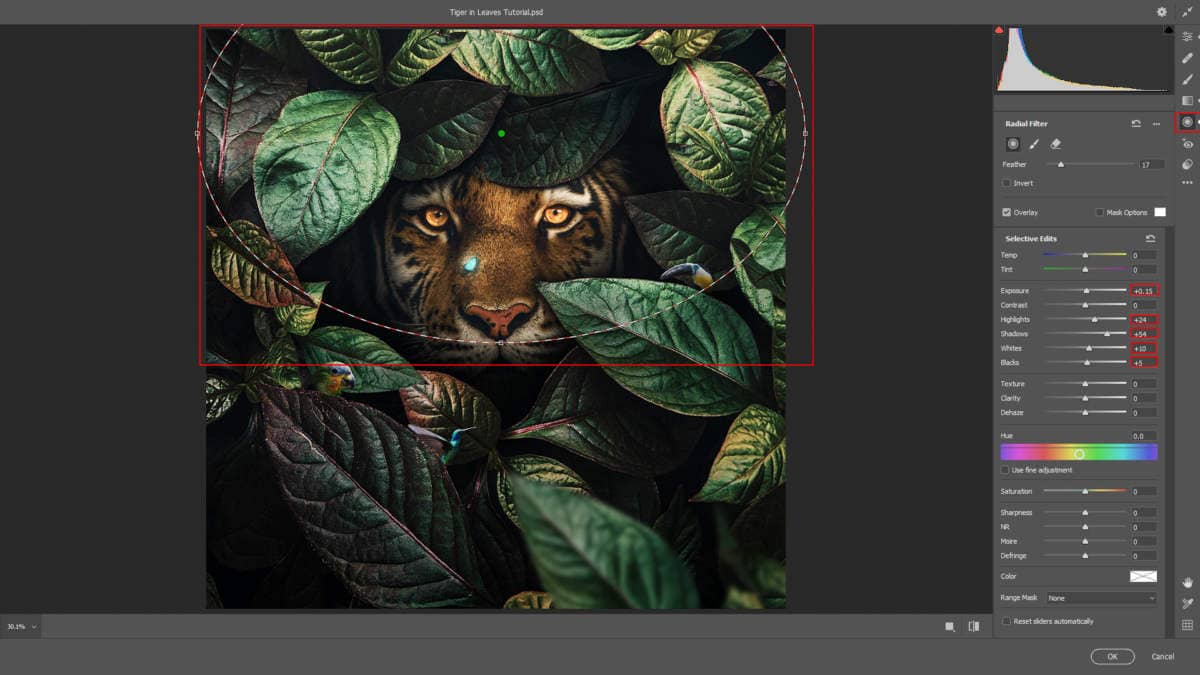
Radial Filter
- Exposure: +0.15
- Highlights: +24
- Shadows: +54
- Whites: +10
- Blacks: +5
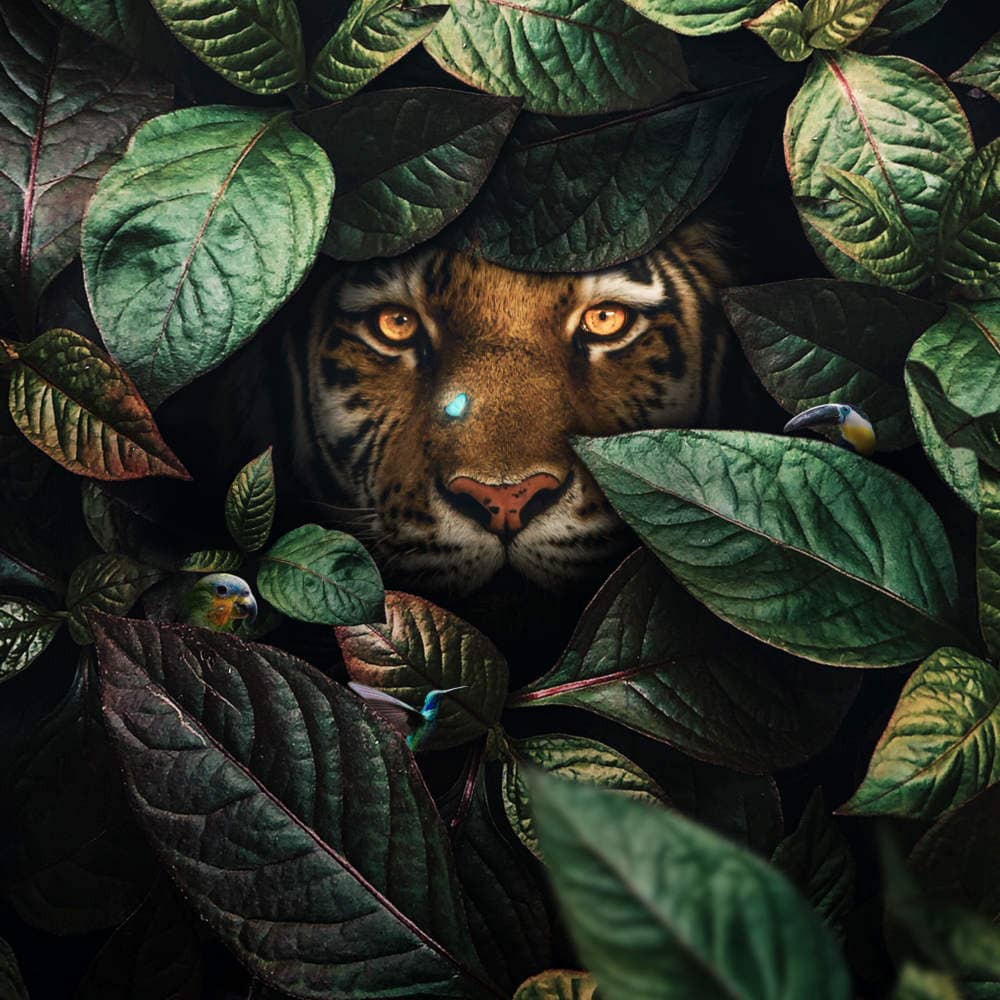
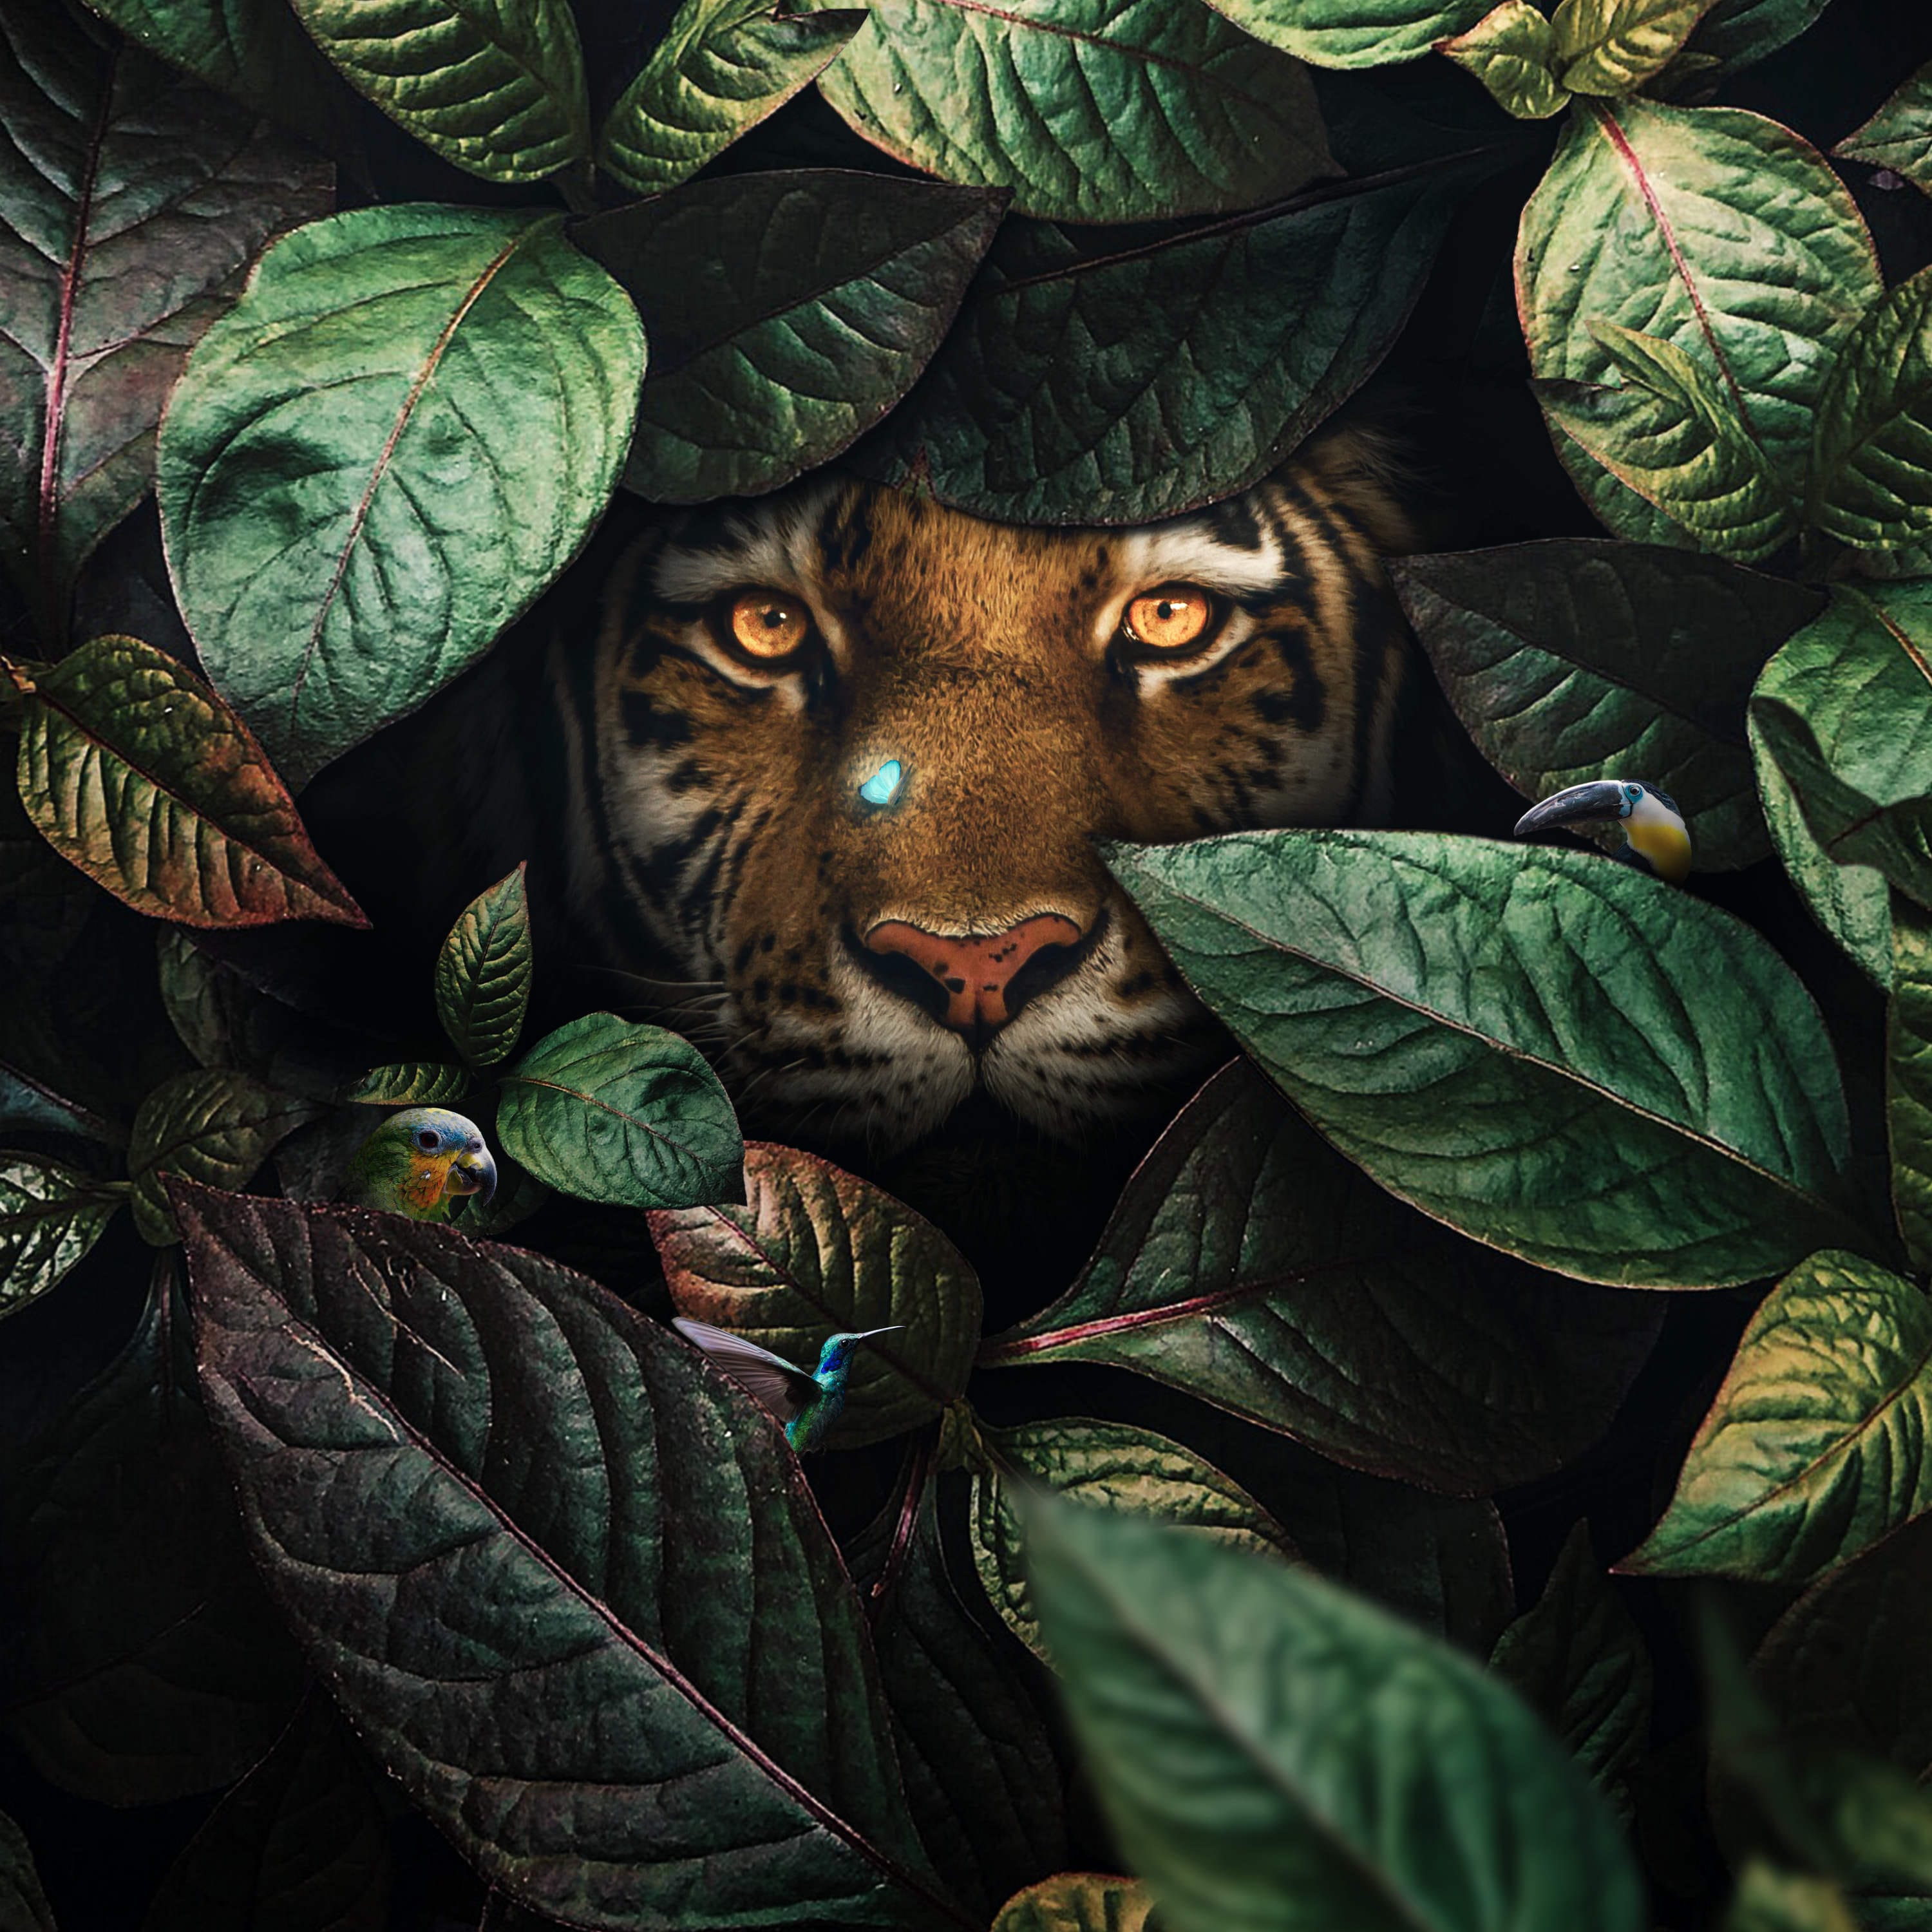
And finally, everything should look like this.

Final Results


3 comments on “Floral Tiger Photo Manipulation Tutorial”
all of the animals are out of proportion and the butterfly ends up looking like a glowing cyst. but great colors
Wow this is superb!
This looks great! I must try it! Thank you!
Su