Turn any photo into a dot grid artwork with these Photoshop actions. You'll get great results with dots that change size. They get larger in brighter areas and smaller in darker areas. Free download available.
Time is the substance from which I am made. Time is a river which carries me along, but I am the river; it is a tiger that devours me, but I am the tiger; it is a fire that consumes me, but I am the fire.
In this Photoshop tutorial we will learn how to create nature scene of tiger. First we create a blank file and place leaves. Then added tiger and blended it with background. Next make several copies of leaves, then added birds and butterfly. Also for final touch added some Gradient maps and apply Camera Raw Filter.
Preview of Final Image

Tutorial Resources
Step 1
Now, let’s start by creating a new image file, go to the Menu bar and click File > New, and then input the following values on their respective fields
- Preset: Custom
- Width: 3080px
- Height: 3080px
- Resolution: 300px
- Color Mode: RGB Color 8 bit
- Background Contents: Transparent

Step 2
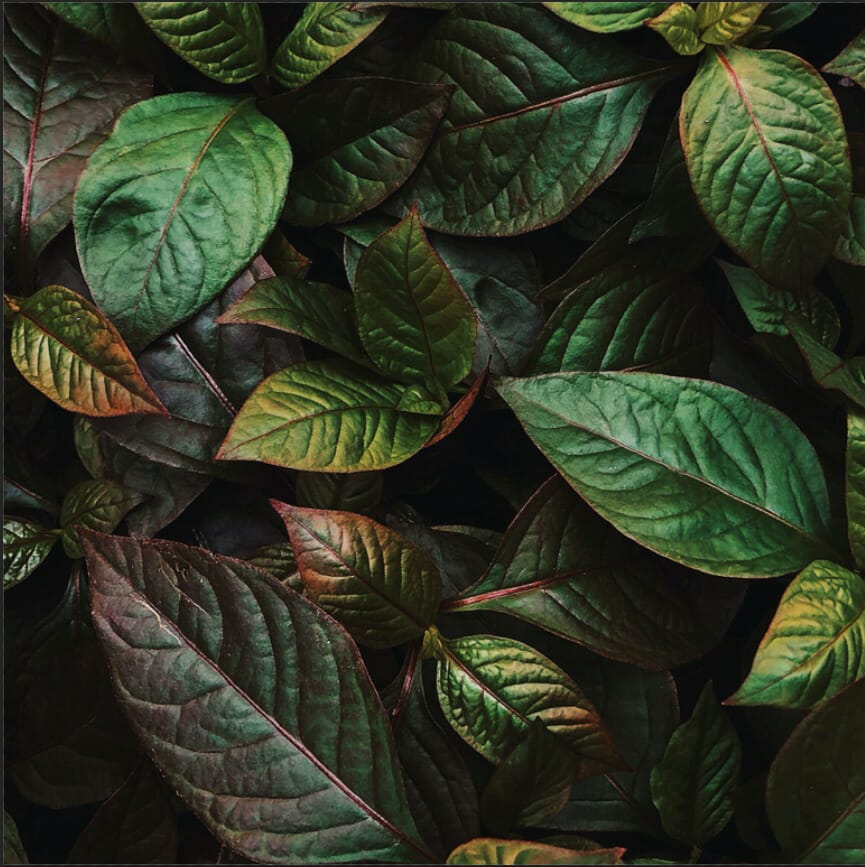
Now, place Background photo Go to File > Place and select Leaves. Then place it to our work canvas. Then position the image with the transform tool (Ctrl / Cmd + T). Hold Alt + Shift and rasterize like the image below. In Photoshop CC only hold Alt to rasterize all sides together.

Step 3
Next, go to open Tiger photo. Go to File > Open and select Tiger. After you open the image, use Rectangular Marquee Tool(M).

After the selection area has been created, simply copy (Ctrl / Cmd + C) and Paste (Ctrl / Cmd + V) it to our work canvas. Then position the image with the transform tool (Ctrl / Cmd + T). Hold Alt + Shift and rasterize like the image below. In Photoshop CC only hold Alt to rasterize all sides together. Right-click and select “Convert to Smart Object”.


Next, select layer and create layer mask. Use Soft round brush tool with foreground color black and paint background over the Tiger.


Step 4
Add Adjustment layer "Color Lookup" and select 3DLut File: FoggyNight.3DL Opacity set to 50%.

Step 5
Add Adjustment Layer "Curves"

Step 6
Add Adjustment Layer "Curves" and press Ctrl/Cmd + I to invert and use Brush Tool(B) Soft Round with foreground color white and paint the highlights parts on Tiger.


Step 7
Next, create a fisrt layer and change blend mode to Color Dodge with Opacity 65%. Then use Soft Round brush Tool (B) and foreground color set to Gray (#808080) and now paint eyes.

Now create a second layer and change blend mode to Overlay with Opacity 45%. Then use Soft Round brush Tool(B) with foreground color Orange (#ba720a) and go paint eyes.


Step 8
Now in next steps we will create a several layers of leafs. First we will go to Background layer and start selecting fisrt leaf. Use Quick Selection Tool(W) and start selecting leaf.

After the selection area has been created, simply duplicate it (Ctrl / Cmd + J) and place above "Color Eye" layer. Then position the image with the transform tool (Ctrl / Cmd + T). Hold Alt + Shift and resterize like image below. In Photoshop CC only hold Alt to resterize al sides together.

Step 9
Next, select another leaf. Use Quick Selection Tool(W) and start selecting leaf.

After the selection area has been created, simply duplicate it (Ctrl / Cmd + J) and place above leaf 1 layer. Then position the image with the transform tool (Ctrl / Cmd + T). Hold Alt + Shift and resterize like image below. In Photoshop CC only hold Alt to resterize al sides together.

Step 10
Start selecting Leaf 3. Use Quick Selection Tool(W) and start selecting. After the selection area has been created, simply duplicate it (Ctrl / Cmd + J) and place above leaf 2 layer. Then position the image with the transform tool (Ctrl / Cmd + T). Hold Alt + Shift and resterize like image below. In Photoshop CC only hold Alt to resterize al sides together.


Step 11
Now, Duplicate Leaf 3 press Ctrl/Cmd + J and position the image with the transform tool (Ctrl / Cmd + T). Next make another one copie of Leaf 3 (Ctrl/Cmd + J) and position the image with the transform tool (Ctrl / Cmd + T).


Step 12
Now apply adjustment layer "Curves" on leaf 3 second copy.

Step 13
Now select Background layer and start selecting leaf 4. Use Quick Selection Tool(W) and start selecting. After the selection area has been created, simply duplicate it (Ctrl / Cmd + J) and place above leaf 3 layer. Then position the image with the transform tool (Ctrl / Cmd + T). Hold Alt + Shift and resterize like image below. In Photoshop CC only hold Alt to resterize al sides together.

Add Adjustment Layer "Curves" and press Ctrl/Cmd + I to invert and use Brush Tool(B) Soft Round with foreground color white and paint dark parts.


Step 14
Next we will open Bird 1. After you open the image, use Quick Selection Tool(W) and start selecting the bird. After the selection area has been created, simply copy (Ctrl / Cmd + C) and Paste (Ctrl / Cmd + V) it to our work canvas. Then position the image with the transform tool (Ctrl / Cmd + T). Hold Alt + Shift and resterize like image below. In Photoshop CC only hold Alt to resterize al sides together.


Step 15
Add Adjustment Layer "Curves" and press Ctrl/Cmd + I to invert and use Brush Tool(B) Soft Round with foreground color white and paint dark(Bottom) parts of bird.


Step 16
Add Adjustment Layer "Curves" and press Ctrl/Cmd + I to invert and use Brush Tool(B) Soft Round with foreground color white and paint highlight(top) parts of bird.


Step 17
Now we will open Bird 2. After you open the image, use Quick Selection Tool(W) and start selecting the bird. After the selection area has been created, simply copy (Ctrl / Cmd + C) and Paste (Ctrl / Cmd + V) it to our work canvas. Then position the image with the transform tool (Ctrl / Cmd + T). Hold Alt + Shift and resterize like image below. In Photoshop CC only hold Alt to resterize al sides together.


Step 18
Add Adjustment Layer "Curves" and press Ctrl/Cmd + I to invert and use Brush Tool(B) Soft Round with foreground color white and paint dark parts of bird.


Step 19
Add Adjustment Layer "Curves" and press Ctrl/Cmd + I to invert and use Brush Tool(B) Soft Round with foreground color white and paint highlight parts of bird.


Step 20
Create a new layer and use Soft Round brush Tool(B) with foreground color black and paint parrot.

Step 21
Next we will open Bird 3. After you open the image, use Lasso Tool(L) and start selecting the bird. After the selection area has been created, simply copy (Ctrl / Cmd + C) and Paste (Ctrl / Cmd + V) it to our work canvas. Then position the image with the transform tool (Ctrl / Cmd + T). Hold Alt + Shift and resterize like image below. In Photoshop CC only hold Alt to resterize al sides together.


Step 22
Add Adjustment Layer "Curves" and press Ctrl/Cmd + I to invert and use Brush Tool(B) Soft Round with foreground color white and paint dark (bottom) parts of bird.


Step 23
Add Adjustment Layer "Exposure" and press Ctrl/Cmd + I to invert and use Brush Tool(B) Soft Round with foreground color white and paint highlight parts of bird.


Step 24
Next we will open Butterfly. After you open the image, use Lasso Tool(L) and start selecting butterfly. After the selection area has been created, simply copy (Ctrl / Cmd + C) and Paste (Ctrl / Cmd + V) it to our work canvas. Then position the image with the transform tool (Ctrl / Cmd + T). Hold Alt + Shift and resterize like image below. In Photoshop CC only hold Alt to resterize al sides together.


Now right click on layer and select Blending Options. We now get an Layer Style options window. 1. Drop Shadow

Step 25
Lets add some glow to Butterlfy, create a new layer and change Blend mode to Linear Dodge(Add) with Opacity 25%. Now use Brush Tool(B)Soft Round with foreground color Aqua #5aa99d and paint with small Brush.

Create new layer and use Brush Tool(B) Soft Round wih foreground color Aqua #2a89a3 and paint to Butterfly with Medium brush Size. Blend mode change to Linear Dodge(Add) with Opacity 25%.


Step 26
Now select Background layer and start selecting leaf 5. Use Quick Selection Tool(W) and start selecting. After the selection area has been created, simply duplicate it (Ctrl / Cmd + J) and place above Butterfly layer. Then position the image with the transform tool (Ctrl / Cmd + T). Hold Alt + Shift and resterize like image below. In Photoshop CC only hold Alt to resterize al sides together.


Step 27
Add Adjustment Layer "Curves" and press Ctrl/Cmd + I to invert and use Brush Tool(B) Soft Round with foreground color white and paint bottom part of leaf.


Step 28
Next, select another leaf. Use Quick Selection Tool(W) and start selecting leaf.

After the selection area has been created, simply duplicate it (Ctrl / Cmd + J) and place above leaf 1 layer. Then position the image with the transform tool (Ctrl / Cmd + T). Hold Alt + Shift and resterize like image below. In Photoshop CC only hold Alt to resterize al sides together.

Step 29
Add Adjustment Layer "Curves" and press Ctrl/Cmd + I to invert and use Brush Tool(B) Soft Round with foreground color white and paint bottom part of leaf.


Step 30
Now duplicate Leaf 5 (Ctrl/Cmd + J) and Convert to Smart Object. Then go to > Filter > Blur > Gaussian Blur and set radius to 12.5px.


Step 31
Add Adjustment Layer "Gradient Map" Black and White. Blend mode change to Soft Light with Opacity of 25%.

Step 32
Add Adjustment Layer "Color Lookup" and set 3DLut File to FuturisticBleak.3DL Opacity set to 25%.

Step 33
Add Adjustment Layer "Gradient Map" and set blend mode to Soft Light With Opacity of 16%.

Step 34
Now go back to "Color Eye" layer and select it. Next, create a new layer and use Brush Tool(B) Soft Round with foreground color black. Blend mode of layer change to Multiply and start painting with a black brush over the Tiger.


Step 35
When we finished all this, now merge all layers to one. Select the last layer and hold CTRL/CMD + SHIFT + ALT + E. Now we have a final layer, right click on mouse and select Convert to Smart Object. Then go to Filter > Camera RAW Filter. At its most basic, the Photoshop Camera Raw filter allows you to use the functions of the ACR interface at any time within Photoshop.

Step 36
Now in Camera Raw Filter, set the Value: Basic
- Temp: -3
- Exposure: -0.20
- Contrast: +2
- Highlights: +5
- Whites: +5
- Texture: +15
- Clarity: +11
- Vibrance: +10
- Saturation: -7

Color Mixer Hue
- Reds: -18
- Oranges: -8
- Yellows: -5
- Greens: -4
- Blues: -24
Saturation
- Oranges: +8
- Yellows: +5
- Greens: +4
- Blues: +8
Luminance
- Oranges: +11
- Yellows: +15
- Greens: -1

Gradulated Filter
- Exposure: -0.50
- Shadows: -21
- Blacks: -4

Radial Filter
- Exposure: +0.15
- Highlights: +24
- Shadows: +54
- Whites: +10
- Blacks: +5

And finally, everything should look like this.

Final Results

3 comments on “Floral Tiger Photo Manipulation Tutorial”
all of the animals are out of proportion and the butterfly ends up looking like a glowing cyst. but great colors
Wow this is superb!
This looks great! I must try it! Thank you!
Su