Download Lightroom presets and LUTs, absolutely free. Use the presets to add creativity and style to your photos.
![28_3[3] 28_3[3]](https://cdn.photoshoptutorials.ws/images/stories/4f283df24450_28B2/28_33.jpg?strip=all&lossy=1&quality=70&webp=70&avif=70&w=1920&ssl=1)
Last thing to add is shadow under the shoe. To do that add another adjustment layer Levels and set the Input Levels on 0; 0,62; 255. Fill the layer mask with black again and grab the Brush Tool (B). Lower the Opacity of the brush on 30% and start building up the shadow to get something similar to the picture below.
![28_4[3] 28_4[3]](https://cdn.photoshoptutorials.ws/images/stories/4f283df24450_28B2/28_43.jpg?strip=all&lossy=1&quality=70&webp=70&avif=70&w=1920&ssl=1)
Step 29 - Desaturation
This is the very last step in which you'll desaturate cyan tones little bit. To do that add new adjustment layer Hue/Saturation, as color choose Cyans and set the value Saturation on -15.
![29_1[3] 29_1[3]](https://cdn.photoshoptutorials.ws/images/stories/4f283df24450_28B2/29_13.jpg?strip=all&lossy=1&quality=70&webp=70&avif=70&w=1920&ssl=1)
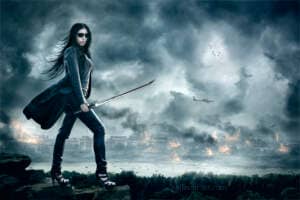
Final Results
![final-results[7] final-results[7]](https://cdn.photoshoptutorials.ws/images/stories/4f283df24450_28B2/final-results7.jpg?strip=all&lossy=1&quality=70&webp=70&avif=70&w=1920&ssl=1)
Download the PSD
Last Chance.zip | 2.62 MB
Download from Website


![profile[3] profile[3]](https://cdn.photoshoptutorials.ws/images/stories/4f283df24450_28B2/profile3.jpg?strip=all&lossy=1&quality=70&webp=70&avif=70&resize=125%2C125&ssl=1) Thank you for reading this tutorial. I really hope it was useful for you and that it gives you some tips or inspiration for your next artwork!
Thank you for reading this tutorial. I really hope it was useful for you and that it gives you some tips or inspiration for your next artwork!
5 comments on “How to Create Dramatic Sci-Fi Photo Manipulation in Photoshop”
Amazing photo manipulation tutorial in Photoshop. Local adjustment, global adjustment, fire and light effects are raeally art work.
This is impressive, thanks for sharing.
one of the best Photo Manipulation tutorial! Well done)
Nice tutorial and awesome final result pic.
Thanks for sharing and for the nice brushes you suggested ;)
Nice artwork, Jarka. Thanks for sharing us your knowledge :)