Download Lightroom presets and LUTs, absolutely free. Use the presets to add creativity and style to your photos.
- Brush size: 700px
- Hardness: 0%
- Opacity: 18%
- Flow: 100%
- #: ffffff
Then, paint:
![image028[3] image028[3]](https://cdn.photoshoptutorials.ws/images/stories/adbb194b9a45_135BA/image0283.jpg?strip=all&lossy=1&quality=70&webp=70&avif=70&w=1920&ssl=1)
The result of that should be similar to this:
![image029[3] image029[3]](https://cdn.photoshoptutorials.ws/images/stories/adbb194b9a45_135BA/image0293.jpg?strip=all&lossy=1&quality=70&webp=70&avif=70&w=1920&ssl=1)
Create another layer (Ctrl/Cmd + Shift + N) and name it "Light 3".
Activate the Brush tool (B) and input the following:
- Brush size: 700px
- Hardness: 0%
- Opacity: 8%
- Flow: 100%
- #: ffffff
![image030[3] image030[3]](https://cdn.photoshoptutorials.ws/images/stories/adbb194b9a45_135BA/image0303.jpg?strip=all&lossy=1&quality=70&webp=70&avif=70&w=1920&ssl=1)
The result:
![image031[3] image031[3]](https://cdn.photoshoptutorials.ws/images/stories/adbb194b9a45_135BA/image0313.jpg?strip=all&lossy=1&quality=70&webp=70&avif=70&w=1920&ssl=1)
Next, we will darken some parts of the photo to make it look more dramatic. Create a new layer (Ctrl/Cmd + Shift + N) and name it "Darken 1".
Activate the Brush tool (B) and then input the following:
- Brush size: 900px
- Hardness: 0%
- Opacity: 25%
- Flow: 100%
- #: 000000
![image032[3] image032[3]](https://cdn.photoshoptutorials.ws/images/stories/adbb194b9a45_135BA/image0323.jpg?strip=all&lossy=1&quality=70&webp=70&avif=70&w=1920&ssl=1)
Let's paint here:
![image033[3] image033[3]](https://cdn.photoshoptutorials.ws/images/stories/adbb194b9a45_135BA/image0333.jpg?strip=all&lossy=1&quality=70&webp=70&avif=70&w=1920&ssl=1)
The result should be similar to this:
![image034[3] image034[3]](https://cdn.photoshoptutorials.ws/images/stories/adbb194b9a45_135BA/image0343.jpg?strip=all&lossy=1&quality=70&webp=70&avif=70&w=1920&ssl=1)
Create a new layer once again (Ctrl/Cmd + Shift + N) and name it "Darken 2".
Activate the Brush tool (B) and input the following:
- Brush size: 900px
- Hardness: 0%
- Opacity: 25%
- Flow: 100%
- #: 000000
![image035[3] image035[3]](https://cdn.photoshoptutorials.ws/images/stories/adbb194b9a45_135BA/image0353.jpg?strip=all&lossy=1&quality=70&webp=70&avif=70&w=1920&ssl=1)
The result of that should be similar to this:
![image036[3] image036[3]](https://cdn.photoshoptutorials.ws/images/stories/adbb194b9a45_135BA/image0363.jpg?strip=all&lossy=1&quality=70&webp=70&avif=70&w=1920&ssl=1)
Now let's enhance the exposure of the image. To do that, first click on the "Create New Fill/Adjustment layer" button.
![image037[5] image037[5]](https://cdn.photoshoptutorials.ws/images/stories/adbb194b9a45_135BA/image0375.jpg?strip=all&lossy=1&quality=70&webp=70&avif=70&w=1920&ssl=1)
Once up, click on "Exposure".
![image038[3] image038[3]](https://cdn.photoshoptutorials.ws/images/stories/adbb194b9a45_135BA/image0383.jpg?strip=all&lossy=1&quality=70&webp=70&avif=70&w=1920&ssl=1)
When the Exposure box opens, input the following:
- Exposure: 0.44
- Offset: -0.0098
- Gamma Correction: 1.10
![image039[3] image039[3]](https://cdn.photoshoptutorials.ws/images/stories/adbb194b9a45_135BA/image0393.jpg?strip=all&lossy=1&quality=70&webp=70&avif=70&w=1920&ssl=1)
The result of that should be similar to this:
![image040[3] image040[3]](https://cdn.photoshoptutorials.ws/images/stories/adbb194b9a45_135BA/image0403.jpg?strip=all&lossy=1&quality=70&webp=70&avif=70&w=1920&ssl=1)
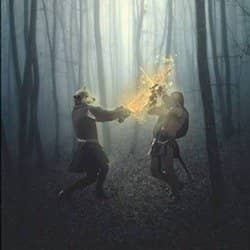
Step 4: Create the Warriors
Now, we will be creating the warriors who are battling for their life in this dark forest. To start, open the stock image: "Knights" by jmjvicente. Once open, activate the Polygonal Lasso Tool (L) and create a selection area around these warriors.
![image041[3] image041[3]](https://cdn.photoshoptutorials.ws/images/stories/adbb194b9a45_135BA/image0413.jpg?strip=all&lossy=1&quality=70&webp=70&avif=70&w=1920&ssl=1)
![image042[3] image042[3]](https://cdn.photoshoptutorials.ws/images/stories/adbb194b9a45_135BA/image0423.jpg?strip=all&lossy=1&quality=70&webp=70&avif=70&w=1920&ssl=1)
Once you've made the selection area, activate the Move tool (V) and drag those warriors to our canvas.
Position them as shown below:
![image043[3] image043[3]](https://cdn.photoshoptutorials.ws/images/stories/adbb194b9a45_135BA/image0433.jpg?strip=all&lossy=1&quality=70&webp=70&avif=70&w=1920&ssl=1)
Next, rename this layer to "Warriors".
After that, we would need to blend this layer's color to the background. We would need to make give them a bluish color - to do that, go to Image > Adjustments > Color Balance.
Once it opens, input the following:
- Color Levels: -56, 0, 0
- Tone Balance: Midtones
- Preserve Luminosity: Checked
![image044[3] image044[3]](https://cdn.photoshoptutorials.ws/images/stories/adbb194b9a45_135BA/image0443.jpg?strip=all&lossy=1&quality=70&webp=70&avif=70&w=1920&ssl=1)
Next, open the Color Balance box once again and input the following:
- Color Levels: 0, 0, 24
- Tone Balance: Shadows
- Preserve Luminosity: Checked
![image045[3] image045[3]](https://cdn.photoshoptutorials.ws/images/stories/adbb194b9a45_135BA/image0453.jpg?strip=all&lossy=1&quality=70&webp=70&avif=70&w=1920&ssl=1)
The result of both those changes:
![image046[3] image046[3]](https://cdn.photoshoptutorials.ws/images/stories/adbb194b9a45_135BA/image0463.jpg?strip=all&lossy=1&quality=70&webp=70&avif=70&w=1920&ssl=1)
Next, let's enhance the Brightness/Contrast of the warriors. Make sure that the "Warriors" layer is selected and then go to Image > Adjustments > Brightness/Contrast and then input the following once there:
- Brightness: -44
- Contrast: -50
![image047[3] image047[3]](https://cdn.photoshoptutorials.ws/images/stories/adbb194b9a45_135BA/image0473.jpg?strip=all&lossy=1&quality=70&webp=70&avif=70&w=1920&ssl=1)
The result:
![image048[3] image048[3]](https://cdn.photoshoptutorials.ws/images/stories/adbb194b9a45_135BA/image0483.jpg?strip=all&lossy=1&quality=70&webp=70&avif=70&w=1920&ssl=1)
That still isn't good, so let's lower the Brightness/Contrast levels a little further. Go to Image > Adjustments > Brightness/Contrast and then input the following once there:
- Brightness: -33
- Contrast: -17
![image049[3] image049[3]](https://cdn.photoshoptutorials.ws/images/stories/adbb194b9a45_135BA/image0493.jpg?strip=all&lossy=1&quality=70&webp=70&avif=70&w=1920&ssl=1)
The result:

