Create this “City to Country” Photo Manipulation with Photoshop

Create this “City to Country” Photo Manipulation with Photoshop

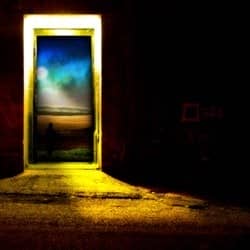
This tutorial will show you how to create a beautiful "city to country" composition using several images. You'll accomplish this by combining & blending images, and also creating a few lighting/color effects.

Preview of Final Results


final-results[6]

Tutorial Title


Resources


Step 1 - Open and set up door image

Let's start out by opening up the image "Door". Once opened, duplicate this layer and name it "Door Copy". Once duplicated, we are going to add a few adjustments. We are going to start with Image > Adjustments > Levels (Ctrl/Cmd+L).

adjustments[4]

The second adjustment, is Image > Adjustments > Brightness/Contrast.

brightness[4]

The third adjustment we are going to apply is Image > Adjustment > Photo Filter.

filter[4]

Step 2 - Darken and soften up the door

The door is a bit bright, so we are going to make it a little darker while adding softness to it. So to start, duplicate the "Door Copy". Then apply Blur > Gaussian Blur > 20px. Once you've added the blur, set this layers opacity to 65%. So you don't add clutter to your layers palette, merge your "Blur" and "Door Copy" layers together. You should have a composition like this.

steptwo[4]

We are going to go a little bit further and add another adjustment to darken it even more. To do this, we are going to apply Layer > Adjustment > Levels.

leveltwo[4]

Step 3 - Mask out the door

So we can add in the inside images, we have to create a mask on the door. So to do this we are going to use the Polygonal Lasso Tool (L), and create a rectangle around the door like so. You should have marching ants around the door.

SIDE NOTE: Be sure to zoom in so you are able to get exaCtrly the door outline.

cutdoor[4]

Once you've got the door outlined with your marching ants, we are going to mask this out. To do this, go to Layer > Layer Mask > Hide Selection. This will cut out that part of the door. SIDE NOTE: You will still see the original door from the "Background" layer, which is okay. You can either choose to delete this layer, or hide it. It is not needed anymore. This is what it will look like hidden/deleted.

cutout[4]

Step 4 - Add your country landscape

Now that the door is masked out, we can begin to add the country environment in the door. So let's open up the image "Landscape.jpg" and drag it into our composition. Name this layer "Landscape". For now, put this layer above your "Door Copy" layer so we can see it's size. It's very large, so we must make it smaller. To do this, to go Image > Transform > Scale (Ctrl/Cmd+T). We want to align it like the image below.
landscapealign[4]

Once you've aligned it correctly, let's darken this image up a little bit. So again we will do Image > Adjustments > Levels (Ctrl/Cmd+L). Change the value to 40 / 1.00 / 255.


Step 5 - Landscape Placement

Now it's time to correctly place your landscape image. Drag this layer and put it underneath your "Door Layer" copy. We want to align it with a little bit of grass right above the door. It should like this this.

landscapefinal[4]

Step 6 - Adding the second sky

Now we are going to start adding a gradient like sky transforming the cloudy sky into a galaxy looking sky. We now need to open the image "Skylight". It also has a high resolution, so we will have to Scale this down a bit. So do Image > Transform > Scale (Ctrl/Cmd+T). We only want to scale it enough to where it's still covering most of the composition at this time. It should look like this.

skylight[4]

We don't need all of this, we just want the top white to blue area. So we want to use the Rectangular Marquee tool (M) to select the stop area of this. Once we've selected it below. Inverse the selection by doing Selection > Inverse. Use the Eraser (E) to erase the outside. Then unselect this layer (Ctrl/Cmd + D)

skylightcrop[4]

Once erased, it should look like this. Align it like so, just barely between the tree's and sky. You want to keep the very white/bright part of the sky near the tips of the horizon tree's.

skycrop[4]

Now lastly, move this layer under "Door Copy", but above "Landscape". Set this layers mode blending mode to Multiply. The composition should now look like this.

skyfinish[4]

Zoom in on the compostion where the two layers meet. You'll notice you can still see the hard edge of the "Sky" layer. Take a eraser tool (E)

skyerase[4]

Step 7 - Add the galaxy to the sky

The sky's a little dull, so let's add some dazzle to it. Open the image "Nebula.jpg". And resize it a little to your liking. You can choose how much of the cloud you want to show up. After you resize it, you want to make the cloud horizontal. Use Image > Transform > Rotate and rotate the image until the cloud is horizontal.

nebula[4]

Next let's put this layer behind the "Door Copy". Move the "Nebula" layer beneath your "Door Copy" layer, but make sure you keep it above the "Sky" and "Landscape" layers.

nebula1[4]

Set this layer's blending mode to Multiply and it's Opacity to 66%. You should now have this.

nebula2[4]

We just have one more to add to this. Let's erase the bottom so it blends cleary between the layers. Use the Eraser tool (E), and zoom in and erase with the horizon. Depending on the size of your composition, depends on your eraser size. Larger the better so it creates a nice even transition.

nebula3[4]

Step 8 - Add the glowing moon

Now It's time to add the moon. Open the image "Moon.jpg". Before we move this into our composition we must cut it out. To do this, use the Magic Wand (W) and select anywhere other then the moon. You have no created a selection around the moon. Go to Selection > Inverse so it grabs just the moon, and we can now move this into our composition.

mooncut[4]

The moon is clearly to big. So we must resize it. So again we will use our Scale tool. Go to Image > Transform > Scale (Ctrl/Cmd + T) and scale it down to proportion. And cut off the left side slightly to add a more interesting effect.

moonscale[4]

Now the moon isn't really in the mood. Let's change this by setting the layers blending mode to Screen, and adding some glow to it. Right click the layer and choose Blending Options, and check Outer Glow.

moonglow[4]

You're result so far


Step 10 - Add the inside door border

Now we will add a black border on the inside of the door using the Brush tool (B). First, create a new layer, and name it "Black Border". And set it above the other layers, but below the "Door Copy" layer. Using your brush, set the hardness to 0% and use a fairly large size brush to add this border. Use the Shift key to keep your brush a straight line as you move up. Be careful not to make it took dark. This should be your outcome.

blackborder[4]

Step 11 - Add moonlight

Now we are going to add a glow emitting from the moon. To start, we need to create a new layer. Name this layer "Moon Glow". This layer does go ABOVE "Door Copy"! Using the Polygonal Lasso Tool (L)create the shape below.

brushoutline[4]

Use your Brush Tool (B) and paint the inside of this selection White. Then deselect this layer.

brushwhite[4]

Set this layers blending mode to Overlay, and zoom in with and use the Eraser (E) and erase the edges to make a nice soft, glowing effect. When erasing, be sure to erase on the outside right of the door, as if it's shining on both the inside of the door and outside.

eraseglow[4]

Duplicate the "Glow Layer" to add a more intensified effect.


Step 12 - Add the person

Let's add the last finishing touch. We're now going to put a person inside our country environment. Open up "Person.jpg". We just want the person, so use the Magic Wand (W) and click inside the person until we have them fully outlined. Be patient, as it doesn't always work as you want it to.

personselect[4]

Next, drag the selection of the person into our composition. And we must again scale the person down using Image > Transform > Scale. (Ctrl/Cmd + T). Scale them down to perspective and place them on the bottom left of the door. A little bit above the door to show they are walking inside. Zoom in and eraser any extra outline that came with selecting the person, as it always doesn't select the person exaCtrly.

person[4]

Last and final step, set the blending mode of the person to Multiply. Tada! You're done!


Final Results

final-results[7]

Download the PSD

City to Country Photo Manipulation.zip | 3 MB


Authors Comment

In conclusion, this image has a very interesting perspective and mystery to it. As the glow shines out of the door, but is blocked off on the right side of the door showing perspective between the two worlds. The mysteriousness of the dark person makes you wonder..."what are they doing?". I'd also like to mention that this was my very first tutorial, and I'd like to thank everyone for taking their time and reading it. I'd love to see others creations following this tutorial! I currently do not have a website, but I have a photography page on facebook. Just search "Marketti Photography". Most of the images in this I were my images, and I love being critiqued and hearing feedback! Questions or comments? Shoot me an e-mail @ [email protected]

- Nolan Marketti


Luminar: AI Photo Editing
Sponsored

Luminar AI lets you turn your ideas into reality with powerful, intelligent AI. Download the photo editor and see how you can completely transform your photos in a few clicks.

One comment on “Create this “City to Country” Photo Manipulation with Photoshop”

Leave a Reply

Your email address will not be published. Required fields are marked *

cross