

Make your artwork look like they're from an alternate universe. These Cyberpunk presets work with Photoshop (via the Camera Raw filter) and Lightroom. Download all 788 presets for 90% off.
Add a layer mask to this image (use icon on Layer panel or go to Layer > Layer Mask > Reveal All). Use large soft brush (Size: 300px, Opacity: 100%) and brushed with black color on a layer mask everything except the sky. Change Blending Mode to "Overlay". Group all city layers by selecting all layers and press Cmd/Ctrl + G or use icon on Layer panel.

Step 10
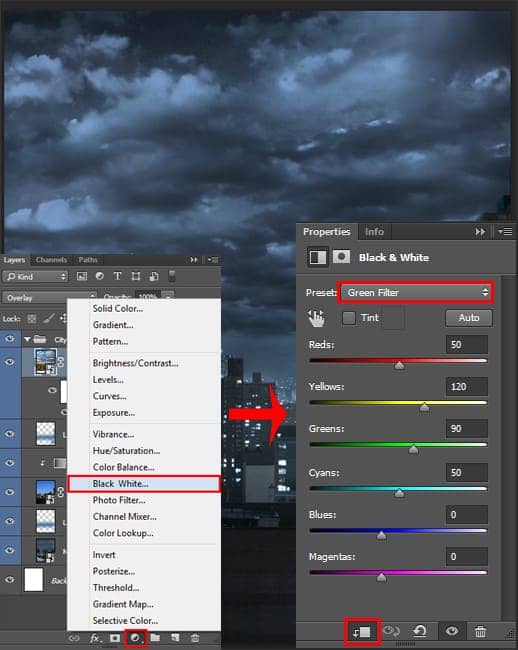
When you change the blending mode, the clouds are well superimposed on the image but showed their colors. To get rid of the colors, use an adjustment layer Black & White from Adjustment panel or from Layer > New Adjustment layer > Black & White... Make from this layer a clipping mask to sky layer and set Preset: "Green Filter". You can try different presets to change the light/shadow map.
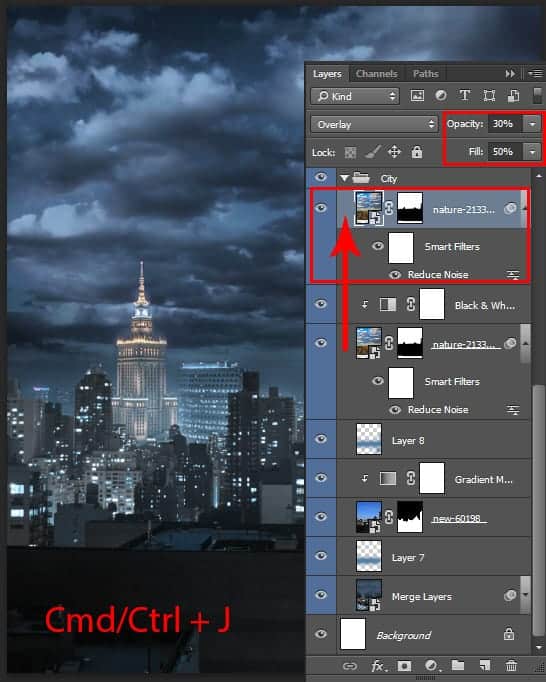
Duplicate original sky layer (Cmd/Ctrl + J or go to Layer > Duplicate layer) and move it to front of Layer panel. Set Opacity around 30%, Fill to 50%.
Step 11
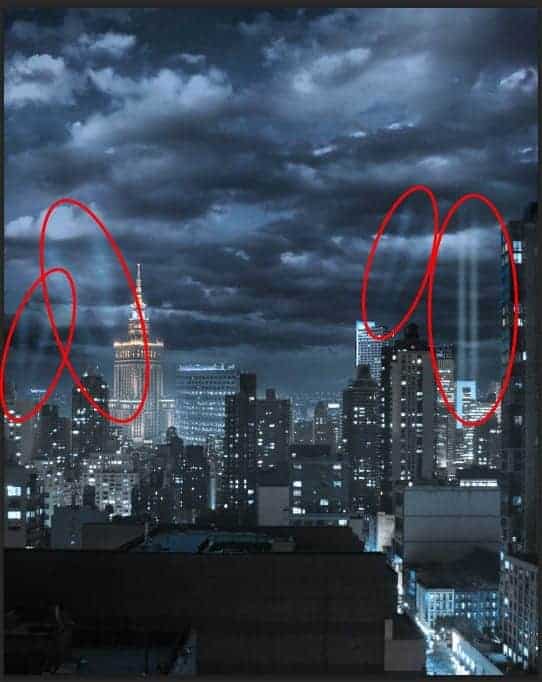
I decided to add a bit of action and create beams of light over the city. This will add drama and fiction. Create a new layer (Cmd/Ctrl + Shift + N or Layer > New > Layer). Use Brush Tool (B) with size: 70 - 30px, Opacity: 50% and Hardness: 0% to draw a beams. Use colors from this image or use #3f92de and #84bedc like me. Does not matter how and where to place the beams, but it is better not to occupy the center, because in that place there will be a model. Set Blending Mode to "Screen".
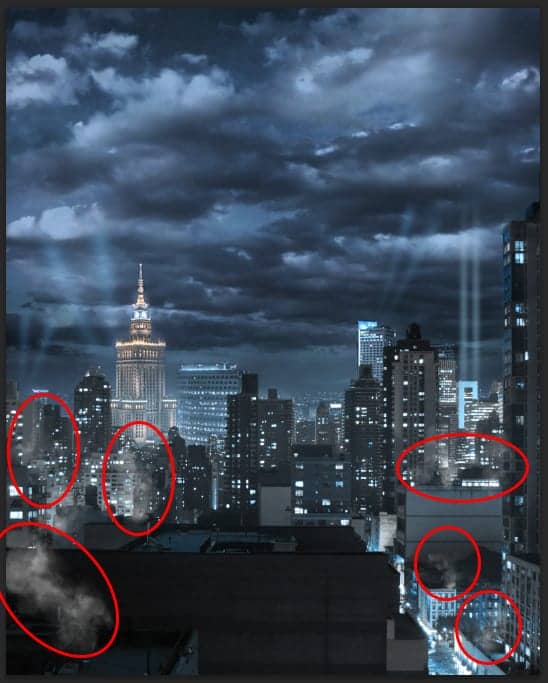
Same thing with a smoke. Create a new layer, upload a "effects_brushes_by_vincdesign-d4mwjs4" brush set in Photoshop and use "CLOD 3" brush with Size 250 - 500px, Opacity: 35 - 70% and color: #c4c4c4. Change the brush size depending on how far you where you want to apply it. Also, first draw mainstream smoke. Then use Eraser Tool (E) with same settings as a brush and make it more voluminous by erase some parts. Use several layers to control Opacity and then merge them (Cmd/Ctrl + E or Layer > Merge Layers...).
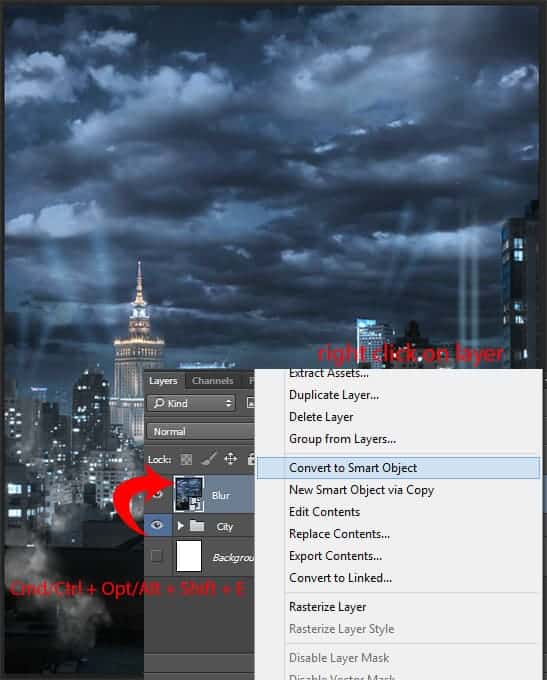
Now that everything is ready, click on a group "city" and create a merged copy Cmd/Ctrl + Opt/Alt + Shift + E and convert this layer to Smart Object (right click on layer > Convert to Smart Object).
Step 12
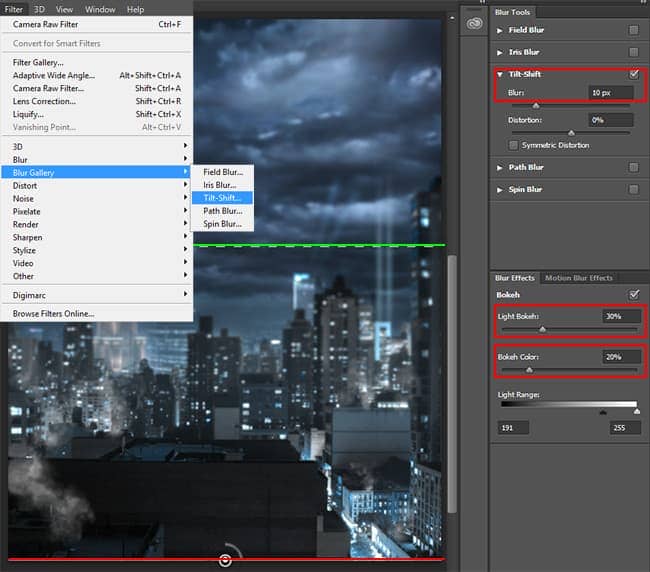
Now the depth of field. This is very important because we are creating a portrait/poster, and in this case, attention should be drawn to main character. I give you two options: as I did and alternative. I have Adobe Photoshop CC 2014 and use Tilt-Shift blur from Blur Gallery. This new features in this version, so if you have a different version of Photoshop a description of an alternative version of a little lower. First Tilt-Shift blur. Go to Filter > Blur Gallery > Tilt-Shift... Move the center circle at the lower boundary of the working field. In the upper right window settings (check that there was only one checked - Tilt-Shift) set Blur: 10px, Distortion: 0. In the lower window set Light Bokeh: 30%, Color Bokeh: 20% and click OK to apply filter.
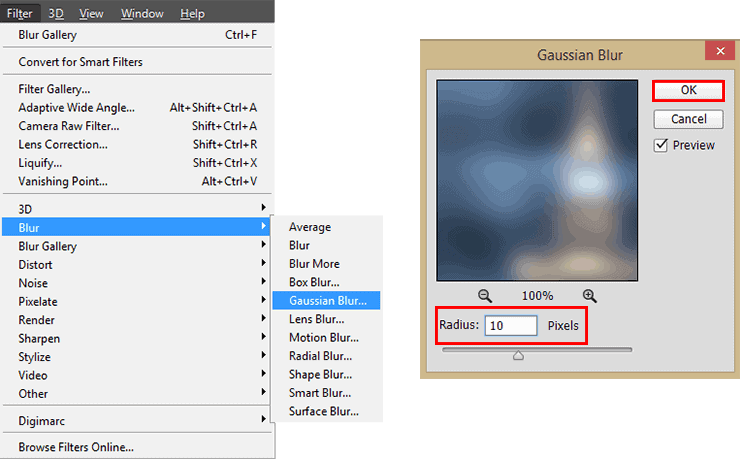
Now for those who are using a different version there is an alternative way to achieve the desired effect. Go to Filter > Blur > Gaussian Blur... In window that appears set Radius to 10px and click Ok.
Take a Gradient Tool, set default black & white gradient and background/Foreground colors (D) with linear method. Apply gradient on filter layer mask from Bottom to black roofs of buildings from the first plan (this will remove the effect of the filter on the first plan). And then you get a similar effect.
27 comments on “Create This Magnificent Sniper Artwork in Photoshop”
Great tutorial but the skyscraper link goes to a search result rather than the image used in this tutorial
Anton, you should download some of her PSD files so you can see what's she's doing. It'll help you learn PS faster.
Yea thanks. I'm gonna definitely check this out
Great Tutorial. Ive been working on my weaknesses, and photo manipulation is one of them. I never even used some of the adjustment techniques in this, so that was a real eye opener. Camera Raw was really cool. Very powerful.
Thank you very much for this tutoria! I gave it a try and submited it here: http://dilarosa.deviantart.com/art/Meanwhile-in-the-rain-589781746 with due credit :D
I couldn't find the skyscraper image from the link provided
WOW. These comments are amazing. Did anyone even do the tutorial? How about the part with the first step where you have to download the skyscraper image, and how it's not actually available in the link provided.... ? Do we just try with another image that looks kinda similar? Is this tutorial meant to be a "rough guide" ?
I'm looking forward to trying this exercise out with some of my students.
This kind of work is common, there are several works in this style.
It would be very interesting if the owner of the website to publish creative tutorials.
For goodness sake why a gun? Such barbarity and not anything to celebrate or glorify. Go take a picture of something less banal and more inspirational.
This is simply wonderful composite work...just one correction she's not a Sniper as she's carrying a customized M4 Assault Rifle with Reflex sight & Sound Suppressor attachment..
Mahmoud Ibrahim ElKasrawy, And what's the similar here - rain?
Long Ago, i made a project that is similar to this.
You can view all the process in the photo Album + the photo description
https://www.facebook.com/elkasrawy.ph/photos/a.673942746020840.1073741860.521393071275809/673943752687406/?type=3&theater
And what's the similar here - rain?
maybe the model :) .
Oops! By the way here is a small list of artworks that were long time ago previous to your artwork and they are very similar to your. http://nenoc2.deviantart.com/art/Demonia-Web-387514487?ga_submit_new=10%253A1374561982%29
http://trehote.deviantart.com/art/Wall-test-001-377658984
http://julez88.deviantart.com/art/Never-Alone-382434639
http://kaderart.deviantart.com/art/LA-VENGEANCE-DE-KAYLA-422798633
http://child-of-minerva.deviantart.com/art/Raven-that-s-the-fourth-wall-don-t-touch-that-423379938
Maybe because they used the same stock which is a model on deviantArt :) .
and she allows others to use her photos.
Then, what is similar in these photos. http://phelandavion.deviantart.com/art/Olesia-Anderson-STOCK-III-515126408
http://kayladavion.deviantart.com/art/Katana-Stock-4-376959103
Kayla Davion is one, but the characters are different.
I don't get why you are panicking :)
When a man rolls up to a lie, he loses his face. I panic because there are no more men.
No, you are showing 2 things by that attitude.
- you Need to grow up
- you have no self confidence :)
There is nothing in the world says to attack others work in order to maintain yours. :)
Although if you just focused alittle. if i say that i did something similar , it would mean that i like yours.
but as i said. you just need to mentally grow up (Y)
Cheers.