Download Lightroom presets and LUTs, absolutely free. Use the presets to add creativity and style to your photos.
In this tutorial I will show you how from just two photos create a beautiful summer poster. This technique is based on blend modes and filters. I'll tell you about using blending modes and filters, working with color and composition. In this tutorial the final result variants a lot! Read this tutorial and Immerse yourself in the atmosphere of summer vacation!
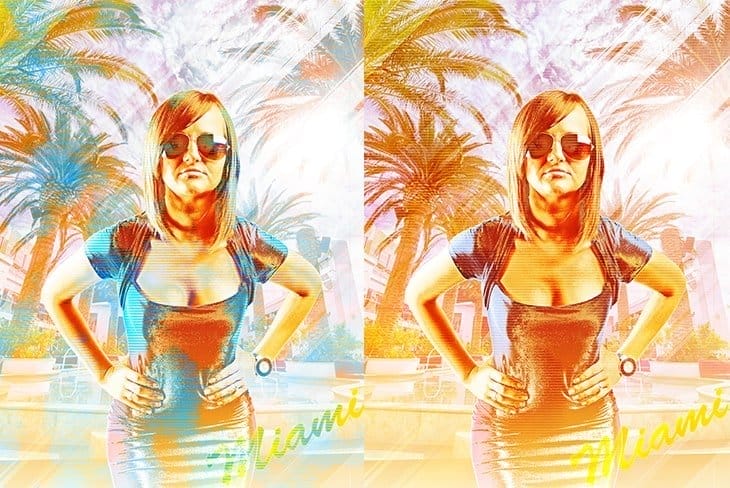
What you'll be creating
Many have a photo from vacation. But why did not the usual photos to add a little style and creativity to see them in a new way? In this tutorial Let's start creating this picture by adding the basic elements and create the background. Then we will create a new kind of model, and add effects. At the end of this tutorial will work with the text and details. You can use your photos from vacation, a little creativity, good humor and Photoshop starting from CS version.

Tutorial Resources
Step 1
So let's start. The first thing we need is to create a new document. Go to File > New or use Cmd/Ctrl + N. Set up document to 1800 height, 1350 width and resolution to 150 pixels/Inch.

Step 2
Go to File > Place.../Place Embedded and open "Ms__Officer_by_xn3ctz" image. In Free Transform mode (Ctrl/Cmd+T or Edit > Free Transform) slightly increase the size with holding Shift key of the photo and position the model in the center of the working field.

Step 3
Take a Magic Wand Tool (W), set Tolerance to 10 and select background. In this case, to use this tool easier and faster to create selection (also add to selection white background). With active selection go to Layer panel and with holding Opt/Alt click on "Add a layer mask" icon to a model layer or go to Layer > Layer Mask > Hide Selection.

Step 4
Now create the background. First I add a gradient. Go to Layer > New Fill Layer > Gradient... or use "Create new fill or adjustment layer" icon. Select default Black & White gradient and set up following gradient #fef4da > #f5ca6c > #ecad2a > #e39a0a > #dd9302 and click OK. Set gradient Angle to 90 degrees, Scale to 100% and hit OK. This layer must be under layer with a model.

Step 5
Go to File > Place.../Place Embedded and open "swimming-pool-731886" image. With Free Transform tool (Ctrl/Cmd+T or Edit > Free Transform) resize the layer like shown in the image below. Also use Perspective Tool (right click in transform mode > Perspective) to reduce lens distortion in the image.

Step 6
Now change layer Blending Mode to "Lighten". The Lighten blending mode compares the color information for each pixel of the base and the blend color and applies the lighter color as the result. Duplicate this layer (Layer > Duplicate Layer or Cmd/Ctrl + J) and change Blending Mode to "Screen". With Screen blend mode the values of the pixels in the two layers are inverted, multiplied, and then inverted again. Using these two modes complements the first photo with missing parts from the second, thus getting a nice bright image.

Step 7
Now create the texture in the image. I think that the lines would look interesting and give poster style to the image. So, create a new layer by using "Create a new layer" icon at the bottom of Layer panel or use Cmd/Ctrl + Shift + N. Set default background and foreground colors (D). Go to Filter > Render > Clouds. On a cloud texture apply filter "Mezzotint" (Filter > Pixelate > Mezzotint...). Set Type to "Long Lines" and click OK.

Step 8
To transform the texture into lines go to Filter > Blur > Motion Blur. Set Angle: 45 degrees and maximal Distance - 2000 pixels. To lines became more evenly throughout the working field, apply the filter again via Cmd/Ctrl + F or Filter > Last Filter...(Motion Blur). Everything is good! The result was a perfect texture. You can experiment with different blur angle to get interesting results.

Step 9
Press Cmd/Ctrl + L or go to Image > Adjustments > Levels... to open "Levels" adjustment window and set for blacks: 90, midtones: 1.30 , whites: 210. This will help you to create a contrast between the dark and light lines. Now hide model layer by clicking on eye icon near thumbnail.

Step 10
Go to Tab Channels, hold Cmd/Ctrl and click on RGB thumbnail or "Load channel as selection" button to select only white lines. When you select lines go to tab "Layer", create a new layer (Cmd/Ctrl + Shift + N) and fill selection with white color (D, Cmd/Ctrl + Del or go to Edit > Fill > Color).

Step 11
Lock transparent pixels and use Brush Tool (B) with large size around 700px, Hardness: 0% and Opacity around 50%. Use different colors from "Swathes" window to colorize lines (I use #ff4c00, #ee00ff, #662d91, #00aeef). Set layer Blending Mode to "Overlay". Group all background layers via Cmd/Ctrl + G or do to Layer > Group Layers (except gradient layer).

Step 12
Now turn on a model layer and make selection from a layer mask (hold Cmd/Ctrl and click on layer thumbnail). Hold Opt/Alt and add a layer mask to group with background images. It is necessary that the background is not working on a model when we add effects.

Step 13
Now back to the model. Probably you were looking forward to this part. Keep an eye out for my actions and a little experimentation will help you discover in this picture has some interesting variations. So, for now hide all except model layer. Go to Select > Color Range... Set Select to "Shadows" and Range: 10, Fuzziness: 25%.

Step 14
Duplicate selection from a model layer (Cmd/Ctrl + J) and hide this layer. Go back to the model layer, again go to "Color Range" and set Range: 0, Fuzziness: 3%. Duplicate selection and move this layer over the previous in a layer stack. Repeat this process a few more times with different values to get almost full range image. I used 8 layers to create result like in image below. Do not worry if some parts are missing. This is part of the visual image.

Step 15
Hide original model layer and let deal with each layer. For dark layers (shadows/midtones) set layer Blending Mode to "Overlay" and "Screen" for light tones. Lock transparent pixels on each layer. Take a Brush Tool (B) with settings - Size: 500px, Hardness: 0, Opacity: 50%, colors: #0072bc, #92278f, #39b54a. Paint only on "Overlay" layers to create color tint.

Step 16
To create a brilliant texture of the dress change Blending Mode for the layer of Step 13 to "Divide". Now you have a choice of what to do next. The first option is to leave model as is and continue to effect or you can turn on the original model layer and set Opacity to 73%, Fill to 40%. These are two different types of model. It is a creative process and what colors you will use it's only your solution. Next in tutorial, I will continue with the original model layer turn off.

Step 17
Group all layers with a model (Cmd/Ctrl + G) and duplicate it (Cmd/Ctrl + J). Merge the resulting copy (Cmd/Ctrl + E or go to Layer > Merge Layers). Change Blending Mode to "Overlay" and Fill to 70%. If you decide to leave the original layer with the model simply go to next step.

Step 18
Duplicate merged model layer two times and convert each layer to Smart Object (right click on layer > Convert to Smart Object). Go to Filter > Other > High Pass... Set Radius to 10 pixels. This layer is increase the sharpness of detail and show even the smallest details.

Step 19
For a top model layer add a filter "Glowing Edges" from Filter Gallery (Filter > Filter Gallery > Stylize > Glowing Edges) with settings Edge Width: 1, Edge Brightness: 8, Smoothness: 5. Set layer blending Mode to "Screen". This layer is to create a glowing edge of the image, which is very good showing the effect of drawing. With similarly effect works filter "Find Edges" (Filter > Stylize > Find Edges) only the outlines will be dark. In case of this filter you should use "Multiply" Blending Mode.

Step 20
Add a bit of contrast in a picture. Go to Layer > New Adjustment Layer > Levels... or use "Create new fill or adjustment layer" icon at the bottom of Layer panel. Set Blacks: 99, Midtones: 1.14, Whites: 255. Change layer Blending Mode to "Multiply". Hold Opt/Alt and drag the layer mask from "Background" group on an adjustment layer so as not to affect to the model.

Step 21
Now play around with color. In this step, you can open three possible tinting of the image. Create a new adjustment layer "Gradient Map" (Layer > New Adjustment Layer > Gradient Map...) below "Model" group. Set up gradient #030303 > #0c0b0b > #3a3732 > #77736a > #92b9cc > #cfe0e8 > #fcfcfc.

Step 22
Click on adjustment layer mask and go to Filter > Render > Clouds. Now we need to make contrast clouds. Press Cmd/Ctrl + L or go to Image > Adjustments > Levels... to open "Levels" adjustment window and set for blacks: 105, midtones: 1, whites: 120. Need a good contrast to create areas with color.

Step 23
With selected layer mask go to Filter > Filter Gallery > Sketch > Halftone Pattern. Make following values for this filter Size: 2, Contrast: 25, Pattern Type: Lines and effect is ready. This effect is very good, give pleasant poster mood and completes the picture.

Step 24
Go back to adjustment layer. If you set Blending Mode of this layer to "Color Burn" colors become richer and deeper. But you can use Blending Mode "Hue" you'll see that there was a beautiful shade of turquoise, which is very beautiful in harmony with the general composition. You can also experiment with other blending modes like "Darker Color", "Screen", etc.

Step 25
This step to your liking. You can add text to your holiday destination or other information at your request. In my case, this element is decorative. Take a Horizontal Type Tool (T) and type any text that you want. Set type "Brush Script Std Medium", Size: 205.27px and color #fff200. With Free Transform Tool (Ctrl/Cmd+T or Edit > Free Transform) rotate your text. Move this layer below gradient layer.

Step 26
add a style to the text. Go to Layer > Layer Style > Inner Glow/ Gradient Overlay/ Outer Glow... For styler Inner Glow/ Outer Glow... settings the same - Blend Mode: "Screen", Opacity: 35%, Size: 7px. For a Gradient Overlay set Blend Mode: "Lighten", Opacity: 75%, gradient: #ff7102 > #ffff00 > #ff7102, Style: Linear, Angle: 127 and click OK. That's all!

Final Results
That tutorial came to an end. I hope you find a lot of useful information in this tutorial and satisfied with your result. Do not be afraid to experiment with blending modes, colors and filters.

Download the PSD
[vc_column width="1/1" el_position="first last"] [vc_cta_button title="Download" href="https://downloads.photoshoptutorials.ws/Summer Poster.zip" color="btn" size="btn-large" icon="none" target="_self" position="cta_align_right" call_text="Summer Poster.zip | 71.8 MB" width="1/1" el_position="first last"] [/vc_column]
9 comments on “Create a Chic Summer Style Poster in Photoshop”
One of the best portrait I have ever seen.
i like the final design, but your tutorial is confusing as fuck = /
Fantastic tutorial.....
Thank you! ?
I have tried to download the images which are needed to follow the tutorial and my Norton keeps blocking it saying it's a dangerous site
images 404 Not Found
Some images are not tutorial
Most of the tutorial images are not showing.
Good !!