

Luminar AI lets you turn your ideas into reality with powerful, intelligent AI. Download the photo editor and see how you can completely transform your photos in a few clicks.
The underwater world is really exciting and with this tutorial, you can move there with your imagination! This tutorial will show you how to create an underwater scene using only one stock, create a mermaid with a hand drawn tail, and add bubbles created from scratch. Read this tutorial to learn how to create this amazing underwater photo manipulation!
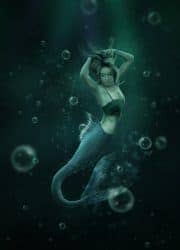
What you'll be creating
In this tutorial, you will start from creating underwater scene with only one stock. Then, you will make beautiful mermaid tail. After that, you can make water bubbles. After all, you will finish by creating nice adjustments, to match all colors. You'll need Photoshop CS5.5 or newer to follow this tutorial.
Tutorial Resources
- Sparkles Brush - wingsofahero
- Mermaid and other poses 13 - cathleentarawhiti
- underwater - koko-stock
- Silky Scale Brushes - imaliea
- Fish - mossi889 (Alternative)
Step 1
Start from creating new file File > New.

Step 2
Add new Adjustment layer with Solid Color. It will be our background. I used #16505a, but you can pick any other color for your work :).

Step 3
Add new layer (Layer > New > Layer or by shortcut) . In your color picker set black and white colors. From top menu choose Filter > Render > Clouds.

Step 4
Now, from the top menu choose Filter > Blur > Gaussian blur. Then, change blending mode to Soft light.

Step 5
In underwater surfaces, light goes from top. Bottom of image should be darker, so add Adjustment layer with gradient fill. Set linear black-transparent gradient, as is shown.

Decrease opacity of created gradient fill to 55%.

Step 6
In your color picker set dark turquoise color (#16505a). From adjustments menu, choose Gradient fill. Now, set radial gradient.
 After all, change blending mode of created gradient fill to Multiply, decrease opacity of this layer to 55%. It's because more important parts of your image, should be brighter.

Step 7
Place underwater stock to your file. Change blending mode of this layer to Color dodge and decrease opacity to 53% - we'll use underwater particles from this stock.

Step 8
As you can see, on the top is rough splash of light. Try to fix it. Click on mask of your layer (right side, white canvas). Pick big, soft brush and gently erase problematic fragment.

Step 9
Now You'll make light rays. Add new layer (Layer > New > Layer or by shortcut). Pick big, soft brush and set blue color - or whatever you want - try to take monochromatic to your background color (If you don't know, what color you should use, see Kuler tool from Adobe). Draw one big dot on your image.
10 comments on “Create an Underwater Scene of a Mermaid”
thank you!!
How do you download the brushes.
Thanks
MsRiotte DigitalArt :)
This dosent take too long and looks awesome! Saved my grade in photo class
thanks :D
Next time I am looking at some downtime with photoshop, I will be trying this tutorial out. Thanks for posting the steps so clearly!
its really helpful for new learners like me..
That's totally amazing! I want to try to make one tomorrow. If nothing else, I'm going to learn a ton of new stuff about adjustment layers (haven't been using photoshop for many years, and never knew about them). Thanks a lot for your effort in making this tutorial!
Vicky tu trouve pas quelle ressemble a annabelle?!
Oui a la des airs :)