
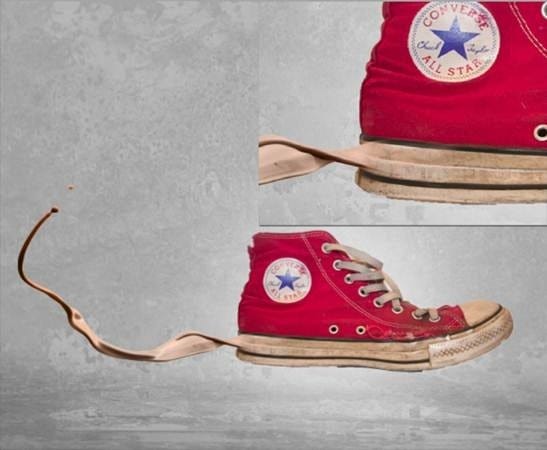
In this tutorial we will use some simple techniques to create a splashing sneakers effect. Lots of copy and paste commands along with some well chosen stock images will be our ingredients for this scene.
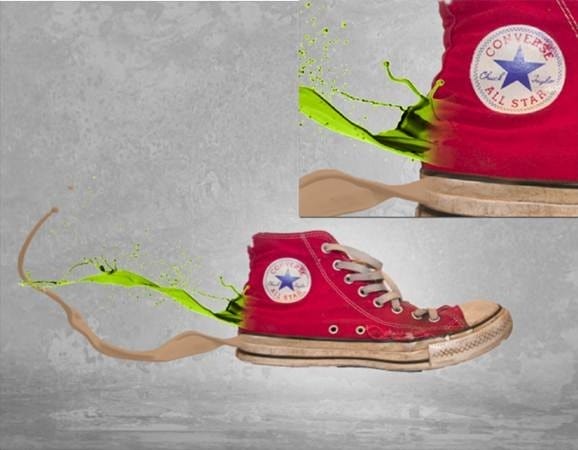
Preview of Final Results
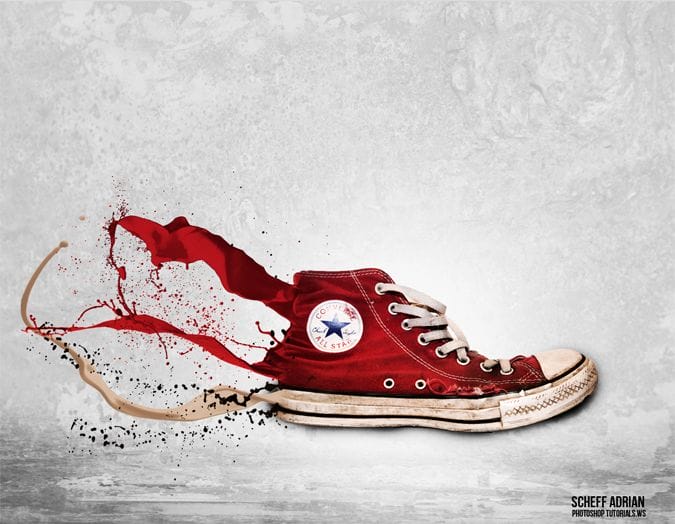
Splashing Sneaker Photoshop Tutorial
Tutorial Resources
Step 1
Create a new document 1289×1000 px and fill the background with #adadad color. Unzip “Metal Package 5” and open file “metal5_1181”. Press Ctrl + A to select all then Ctrl + C to copy. Paste it into our newly created document (Ctrl + V) and desaturate (Ctrl + Shift + U). Lower the opacity of the texture layer to 24% and change the blend mode to Overlay.
Step 2
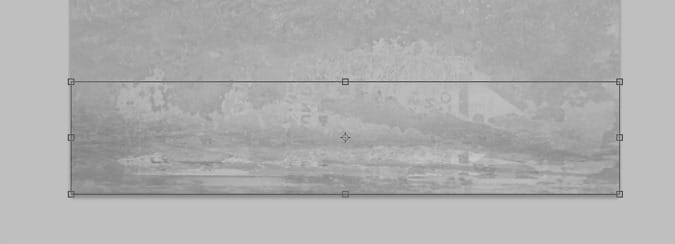
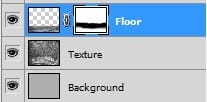
Duplicate the texture layer and change it’s blend mode to normal. Free transform this layer to create the floor and using the Eraser tool or the layer mask blend it seamlessly with the background. If the texture seems blurry sharpen it using the Unsharp Mask filter.
Step 3
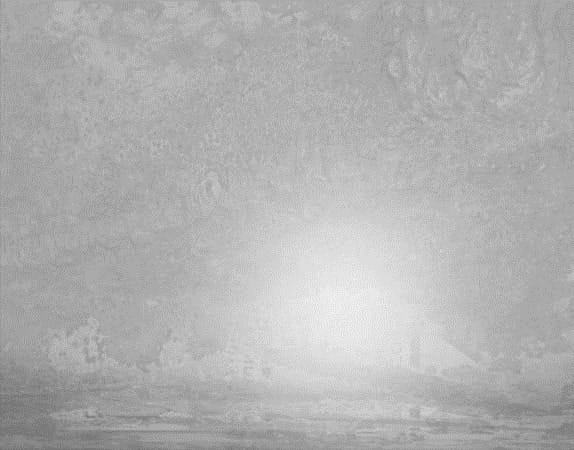
Make a new layer (Ctrl + Alt + Shift + N) and lower the opacity to 11%. With a soft black round brush paint the outer edges to make the floor stand out better. Make another new layer and with a soft white round brush at 700px size dab once in the middle. We will place our shoe over the light to make it the point of interest in our scene.
Step 4
Open file “Shoe” and using your favorite selection tool copy and paste the shoe into our document. Place it in the middle of the scene.

Step 5
Unzip the “Paint Tossing Pack” and open file 15. Using the Magic Wand tool click once on the background to select it an then inverse the selection (Ctrl + Shift + I) to select the splash. Copy and paste this into our document. Position this splash as shown below and use the Eraser tool or add a layer mask and blend it seamlessly with the shoe.
Step 6
Add a clipped Gradient Map adjustment layer and Curves adjustment layer to darken the splash.
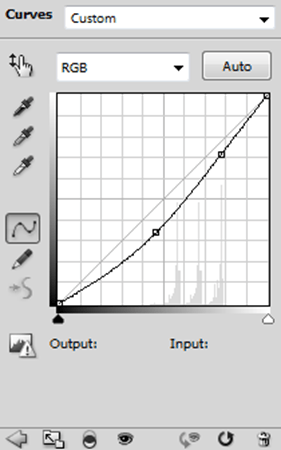
I sampled colors from the place the splash is supposed to be coming and used them as dark and white colors in the Gradient Map adjustment layer.
![image010[1]](https://cdn.photoshoptutorials.ws/images/stories/8f87eb5b68b9_D855/image0101.png?strip=all&lossy=1&webp=82&avif=82&w=1920&ssl=1)
Step 7
Repeat the instructions from step 5 but this time use file “19”.
Step 8
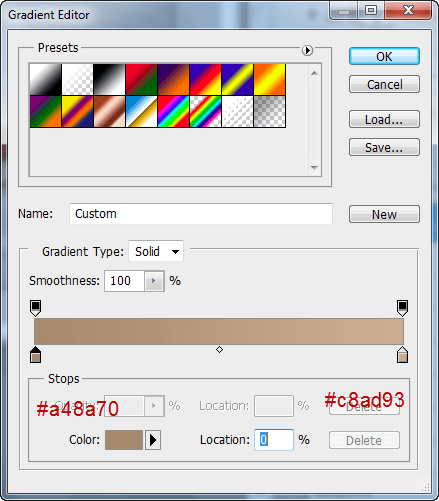
Add a clipped Gradient Map adjustment layer and use the settings shown below. After that add a Curves adjustment layer to slightly darken the splash.
52 responses to “How to Create an Awesome Splashing Sneaker in Photoshop”
-

This is a very good tutorial.
-
This was a bad tutorial never ever share nothing from your part. Thank you for reading this, Trust me don’t share nothing again.
-
agree
-
-
Nice graphic design thank you for sharing.
-
Done using Pixlr – https://www.instagram.com/p/B9fyTQtln21/?igshid=191o2xflglkda
-
I do not watch.
can you help me. -
They kind of obviously added and altered some things themselves… like with one of the splashes it was kind of obvious they used the clone tool to make it more realistic
-
I love this Website
Very awesome and atractive tutorials….!!! -
realy like this blog
thanks master for sharing this.
:) -
thus is too hard.
-
That’s Man is Brilliant :) :D
-
yaaaaaassssssssssssss!!!!!!!
gotttttiiiiiii -
This is an awesome project I’d love to do with my class, but I can’t download the files anymore….when I click on the link there’s an error :(
-
Thanks for letting us know! The link has been fixed :)
-
-
In Step 7 I think it’s :’Repeat the instructions from step 5 but this time use file “19”’ and not ‘Repeat the instructions from step 5 but this time use file “9”’. ;) And btw Great tuto
-
needs to be more specific did understand as i am a beginner
-
I agree good comment
-
-
Nice technique. Really useful…thanks for the post…
-
thanks for the tutorial!
-
i created image named Rainbow Shoe Check it out below
i learn from this tutorial
http://williambunarto.deviantart.com/art/Rainbow-Shoe-462487668?ga_submit_new=10%253A1403380210
-
nice tutorial about photoshop…!! loved it so shared it..
-
I really appreciate your struggle, awesome tutorial to learn photoshop…. simply amazing, i shared it on my site..
-
what kind of photoshop do i need for this?
-
你
-
Awesome Tutorial. I was wondering for something like that :)
-
thanx
-
Thanx for the tutorial, really nice effect. Check Out my version of the splash paint shoe at this link. Thanx alot.
http://www.freeimagehosting.net/zrp2w -
very nicy :)
My result:
http://s23.postimg.org/9r3nydn5n/My_result.jpg -
Thank you for nice tutorial. :D
-
File 9 is File ’19’ for me. (Step 9)
just sayin -
This is really a great job thanks for share. Anyone get this type of clipping path service from us.
-
This isn’t really well explained and maybe you should edit that when it says open file 9 you should open file 19
-
Amazing =)
Thanks for this Tuto !
-
Step 7 should be file “19” not file “9”. This is a great tutorial but it’s a shame you didn’t explain how adjustment layers work a little better. They are difficult to understand for most beginning Photoshop users.
-
Have seen similar tutorial, very good!
-
tankyou .just im cnot speak english im from iran and i am language of pershian.
-
WoW,That Was Great,tnx alot
tnx 4 your every help
im from iran 2 :D
-
-
These are amazing. Super creative and imaginative and all things that are good.
-
It’s available as video now http://www.youtube.com/watch?v=-px0IwHmBvw
-
-
very nice, thank you very much :)
-
Thanks a million! Easy to follow and very effective. Made some changes but the idea is the same. Take a look…
http://dailydeliciousdesign.blogspot.com -
Interesting tutorial. I made it with a high heel. Wonderful result.
-
heh well ima try this n hopefully it turns out ok:) wish me luck
-
Nice tut :)
My result: http://i50.tinypic.com/34hxmj6.jpg -
Awesome tutorial!! I’m no pro at photoshop, but this tutorial was awesome! There’s my final product —–> http://www.freeimagehosting.net/xn2dh
-
I found it very closely similar to this tutorial http://designinstruct.com/graphic-design/make-a-soft-grunge-product-ad-design-in-photoshop/, about final result or even techniques in each step. Is it only a coincidence?
-
w0o0o0www i did it thank u so much ^_^ nice tutorial !!
-
my result http://imageshack.us/photo/my-images/651/tut1try.jpg/
-
-
Hello, Thank You fot this good tutorial. The PSD seems to be broken. It’s possible to put this file available ?
https://www.photoshoptutorials.ws/downloads/PSD/ Look the size file ;-)
jo-
@djodjooo Thanks for the tip! The link has been fixed and you can download it here: https://www.photoshoptutorials.ws/downloads/psd/Splashing%20Sneakers.zip
-
-
thanks for the tutorial.i use it to make some images for my website
-
logo?? nav??
-
Leave a Reply