Turn any photo into a dot grid artwork with these Photoshop actions. You'll get great results with dots that change size. They get larger in brighter areas and smaller in darker areas. Free download available.

Here are the results.

Step 11
To add warm tone to the scene I added a Photo Filter adjustment layer to the scene. Set the setting as shown in the below.
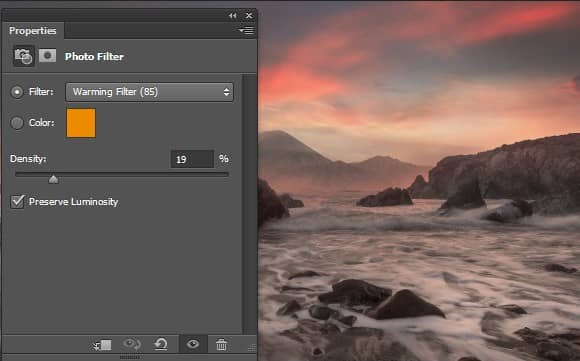
Here are the results.

Step 12
To light up the entire scene I added a Gradient Map adjustment layer then choose the color #030b13 for shadows and for highlight choose the color #56361e. As always you can see the setting as shown in the image below.
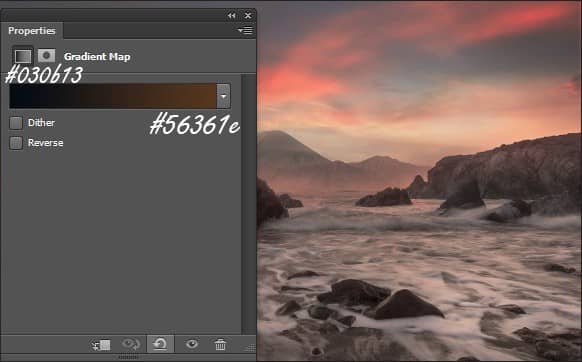
Now, I changed the blend mode of Gradient Map adjustment layer to color dodge. Here are the results.

Step 13
To create a sun I created a new layer by pressing Ctrl+Shift+N on keyboard. Pick the brush tool then change your foreground color to #612828 and paint a big dot as shown in the image below. Name this layer sun.

Step 14
Change the blend mode of sun layer to Linear Dodge then reduce opacity to 55%. Here are the results.

Step 15
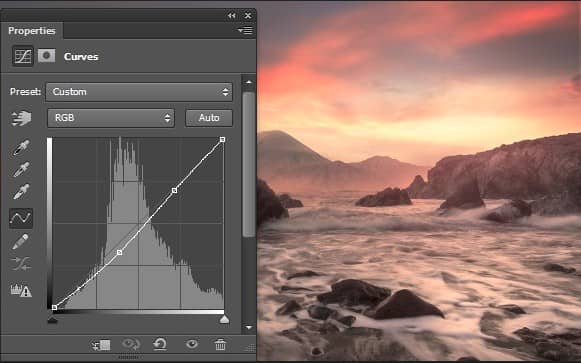
From this step we'll add three new adjustment layer to the entire scene. So, add a Curves adjustment layer then set the setting as shown in the image below.
Step 16
Add Gradient Map adjustment layer to the scene and set the setting as shown in the image below.
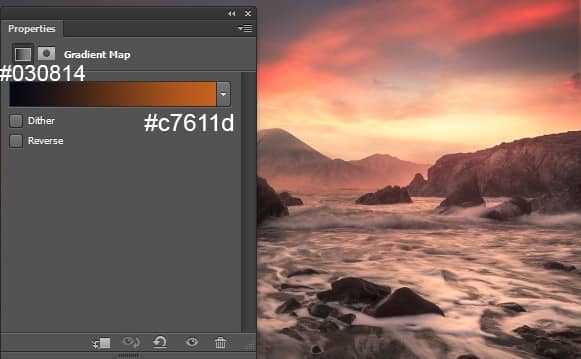
Change the blend mode of Gradient Map adjustment layer to soft light then reduce the opacity to 20%.

Step 17
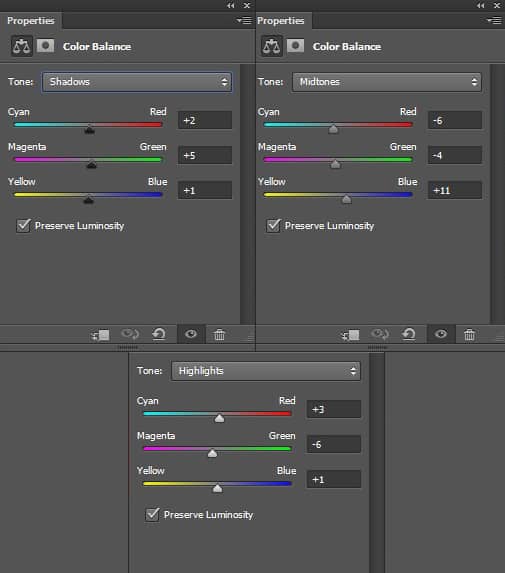
Add a Color Balance adjustment layer and set the setting as shown in the image below.
Here are the results.

Step 18
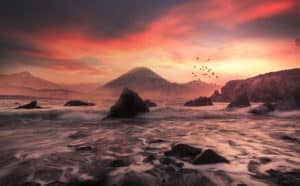
I created a new layer then load the birds brush and choose the 2500 size pixels brush to paint some birds.

Step 19
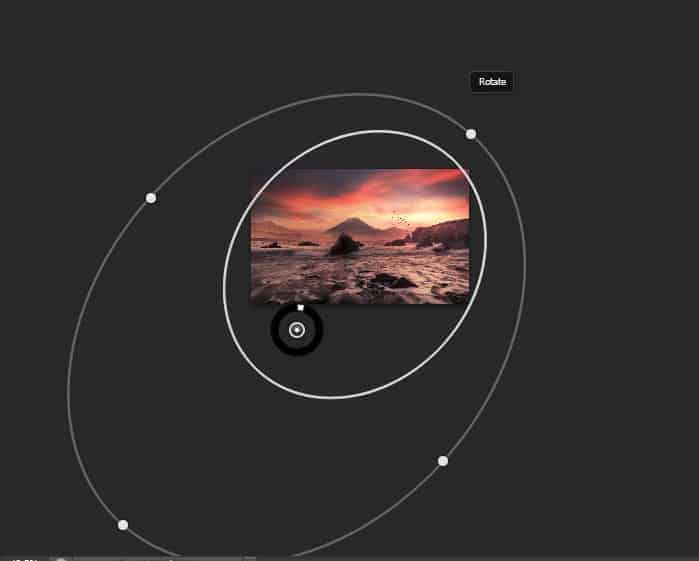
Now, press the Ctrl+Shif+Alt+E key to stamp all the layer into one layer then right click on it and choose convert to smart objects. Then Goto Filter > Render > Lighting Effect and set the hotspot as shown in the image below.
Step 20
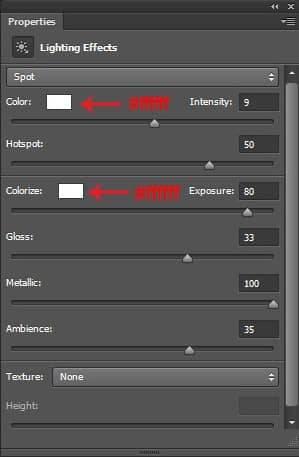
Here the values for the Lighting Effect filter.
Here are the results.

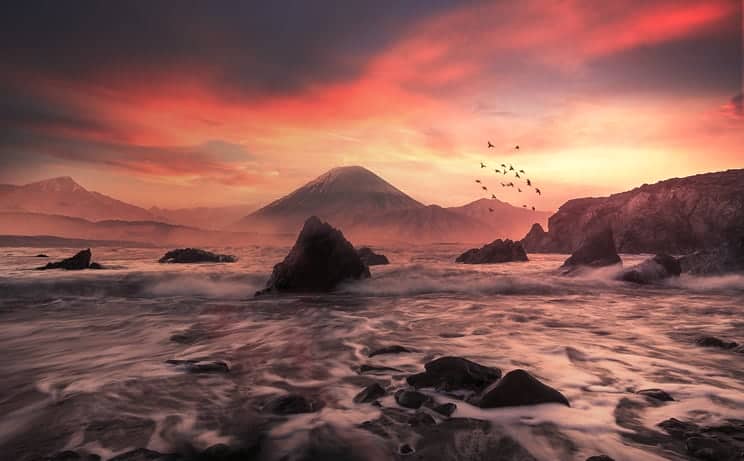
Final Results

Download the PSD
[vc_column width="1/1" el_position="first last"] [vc_cta_button title="Download" href="https://downloads.photoshoptutorials.ws/Sunrise Landscape.zip" color="btn" size="btn-large" icon="none" target="_self" position="cta_align_right" call_text="Sunrise Landscape.zip | 42.9 MB" width="1/1" el_position="first last"] [/vc_column]
Tutorial by Bunty Pundir

Thanks for following the tutorial.Hope, you enjoyed it and it's not difficult for you. I am an artist from New Delhi, India. If you want to see my other artwork then you can visit myDeviantart profile page. Have a great Photoshopping day.
- Bunny

8 comments on “Manipulate a Photo into a Beautiful Fiery Sunset Landscape”
excellent lesson.Thanks, I love it
whauwww beatiful thanks
I am lost at Step 5:
"Now, Add a layer mask to sea layer by clicking the layer mask icon on layer panel.Grab the brush tool by pressing (B) on keyboard then hide the selected the part of sea layer using soft round black brush."
What it the point of grabbing the brush tool, shouldn't i grab the select tool?
You need to use the brush tool to erase some of the layer mask, not the selection tool. He selected it to show you what part you need to erase.
its beautiful
Find your tutorials very helpful as photography is serving me as a therapy due to my accident. Keep your good work,Thanks for your support.
This is simply amazing ...
thanks for the new science.
This is a tutorial?
Why artists like Jenny le and Santosh Rao do more tutorials for this site?
They are great and their tutorials are something more advanced that inspire each of us want to learn ever more.