Make skin look perfect in one-click with these AI-powered Photoshop actions.
When you adjust the level of red, green or blue in an image you are also manipulating their opposite colours - which are cyan, magenta and yellow respectively - so reducing the amount of red in an image, for example, increases the level of cyan.
The colours in raw files taken directly from the camera often appear dull and flat and in need a boost.

Original
In addition to tweaking the tones and contrast in your image, curves can also be used to correct colour.

Correct colour
Experiment with the individual red, green and blue for cool creative effects.

Cross-processed
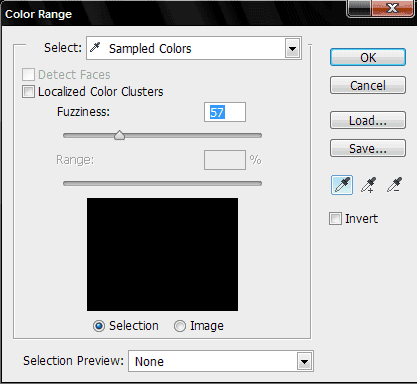
Useful Tip: The Select Color Range Option
A useful tool for making a quick selection, or refining an existing one, is the Select Color Range option. Choose the Sampled Colors option, then use the Eyedropper tool to target an area.
Use the Fuzziness slider to determine the range of colours included in the selection. To add colours to the selection, click on the image - or the preview - with the +Eyedropper and remove them with the -Eyedropper.

Color Balance Adjustment Layers
Using an Adjustment Layer to alter colour balance means you can re-edit the results at any time.
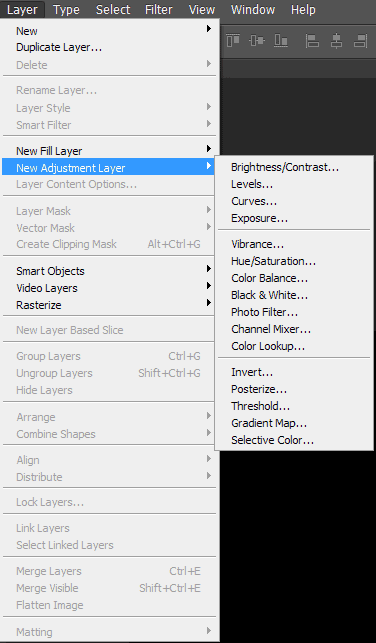
The great thing about Adjustment Layers (Layers>New Adjustment Layer) is that they allow you to make changes to images that you can then adjust or undo whenever you like.
These layers contain the information about the adjustment only, and they are applied to the layers beneath them.

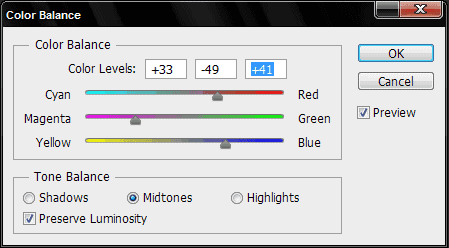
The Color Balance Adjustment Layer controls are exactly the same as the Color Balance controls accessed via Image>Adjustments>Color Balance. There are three sliding controls that enable the balance of opposing colours (red/green, yellow/blue and magenta/green) to be adjusted.
Just the same as using Curves, increasing or decreasing the level of one specific colour has the opposite effect on its opposing colour. Therefore, an image can be warmed by reducing the amount of cyan and blue, which means increasing the level of red and yellow, or made cooler by adding more blue and cyan and reducing the amount of yellow and red.

The majority of Color Balance adjustments are made to the midtones, but it is possible to work separately on both the shadows and highlights as well. You can access them using the Tone Selection option, which is found at the top of the panel.


6 comments on “Quick Tips: Master Fundamental Colors in Photoshop”
I dont know that much about colors, so I just crank around on the sliders until things start to look cool :)
I hope all the steps of layer style looks professional. It will help me more.
Wonderful
Incredible work man!
Very informative and useful read your article very much. Thanks a lot for sharing with us.
PhotoShop very good