Make your artwork look like they're from an alternate universe. These Cyberpunk presets work with Photoshop (via the Camera Raw filter) and Lightroom. Download all 788 presets for 90% off.
Digital technology gives photographers a level of control over colour that the average film photographer could only dream about. Using Photoshop, it's possible to remove colour casts and adjust overall colour as well as working on specific tones and hues.
Introduction
With so much control it can seem rather daunting at first, but provided you always work using Adjustment Layers or Duplicate Layers, you can revert back to your original image and start again whenever you like.
The aim of colour adjustment and white balance correction is often to produce a neutral image. While this may be what is required on many occasions, it can also strip the atmosphere from a scene.
Colour is one of the best ways of conveying mood or atmosphere in an image, so rather than worrying about getting colours technically 'correct' or neutral, it's often more important to think about the emotion or sensation that you want to convey.
For example, give a misty image a hint of blue and you'll shiver inside every time you look at it, but give it a touch of yellow and red and suddenly it seems that the sun is starting to burn off the mist with the promise of a warm, sunny day.
A rich, warm autumnal image is very often far more attractive than a technically correct version. The decision is yours, but the most important consideration is the image itself and what works best.

Curves
Curves offer you control over image colour by manipulating the RGB channels separately.
Although the Curves control is most commonly thought of as a way of adjusting brightness and contrast, it also provides a great method of adjusting image colour, because you can work on the individual colour channels of red, green and blue.

It also allows you to manipulate the colour in the shadows, midtones and highlights separately.
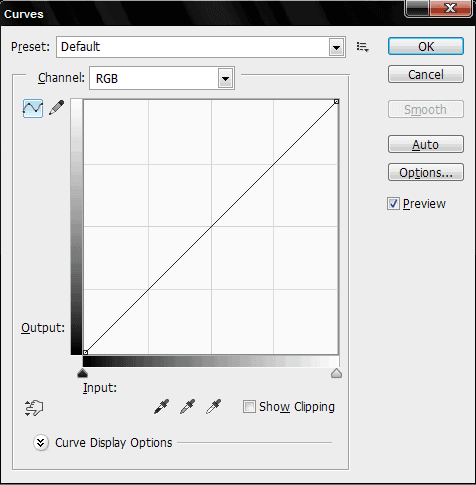
When the Curves Dialog Box is opened - using Ctrl+M or Image>Adjustments>Curves (or by creating a Curves Adjustment Layer) - the channel is set to RGB by default, so use the drop-down list to select the channel you want to work on. Just click on the curve and push it up to increase the channel colour's input, or down to reduce it.


6 comments on “Quick Tips: Master Fundamental Colors in Photoshop”
I dont know that much about colors, so I just crank around on the sliders until things start to look cool :)
I hope all the steps of layer style looks professional. It will help me more.
Wonderful
Incredible work man!
Very informative and useful read your article very much. Thanks a lot for sharing with us.
PhotoShop very good