Make your artwork look like they're from an alternate universe. These Cyberpunk presets work with Photoshop (via the Camera Raw filter) and Lightroom. Download all 788 presets for 90% off.
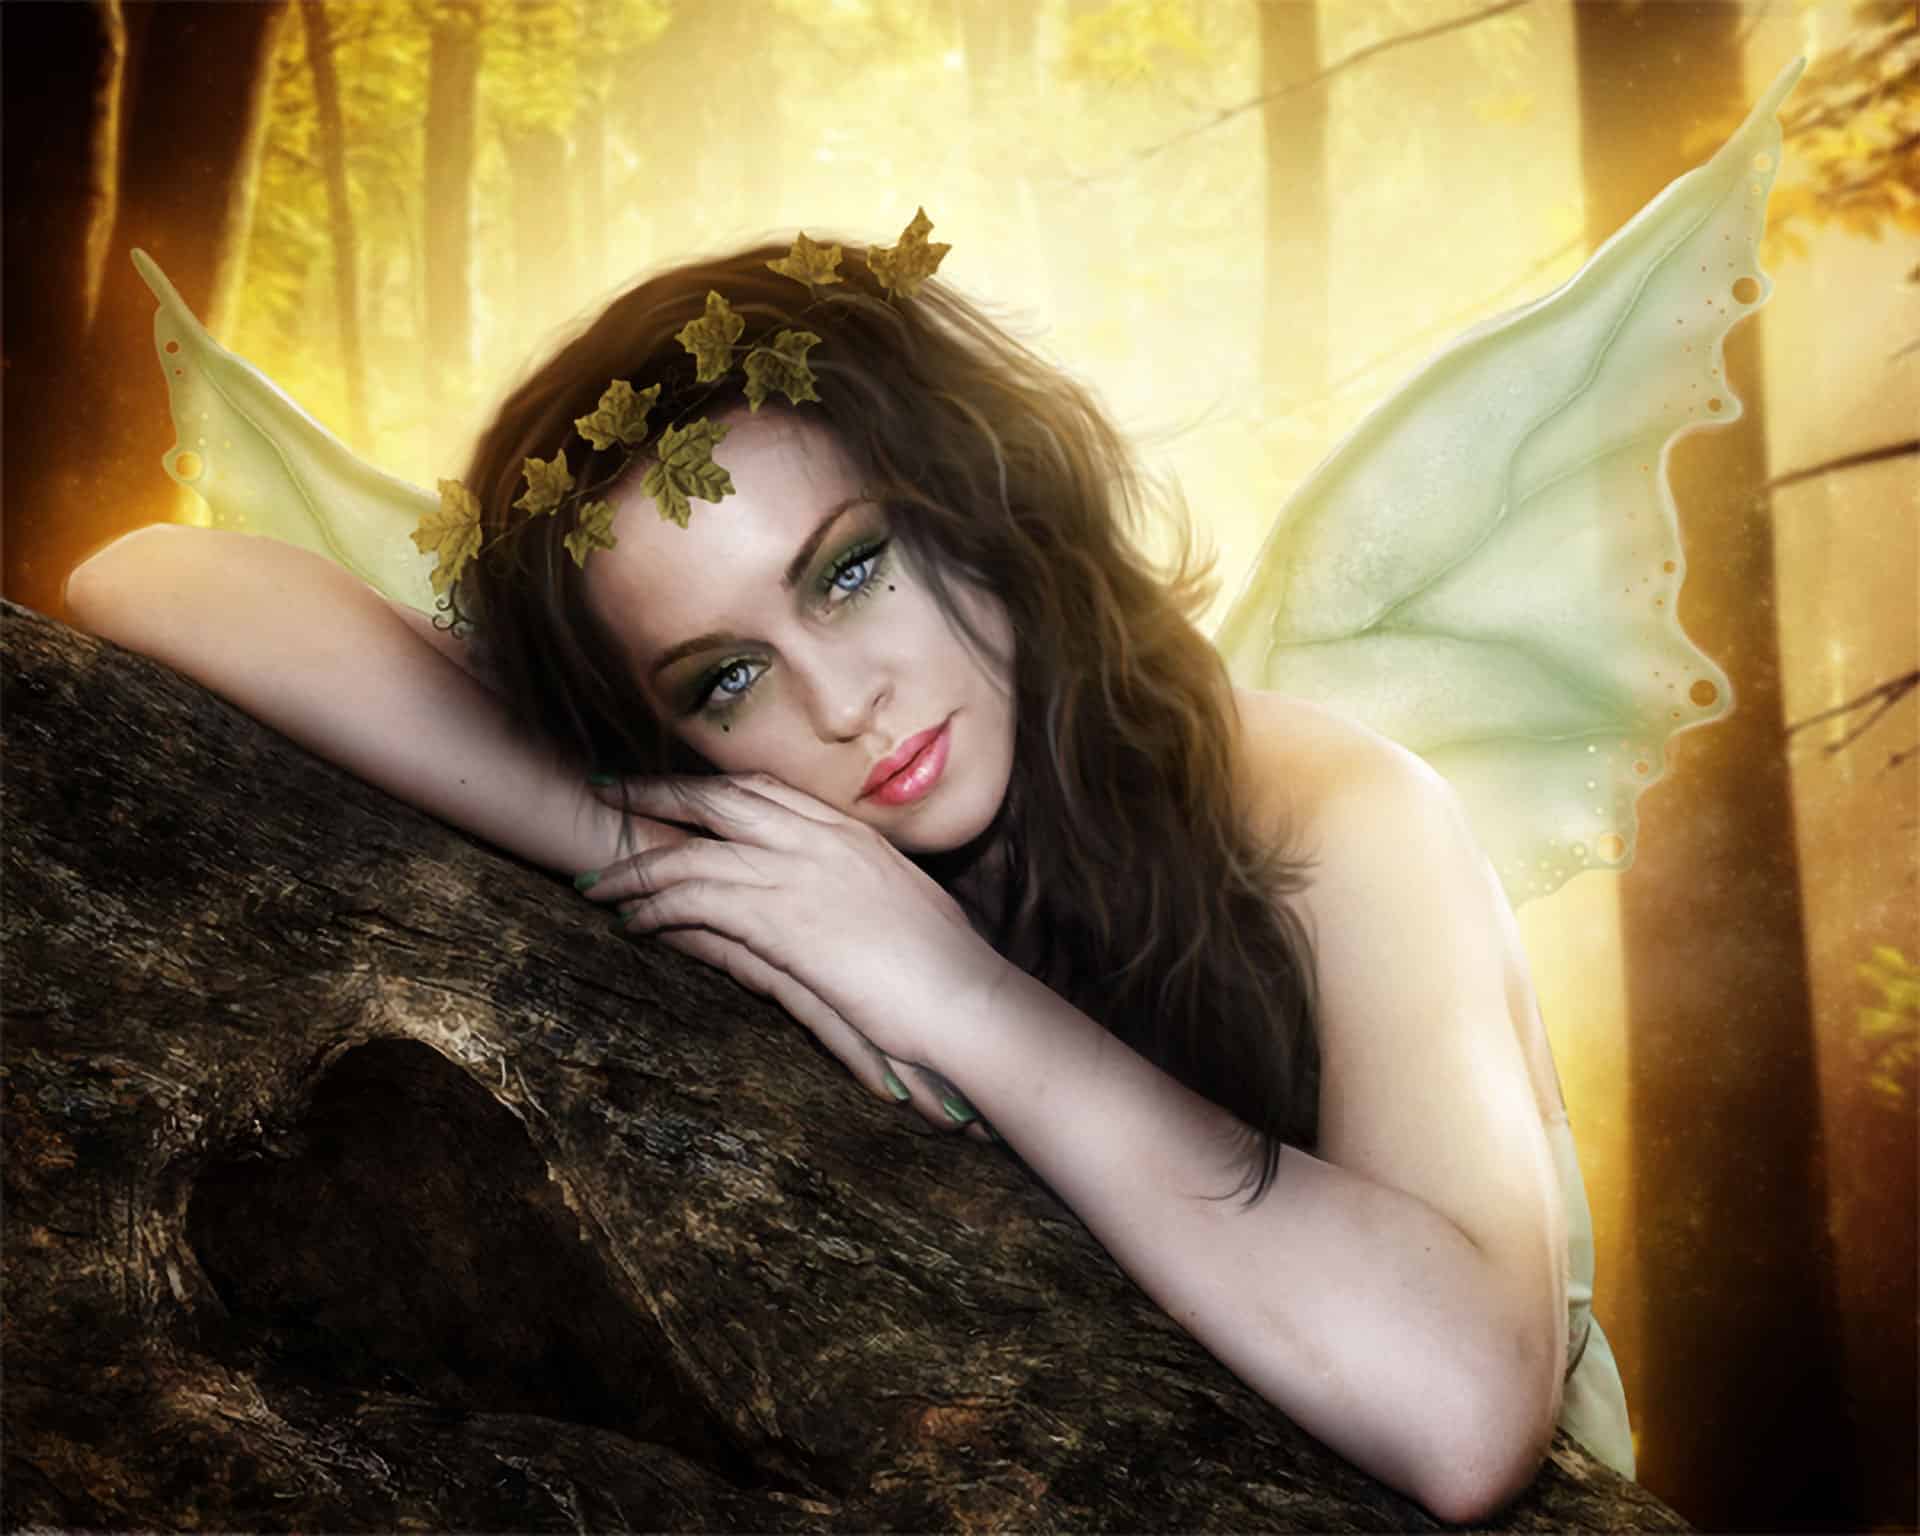
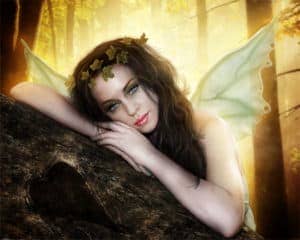
Preview of Final Results
Tutorial Resources
- Model– faestock
- Background– Jess8181
Wings– shoofly-stock(Alternative)Texture–greenaleydis-stock(Alternative)- Tree Heart- cosmiksquirelstock
- Leaves- sammykaye1sstamps
- Hair- Dezzan
Step 1 - Model
Choose the model.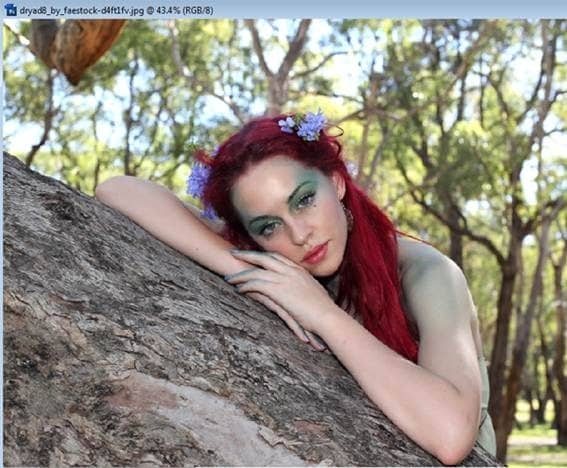
Step 2 – Select the model
Use the Pen Toolto select the model. Make sure the option is in "Paths" like you see in the little box below.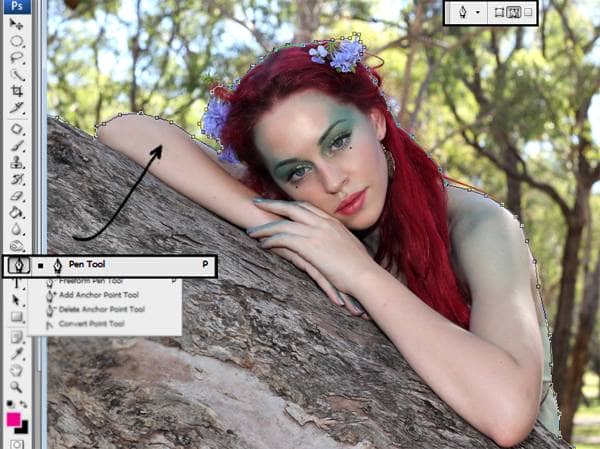
Step 3 – Make the Selection.
When you end with the selection press right-click. In the menu you have on the screen, choose the option make selection.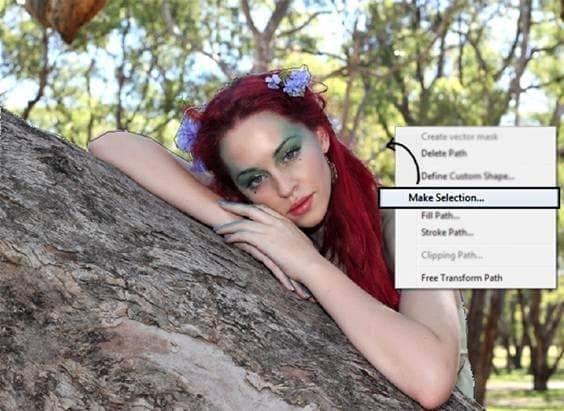
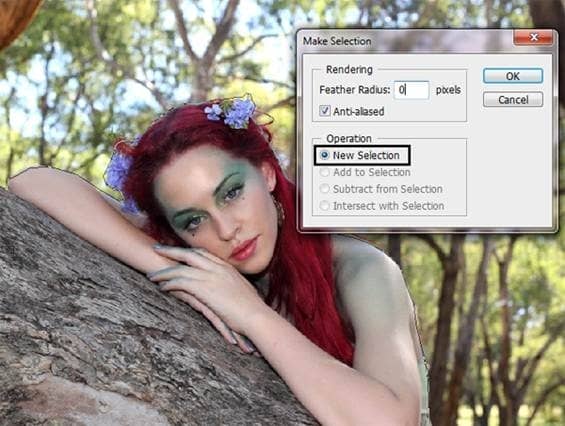
Step 4 - Subtract model from the background
Press Ctrl+J to duplicate the model's selection you made before. The result has to be like this: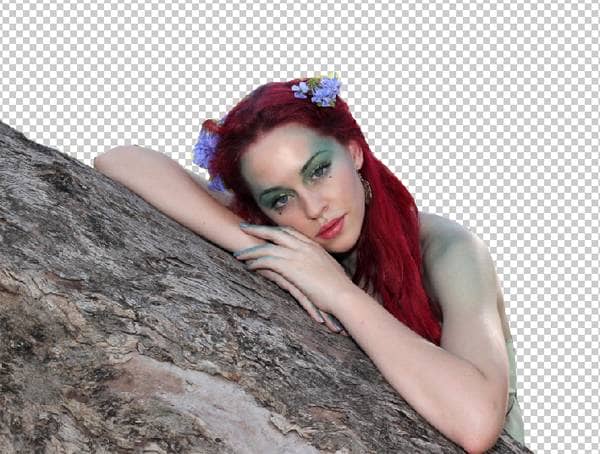
Step 5- Open a new file
To open a new file go to the menu File – New or press Ctrl+ N. The resolution is Width: 1750 x Height: 1400 pixels.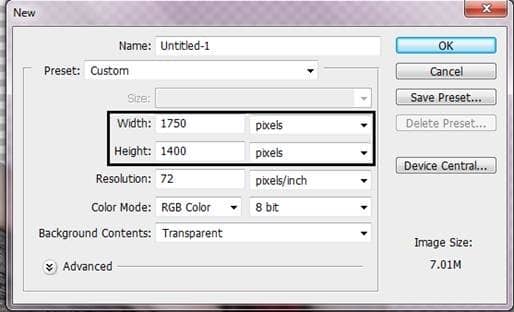
Step 6 - Resize the model.
Now put the model in the new file and change the size to fit this resolution. To change the size press Ctrl + T (Free Transform).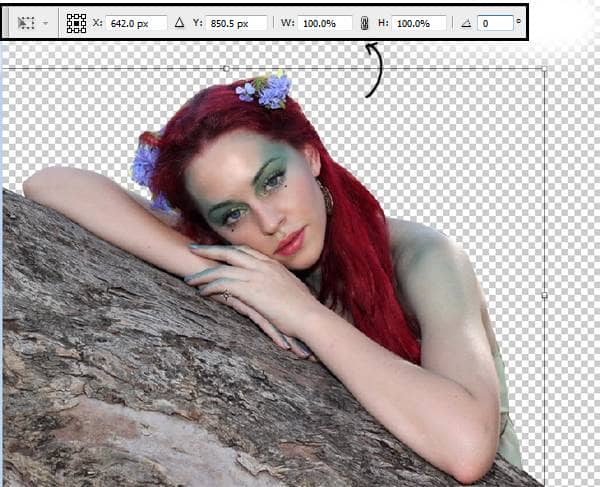
Step 7 – Find a Background
In this case, you can use a forest that doesn't have too many branches, because the main focus is going to be the model.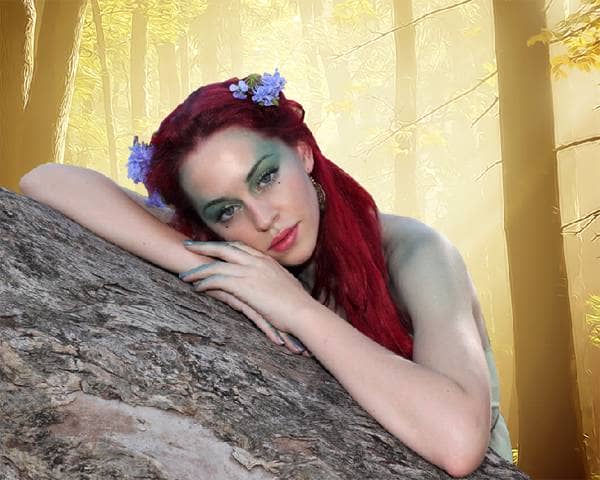
Step 8 – Gaussian Blur.
Apply blur to the background. Go to Filter – Blur – Gaussian Blur. Add a radius of 4 pixels.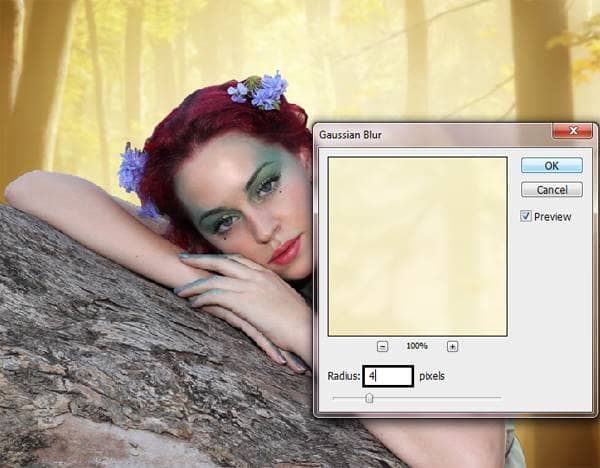
Step 9- Contrast
Duplicate the background layer, press Ctrl + J. and change the layer color, to do this go to Image – Adjustments – Hue/Saturation or press Ctrl+ U. Press the option colorize and press ok.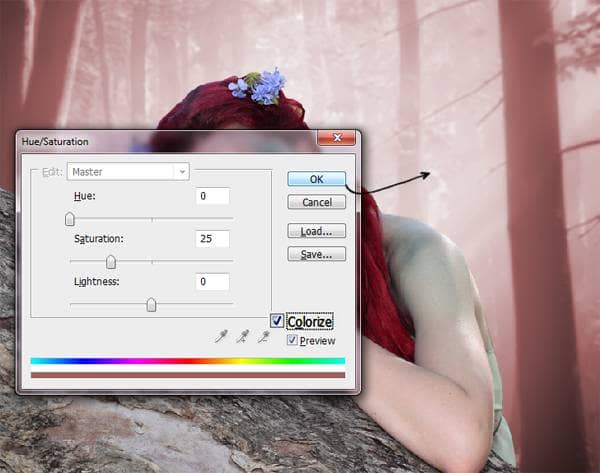
Step 10 – Change layer mode
Now change the layer mode to Soft light. And reduce the opacity to 80%.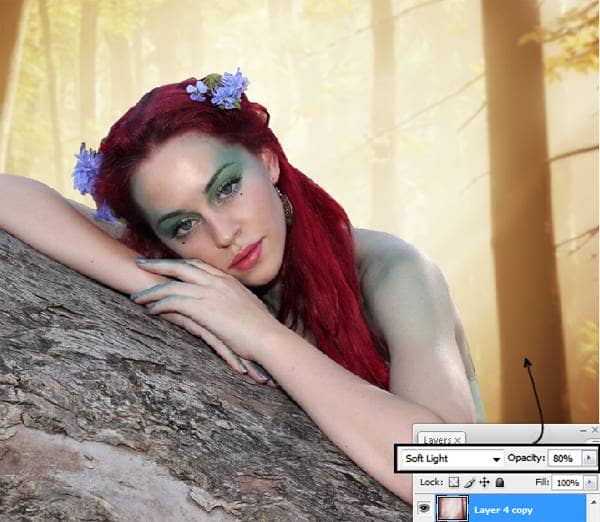
Step 11 – Merge layers.
To merge layers together, right-click in the layer and choose the option to merge down. In this way, you are only going to have one layer of the background.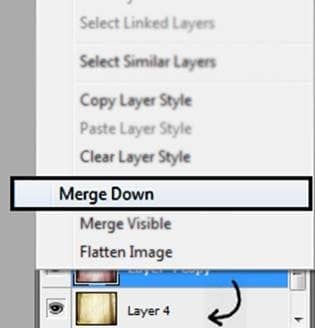
Step 12 – Model's Skin
Select the model's skin with the lasso tool. After you finish the selection press Ctrl+J to duplicate the selection.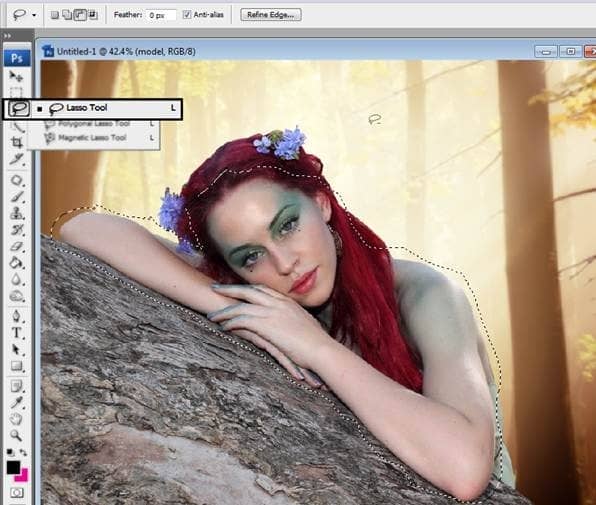
Step 13- Reduce Saturation.
Go to Image – Adjustments – Hue/Saturation (Ctrl +U) and in the option Saturation put -35, press ok to save the changes.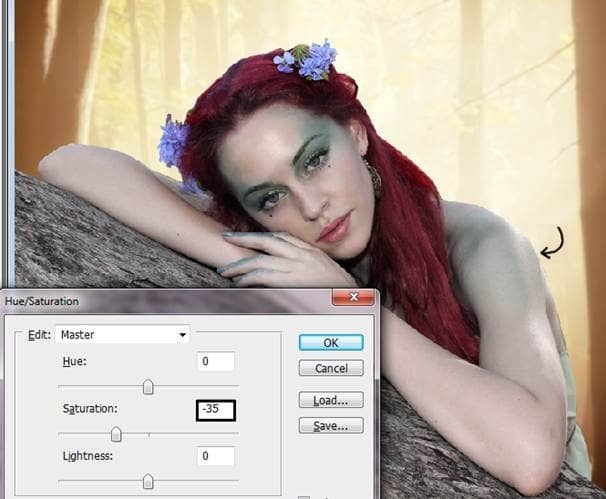
Step 14- More Contrast
Duplicate that layer and change the layer mode to Soft light and reduce the opacity to 50%.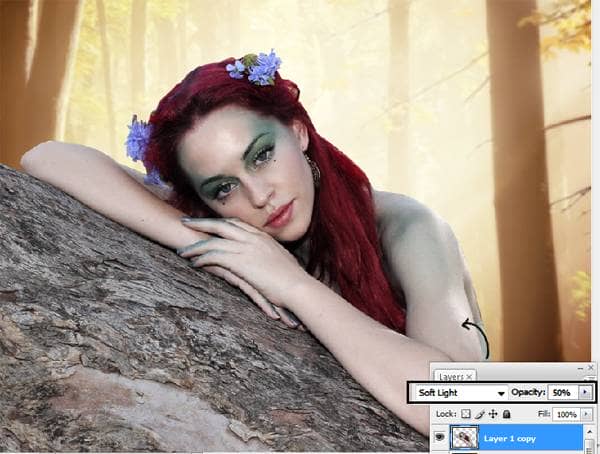
Step 15- Merge the layer
Right-click over the layer and choose the option to merge down.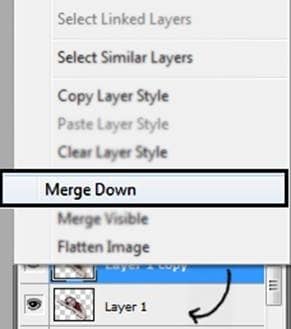
Step 16 – Change skin color.
Duplicate the model's skin layer pressing Ctrl + J. Then go to Image – Adjustments – Hue/Saturation or press Ctrl + U. Press the option colorize and in Hue put: 22 and in saturation 20.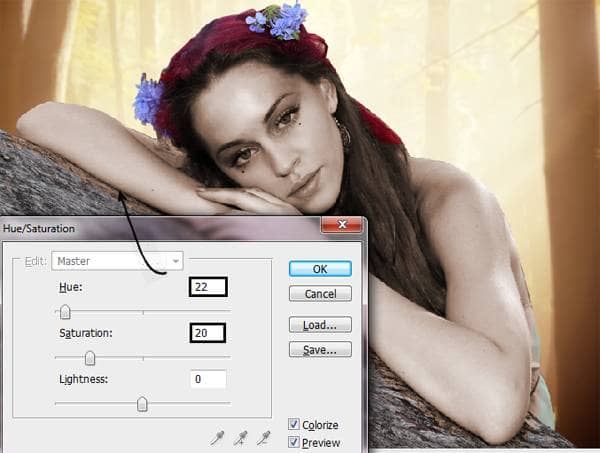
Step 17- Eraser
Use the eraser over the model's eyes lips and hair.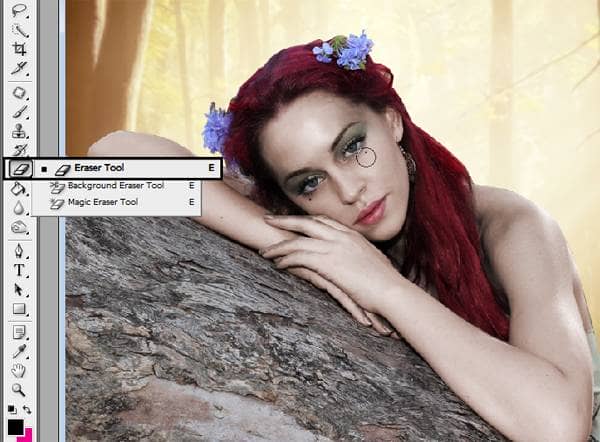
Step 18- Nails
Make a new layer Shift +Ctrl + N, and paint over the model's nails with a soft round brush in a green tone.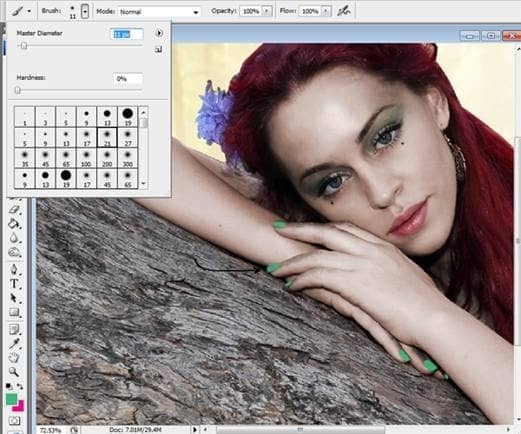
Step 19- change layer mode
Use the layer in soft light mode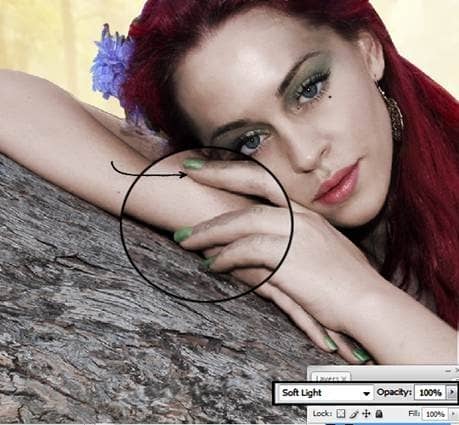

39 comments on “How to Create an Autumn Fairy Photo Manipulation”
Ich bin zwar noch nicht ganz fertig und es wird nicht so aussehen wie deines liebe Andrea.
Aber ich liebe solche Tutorials
Very nice and clear tutorial , Andrea . Thanks for sharing !!! 👍👍👍👍❤😊
Hey andrea!
The tutorial is soo amazing!! I Tried creating this autun fairy photo manupilation in photoshop but i'm having a litte problem....The trird step of duplicating the background pressing ctrl+J is not happening so i there any other way to do this???...Hope u can help me!!
hey andrea!
The tutorial is really awesome but i"m having a little problem...
when i stated doing this autumn fairy manipulation in photoshop..i'm not able the third step i.e duplicate the background pressing ctrl+J..
is there any other way following which i can do it...???
i wish you could make a video tutorial
just awesome tutorial thank you very much for share this technique .
Thanks...this is awesome!
Une irritation des m
Very nice !
Obrigado pelo Tutorial, ficou demais!!
http://marloaugusto.deviantart.com/art/Fairy-by-Marlo-484388939
amazing!! great to see the amazing work of great experienced art directors!!Thanks for sharing
Thank you for this wonderful composition and tutorial, I loved achieve:
http://cartes-mireilled.eklablog.com/montage-d-une-fee-d-automne-en-musique-a112430168
OKey
I love it! You're very creativ!
My version: http://realladypunk.deviantart.com/art/Fairy-479815842?ga_submit_new=10%253A1409666557&ga_type=edit&ga_changes=1&ga_recent=1
I was fine till I got to the makeup...then it all went to hell.
thanks your work is very appriciable
سلام خسته نباشیدخیلی سایت عالی داریداماچون انگلیسی هستش من
یجاهایی به مشکل میخورمونمیتونم جلوبرم خیلی دوستدارم کارایی که به نمایش گذاشتیدویادبگیرم میشه لطف کنیدوبهم کمک کنید
Thake you
ES UN PRECIOSO TUTORIAL APRENDI MUCHAS TECNICAS QUE NO PODIA RECIBE UN FUERTE ABRAZO Y MIS RESPETOS PARA TI
Tutorial muito bom. Gostei muito de fazê-lo. Obrigada.
http://vaniapaiva.deviantart.com/art/Autum-Fairy-by-VPaiva-403958498
http://www.flickr.com/photos/99472326@N06/9375803841/lightbox/
thanks for the tutorial :) helped me learn a heap of new things. Btw you should have a few more steps on how to add the heart as it's a little confusing on your own.
Excellent. Nice one :) now I will create one with my own image :)
Me gusta mucho el tutorial, el resultado final es fantástico y está muy bien explicado paso a paso.
Congrtulations
die link?
wow! such guide to step by step tutorial for cool work
thanks man
Wonderful tutorial, I made a FB cover for friend https://www.facebook.com/photo.php?fbid=459440810783327
An excellent tutorial, very clear and a fantastic outcome, thank you very much.
creativity never ends and If you guys keep sharing such a great tutorial It will definitely enhance the creativity
I have been looking for this.. thank you very much...
http://www.antsmagazine.com
Beautiful tutorial, thank you :)
http://www.flickr.com/photos/pareeerica/8248380807/
@pareeerica I'm so glad you found it useful thank you so much for the link
Andrea
That blog image is very attractive. I like it very much & I read this blog it is very nice. Thanks for the sharing. Keep it up.
I can not download the background and wings. The link takes to the site, but not the images. I am disappointed because I was really looking forward to this my first manipulation.
@JohnBurger That's the thing about free stocks... they just disappear
I can find some similar ones on DeviantART search here:
http://browse.deviantart.com/resources/stockart/?order=9&q=wings
@JohnBurger Yes sometimes that happens, but you can try different images and also get the same result.
Andrea
Great work, thanx
@Ferobanjo I'm glad you like it!
Woow... Andrea !!! You are one of my favorist teacher. Thank you so so much for sharing your artistic.
-andy