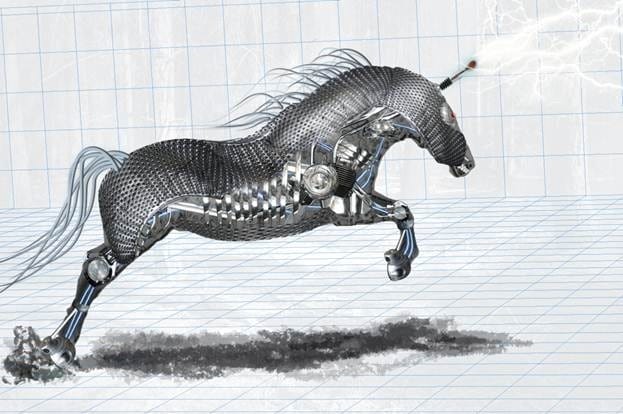
This Photoshop tutorial will show you how to create a robotic horse by combining photos together. You’ll learn how to use stock photos of metal parts and overlay them on top of the horse. This technique can be used to make other types of robotic animals!
Preview of Final Results

Create an Amazing Mechanical Horse in Photoshop
Resources
- Hot Rods 2
- Moto 2
- Two Cylinder
- Fat boy 2
- Trumpeted 1
- Doing the laundry 1
- Chrome jet engine
- Flying Horses 3
- Wine Stopper
- Magical forest at night
- Lightning Brush Set 1
Step 1
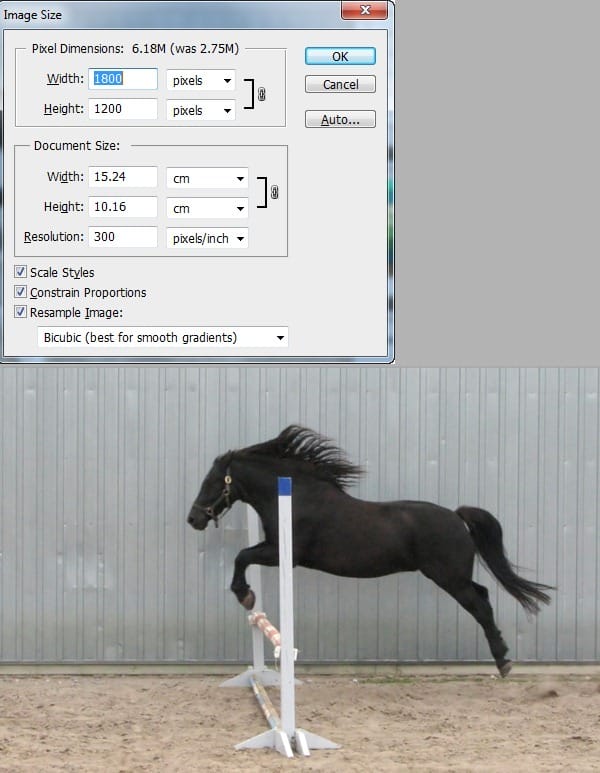
Open file “Flying horses 3”. This is a low resolution picture so we want to increase it’s resolution. Press Ctrl+Alt+I to open Image Size window and choose 1800 for width and 1200 for height.

Step 2
Select the horse using your favourite selection tools. I used Pen tool and Quick Mask for the hairs. Press Ctrl+J to move horse selection to a new layer. Use Clone Stamp Tool to clone over the white bar. Name this new layer “Horse”.

Step 3
Choose Ctrl+T to transform the horse layer then right click and choose Flip Horizontal. I also used the Smudge Tool to make hair look right but this step is optional.

Step 4
We will use our horse as reference for our metallic horse. We will cut different metallic parts from different photos then fit these parts on our horse. You can use the same photos as I did but feel free to use your own photos of engines and pipes as long as they are shiny and don’t have a strong color cast.
Step 5
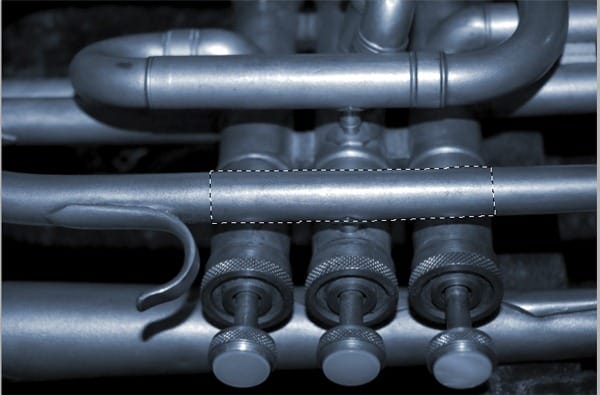
Open file “Trumpeted 1”. Use a selection tool to select a pipe then press Ctrl+J to move it on a new layer. Ctrl+click the layer to select opaque pixels, Ctrl+C to copy and Ctrl+V to paste the layer in our horse document.

Step 6
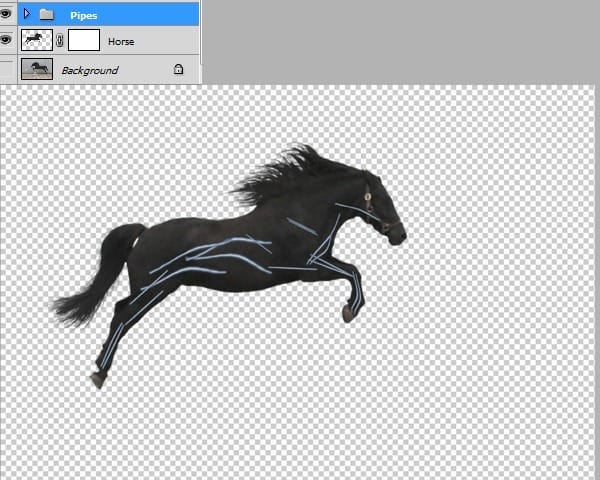
Make as many duplicates of this layer as needed then use Free Transform ( Ctrl+T ) and Warp to make them look like in the image shown below. Select all pipes layers and press Ctrl+G to group them. Name this group “Pipes”.

Step 7
Alt + Click the eyeball icon next to “Pipes” group to turn off the visibility off all layers except this group. Press Ctrl+Alt+E to make a new layer from all the opaque pixels. We will use this layer to add some glow to our pipes. Alt+Click the eyeball again to restore the visibility of the other layers. Double click the new layer the enter advanced blending mode and use the settings shown below. Name this new layer “Pipes Glow”.
3 responses to “Create an Amazing Mechanical Horse in Photoshop”
-
Why don’t you click on next page…..?
-
why you dnt copmlete it…..?
-
it`s on the next page, just click on them shazia.x
-


Leave a Reply