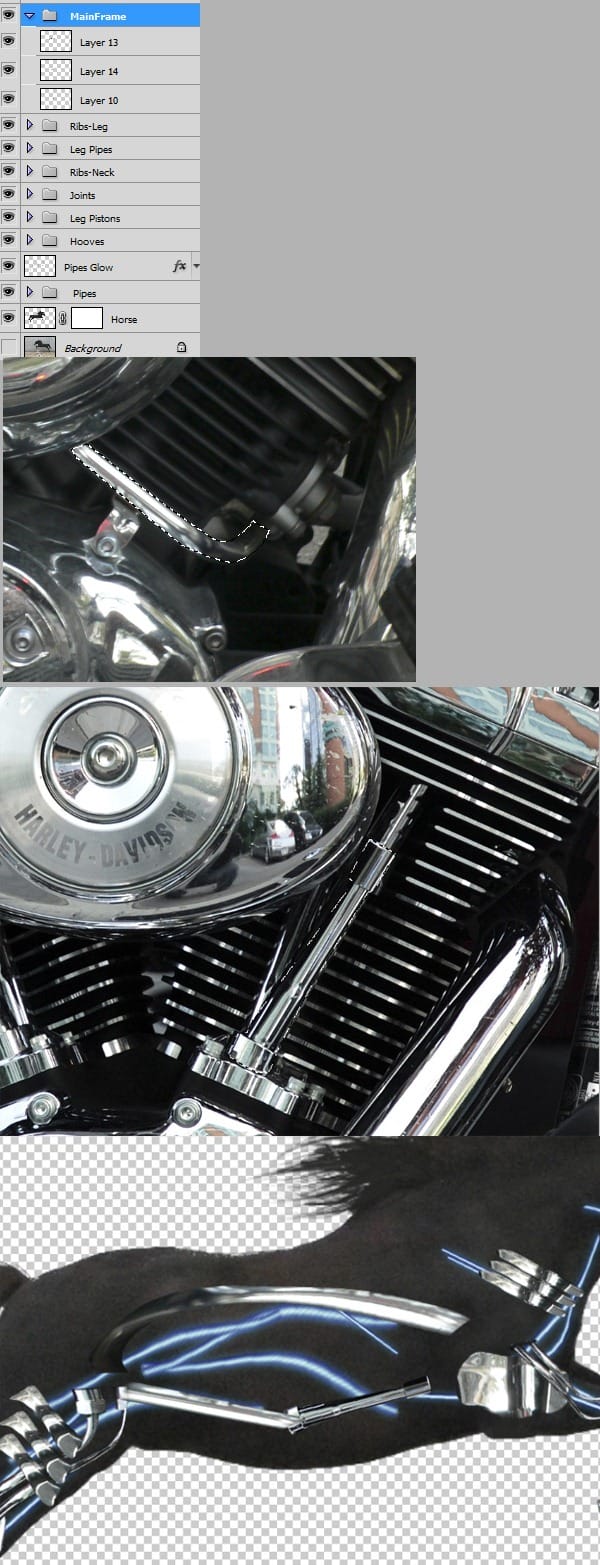
Step 15
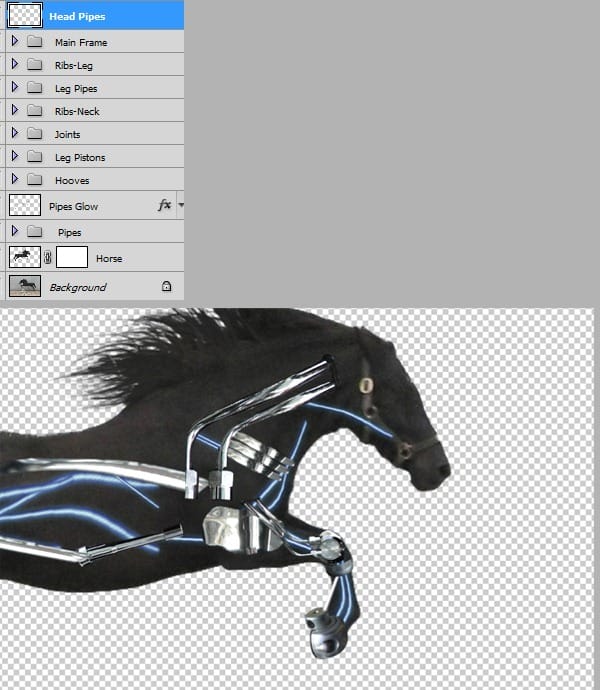
Select one layer from group “Leg Pipes” and press Ctrl+Shift+] to send the layer on top. Use Free Transform to position the layer like shown below. Name this layer “Head Pipes”.

Step 16
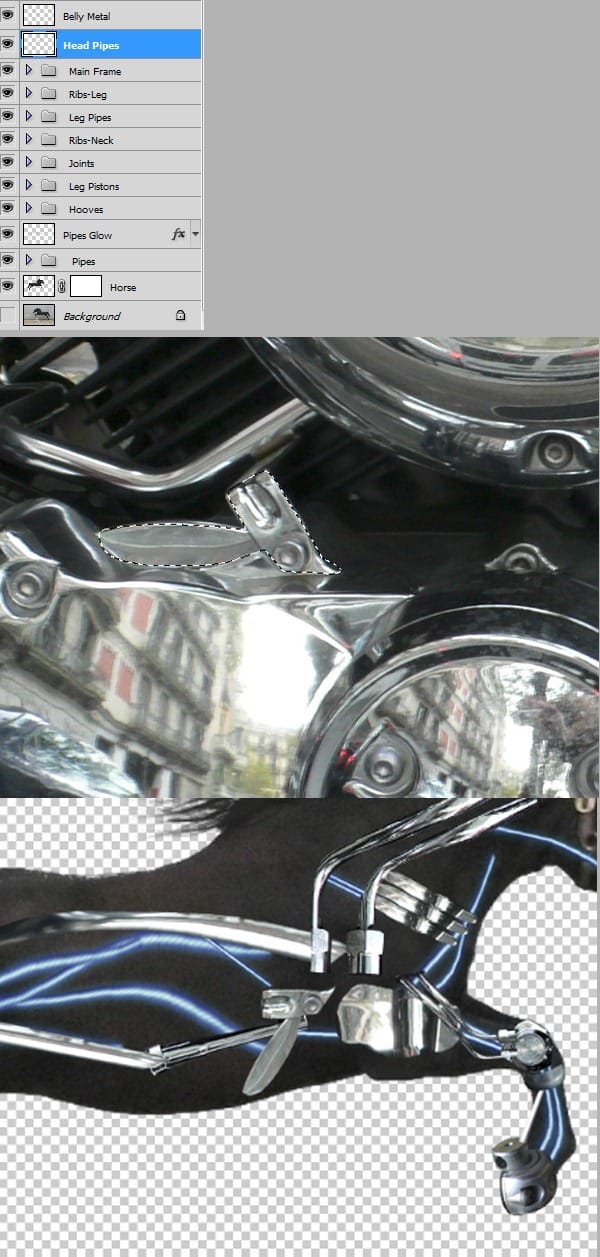
Open file “ Two Cylinder” and make a selection like shown below. Press Ctrl+J to make a new layer from selection. Copy and paste this layer into our horse document. Using Free Transform and warp position this layer like shown below. Name this layer “Belly Metal”.

Step 17
Open file “ Two Cylinder” and make a selection like shown below. Press Ctrl+J to make a new layer from selection. Copy and paste this layer into our horse document. Using Free Transform position this layer like shown below. Name this layer “Engine1”.
Open file “ Fat Boy 2” and make a selection like shown below. Press Ctrl+J to make a new layer from selection. Copy and paste this layer into our horse document. Using Free Transform position this layerlike shown below. Name this layer “Engine 2”.
Group these layers and name the group “Engines”.

Step 18
Open file “ Two Cylinder” and make a selection like shown below. Press Ctrl+J to make a new layer from selection. Copy and paste this layer into our horse document. Using Free Transform and warp position this layer like shown below. Name this layer “Neck Metal”.

Step 19
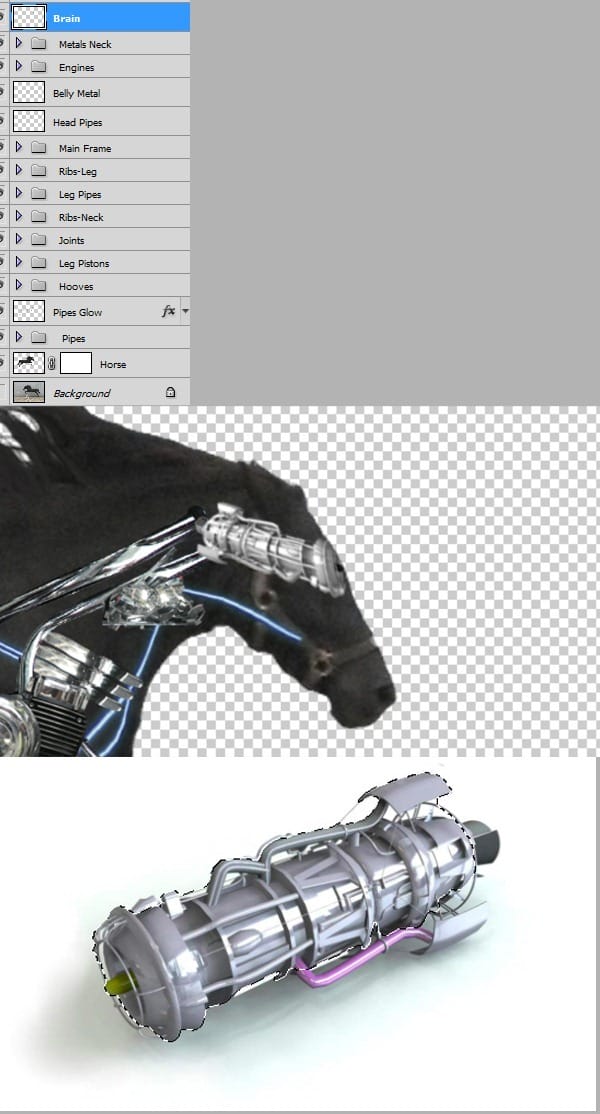
Open file “ Two Cylinder” and make a selection like shown below. Press Ctrl+J to make a new layer from selection. Copy and paste this layer into our horse document. Using Free Transform and warp position this layer like shown below. Name this layer “Brain”.

Step 20
Take one “rib” from the group “Ribs Neck” and send it on top of all layers ( Ctrl+Shift+] ). Using Free Transform and warp position this layerlike shown below. Make another 9 duplicates then group them and name the group “Ribs Big”.

Step 21
Open file “ Two Cylinder” and make a selection like shown below. Press Ctrl+J to make a new layer from selection. Copy and paste this layer into our horse document. Using Free Transform and warp position this layer like shown below. Make another 3 duplicates and apply a apply a Bevel and Emboss effect to each of them. Group these layers and name the group “Teeth”.
3 responses to “Create an Amazing Mechanical Horse in Photoshop”
-
Why don’t you click on next page…..?
-
why you dnt copmlete it…..?
-
it`s on the next page, just click on them shazia.x
-


Leave a Reply