
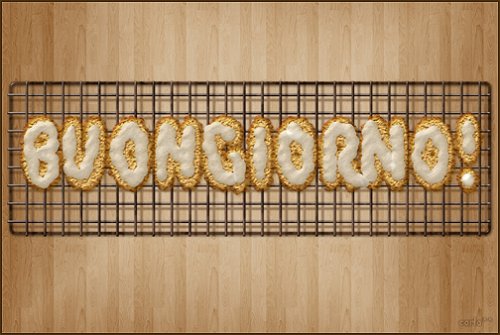
This tutorial will explain how to create delicious frosted cookies text effect. You’ll learn some useful tips for using layer styles, filters, and brushes while creating the various elements of the “cookies”.
Preview of Final Result

Download the PSD
Frosted Cookies Text Effect.zip | 5.4 MB
Download from Website
Create Delicious Cookie Text Using Photoshop
Resources
- 8 wooden patterns – deviantArt (celestesd)
- Bubblegum – dafont
- Rusty Texture – deviantArt (dreamtheorystock)
Step 1
Download the 8 wooden patterns and open the “elso.png” image in Photoshop. Go to Edit -> Define Pattern, and type in any name you want for the pattern.

Go to File -> New, and create a new 1150 x 768 px document.

Create a new layer on top of the Background layer and call it “Wood Pattern”.

Pick the Paint Bucket Tool, and in the Options Bar at the top, choose Pattern for the Fill type, and choose the wood pattern from the patterns drop down menu. Then fill the document with the selected pattern.

Create a new layer on top of the “Wood Pattern” layer and call it “Gradient”. Pick the Gradient Tool, set the Foreground color to Black, and in the Options Bar, choose the Diamond “Foreground to Transparent” gradient, and check the Revers box. Click and drag from the center of the document to one of the corners to create the gradient.

Change the “Gradient” layer’s Blend Mode to Soft Light.

Click the Create new fill or adjustment layer icon down the Layers panel, and choose Levels.

Change the Shadows value to 65. And we’re done with the Background.

Step 2
Create the text with the color #c29f5f. The font used is Bubblegum, and the size is 250 px. The Tracking value (Window -> Character) is set to 10 to avoid stroke overlapping.

Now, we will modify some brush settings to create the stroke. So open the Brush panel (Window -> Brush), and choose a hard round brush. Under Brush Tip Shape, set the Size to 20, the Hardness to 85%, and the Spacing to 68%.

Under Shape Dynamics, set the Size Jitter to 100%, and make sure the other values are as shown below. Also, check the Wet Edges box down the Brush panel.

Back to the Layers panel, right click on the text layer, and choose Create Work Path.

Create a new layer below the text layer and call it “Stroke”. Set the Foreground color to #a06600 and pick theDirect Selection Tool.
10 responses to “Create Delicious Cookie Text Using Photoshop”
-

Nice Tutorial =)
-
Awesome!!!!
Thanks for sharing these steps and performance!! -
Absolutely wonderful,
-
Absolutely wonderful, easy to follow and thorough tutorial! Thank you very MUCH for this!!!
-
Very very nice tutorial!
My version here:
http://car51.altervista.org/_altervista_ht/nuova/biscotti_bgiorno.jpg -
Very very nice!
My version here
http://car51.altervista.org/_altervista_ht/nuova/biscotti_bgiorno.jpg
-
Excelente tutorial. Gracias!!
-
where the heck is the cell pattern
-
Thank you Rose for a great tutorial. It was easy to follow and I enjoyed following along.
-
This is a very super tutorial. Easy to follow, detailed. Thank you so much!
Leave a Reply