

Right click on the path and choose Stroke Path.

Choose Brush from the Tool drop down menu, and un-check the Simulater Pressure box.

This will create the cookies’ stroke.

Step 3
Duplicate the text layer and click the eye icon next to the original text layer to remove it so that the layer content is invisible.

Right click on the copy text layer and choose Rasterize Type.

The text layer will be rasterized, which means you can no longer modify the text, so make sure that you’ve done all the modifications needed bofre this step.

Go to Filter -> Blur -> Gaussian Blur, and set the Raduis to 2.

Press the Ctrl/Cmd key, and click on both the rasterized and the “Stroke” layers to select them. After that go toLayer -> Merge Layers, (or press Ctrl/Cmd + E).

Duplicate the merged layer, and click the eye icon next to the copy 2 layer to make it invisible.

Step 4
Double click on the original merged layer (Cookies copy) to apply the following Layer Styles:
– Drop Shadow: Just change the color to #825a0c.

– Inner Shadow: Change the color to #986917.

– Bevel and Emboss: Change the Size to 10, the Gloss Contour to Notched Slope – Rounded, and check the Anti-aliased box for a smoother effect. Also, change the Highlight Mode to Overlay, its color to #e4d2b2, and the Shadow Mode color to #c5a260.

– Contour: Choose the Half Round contour, and check the Anti-aliased box.

– Texture: Choose the Rusted Metal pattern, and change the Depth to 25%.

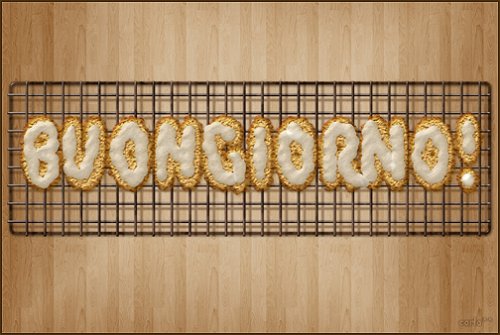
This is what the result should look like.

Step 5
Now click the empty box next to the copy 2 layer so that the eye icon appears again, and the layer is visible.

Double click the copy 2 layer to apply a Color Overlay, and set the color to #c5a464.

This color will be the base for some Filters we are going to apply next.

Step 6
It’s time to apply the Filters to enhance the texture we already have. But first, we are going to convert the copy 2layer to a Smart Object. This will apply the Filters to the Color Overlay instead of the original color, and will enable us to modify the Filters’ values if needed later on.
10 responses to “Create Delicious Cookie Text Using Photoshop”
-

Nice Tutorial =)
-
Awesome!!!!
Thanks for sharing these steps and performance!! -
Absolutely wonderful,
-
Absolutely wonderful, easy to follow and thorough tutorial! Thank you very MUCH for this!!!
-
Very very nice tutorial!
My version here:
http://car51.altervista.org/_altervista_ht/nuova/biscotti_bgiorno.jpg -
Very very nice!
My version here
http://car51.altervista.org/_altervista_ht/nuova/biscotti_bgiorno.jpg
-
Excelente tutorial. Gracias!!
-
where the heck is the cell pattern
-
Thank you Rose for a great tutorial. It was easy to follow and I enjoyed following along.
-
This is a very super tutorial. Easy to follow, detailed. Thank you so much!
Leave a Reply