Make skin look perfect in one-click with these AI-powered Photoshop actions.
Photoshop is among the most useful tools for graphic designers. In this tutorial, you'll learn 5 tips including how to create more vibrant gradients, turn selections into vector paths, create patterns with the hidden Pattern Maker tool, using smart placeholder photos, and creating curved text without warping. Watch this video and you will learn 5 Photoshop tips to improve your workflow.
Tip #1: How to Create More Vibrant Gradients
Gradients with contrasting colors can look flat. For example, this gradient has bright colors on the sides but it looks dull in the middle. And as you can see when we sample the colors, the vibrancy dips in the middle.
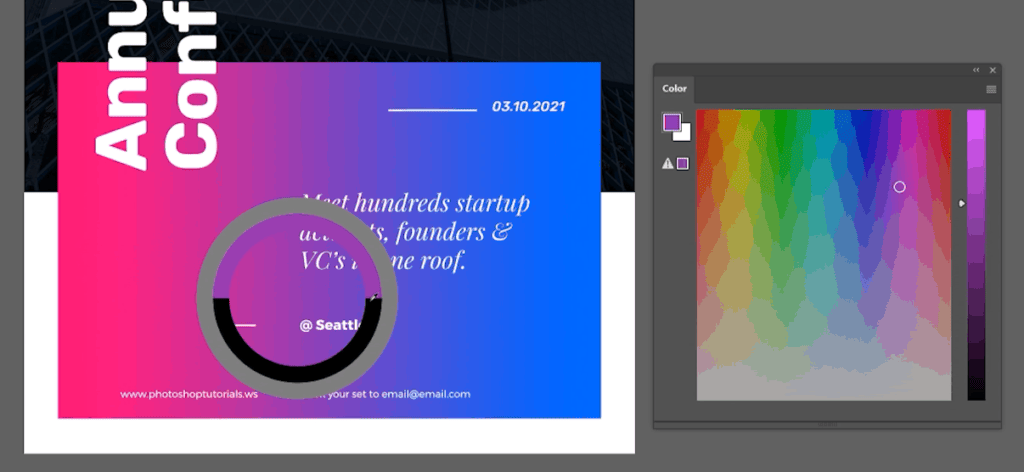
To fix this, we can add a color to the middle of the gradient. Start by editing your gradient with the Gradient Editor. Add a point in the middle then edit the color. Pick a color that is between the two gradient colors. For more natural results, make sure that you're picking a color that is less vibrant than the other two colors.

Here's how it looks before and after. As you can see, adding a third color to the gradient makes it look more vibrant.


Tip #2: How to Turn Selections into Vector Paths
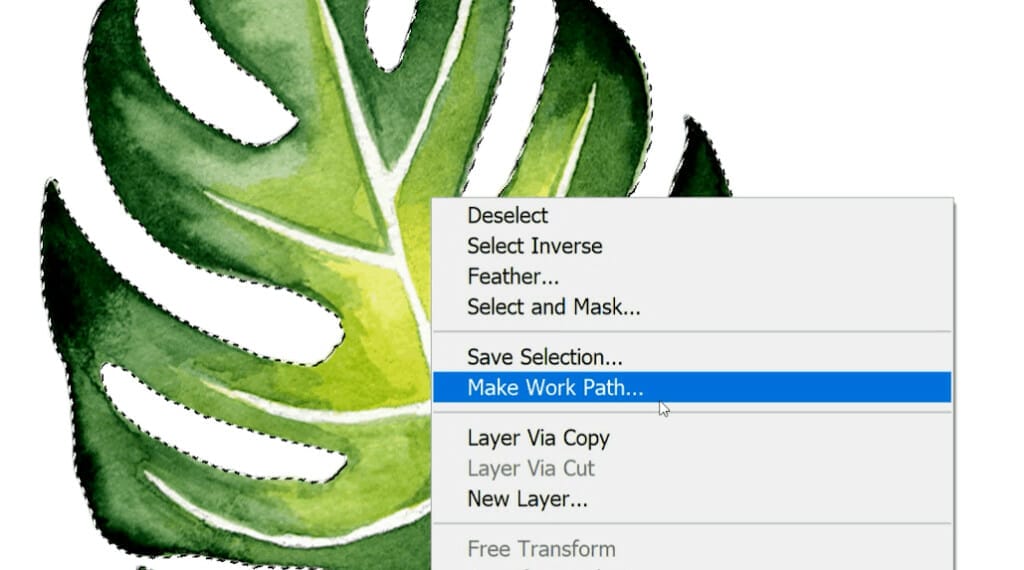
Photoshop has some great tools for creating selections. But what if you want to convert it to a vector shape? Here's how to do it. You'll first need to have a selection tool active. Any selection tool will work, whether it's a lasso or rectangle. Right-click inside the selection then select "Make Work Path".

You'll get a window with a tolerance setting. Enter a number from 0 to 10. The lower the number, the more accurate it is but it will also add more points. I like to start off with 3. If you need to change this, simply undo and open the "Make Worth Path" tool again.

To turn the path into a shape layer, go to the Layers panel, click on the New Adjustment Layer button, and select Solid Color or Gradient.

Tip #3: How to Find the Hidden Pattern Maker Tool
Photoshop has a hidden tool that makes creating seamless patterns easy. Here's how to find it. Start by opening the image that you want to turn into a pattern. Don't worry about cropping it, we can do this later. Go to the Libraries panel. If you don't see this, you can open it by going to Window > Libraries. Click on the Plus button then select "Create from image".

Here, you can choose the pattern style and adjust the scale and rotation. You can also drag on the image to reposition it. When you're ready, click on the "Save to CC Libraries" button.

The pattern will appear in your Libraries panel. To use the pattern, simply double-click on the thumbnail and it'll be placed into your document as a Pattern layer.

Tip #4: Licensing Stock Photo in Photoshop
To avoid spending money unnecessarily, you can create your design with free low-resolution placeholders and buy it when you're done. But this causes extra work because you have to replace all of the placeholders.

There's a solution to this. Before we begin, note that this feature only works with Adobe Stock. On the Adobe Stock website, find a photo that you want to use. Below the title, you'll find a button that says "Open in App". Click on this and select Photoshop.

The image will then be placed into your Photoshop document. When you're done with the design and you want to license it, simply go to the Properties panel and click on the "License Asset" button.

After purchasing it, your placeholder will be updated automatically and you've just saved yourself a lot of time and effort.

Tip #5: Curved Text Without Warping
Photoshop has a warp text tool that lets you curve text. It's easy to use but unfortunately, the text becomes distorted.

A better way of doing this is to create a text path. Here's how to do it. From the toolbar, select the Ellipse tool.

Select "Path" from the options bar. This will make it create a path instead of a shape layer. Draw an oval by dragging it from the center of your document.

Next, press Control T (Command T on Macs) to activate the Transform tool. This will make it easier to size and position the curve. Position the curve where you want your text to appear then press Enter to apply it.

If your path disappears, you can bring it back by going to the Paths panel and selecting the path.

Switch to the Text tool. Before you start typing, click on the "Align Center" button in the options bar. This will make it easier to move the text.

Now that we have that set, let's start typing. Click on the path and type in your text.

To move the text, select the Path Selection tool. Drag the text to your desired position.


We're done! As you can see, the text is curved without warping.

One comment on “5 Photoshop Tips for Designers”
Nice!