

Turn any photo into a dot grid artwork with these Photoshop actions. You'll get great results with dots that change size. They get larger in brighter areas and smaller in darker areas. Free download available.
Learn how to make epic text effect, by simple steps. You will learn, how to make beautiful background to your typography by brushes and stock images. This tutorial will teach you, how to play with layer styles in awesome way.
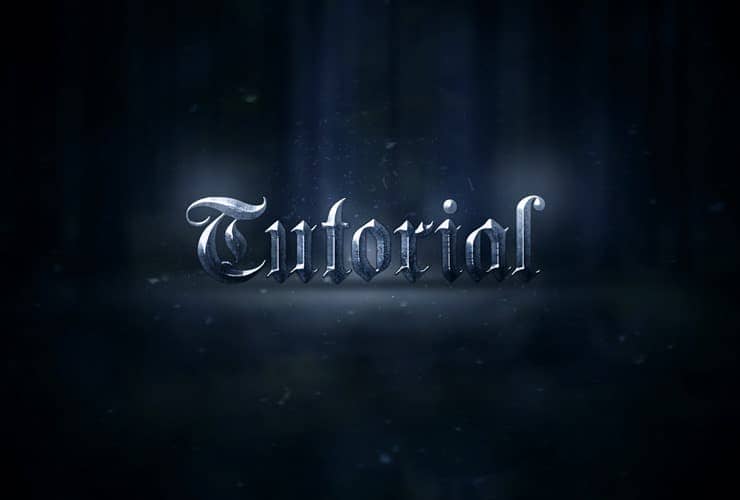
What you'll be creating
You will start from creating background. You will know how to load brush and how to use Cloud filter in Photoshop. Then, you will see how to make epic typography, which can be used in games, covers or flyers in simple steps. At the end, you will learn how to make glow on things. You'll need Photoshop CS5.5 or newer to follow this tutorial.
Tutorial Resources
- Font used: Germanica family - Dafont
- Snow Texture V - emilyemilybeth
- Forest Stock 40 - sed-rah-stock
- Debris Brush Set - zigabooooo
Step 1
Let's start by creating new file - File > New.
Step 2
Add new Adjustment layer with Solid Color. It will be our background. I used #141414, but you can pick any other color for your work :).
Step 3
Add another adjustment layer with Gradient fill. Here you will create a vignette effect.
Step 4
You should make your picture more deeper. Add new layer. In your color picker pick black and white. Then, go to Filter > Render > Clouds.
Step 5
Pick gradient tool. Draw black-transparent gradient on created layer, as shown.
Step 6
Now, add mask to created layer. Use gradient tool, for masking. I've choosen black-white radial gradient with small radius.
Step 7
Place "Forest stock" to your file. Go to top menu. Choose filter > Blur > Gaussian blur.
 In your color picker set black and gray colors. Click on canvas next to your layer (mask). Then, add radial gradient by gradient tool.
Step 8
Add adjustment layer with Color/Balance. You'll make colors cooler xD.
Step 9
Again you should use technique which makes picture deeper. Add new layer. In your color picker set black and white colors. Go to Filter > Render > Clouds. Go to Filter > Blur > Gaussian blur. Rendered clouds are really sharp.
 Change blending mode to Overlay, decrease opacity to 55%.
Step 10
Now you'll draw glow. Pick blue color. Use Soft brush with decreased opacity (around 50%). Draw some strokes on trees and draw some random dots on grass. Add blur for this layer. Go to Filter > Blur > Gaussian Blur.
 At the end of this step, change opacity to 25%.
14 comments on “Create an Epic Metal Text Effect From Scratch”
scratched texture can not be found... where is it?
trash
Final is too dark. You need to make it brighter and recalibrate your monitor.
This post was PERFECT! thank you!
its not that good
yes i hate this
i hate this page
it's a waste of time
Hvala dobra ideja !!!
next time make the instructions clear
The explanations are a piece of crap
Ur explanations are awesome Monika Nowakowska. Great article !!
Marlon Gouvêa
I can provide Some ...................................amazing tutorials ! #someamazingtutorials