

Luminar AI lets you turn your ideas into reality with powerful, intelligent AI. Download the photo editor and see how you can completely transform your photos in a few clicks.
The Perspective Warp tool is almost like magic. It lets you change the perspective in your image and can be used to rotate buildings and objects, make telephoto shots look like wide angle shots, and quickly straighten multiple objects in less than a minute. Read this tutorial and find out four useful ways to use the Perspective Warp tool in Photoshop CC.
Video Tutorial
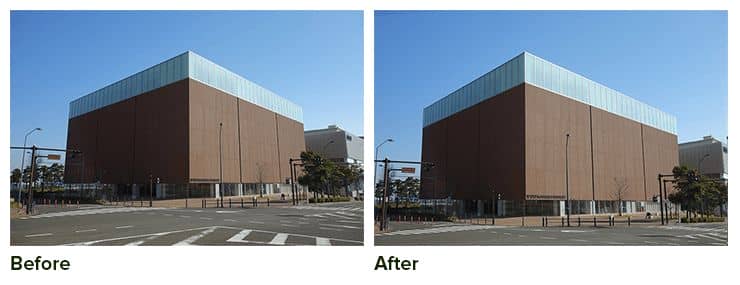
Rotate a Building
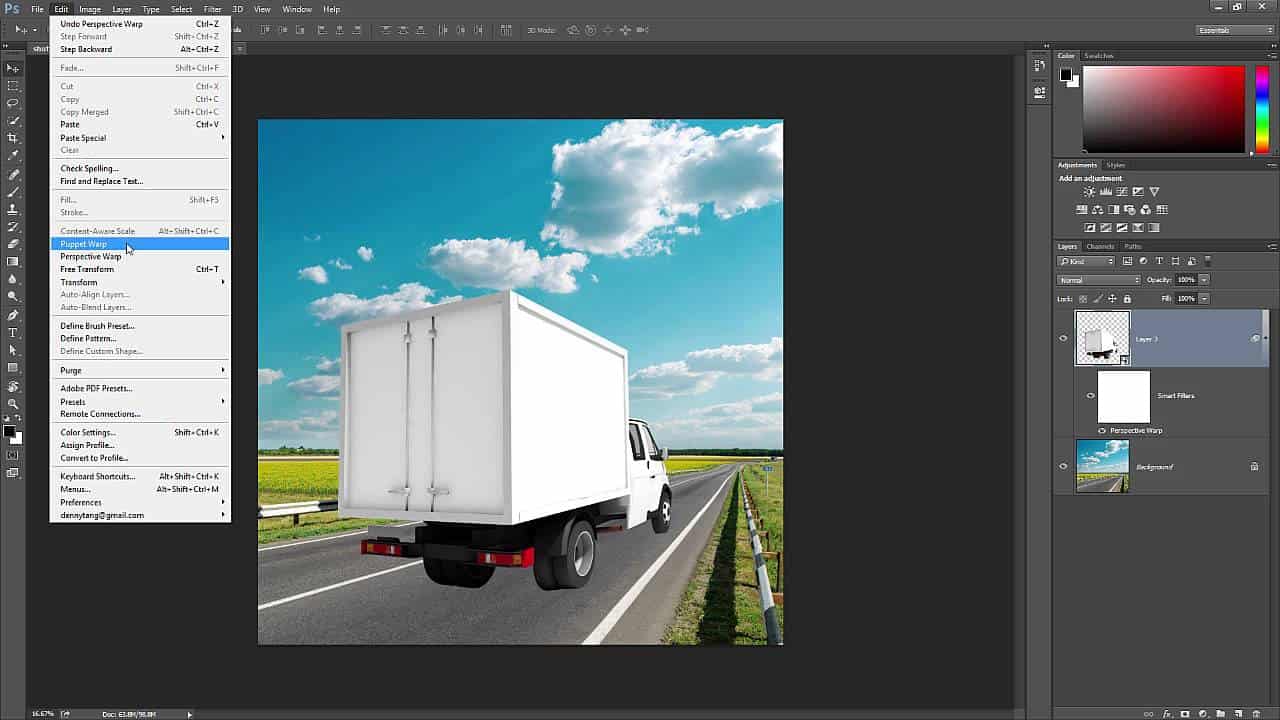
The primary reason the Perspective Warp tool was created was to allow you to change the perspective of an object. In this case, we’ll use a building since it’s the simplest example. As you can see in this image, the building was photographed at an awkward angle. In hindsight, I should have took it from another angle. But thanks to the Perspective Warp tool, we can now fix this without going back there.
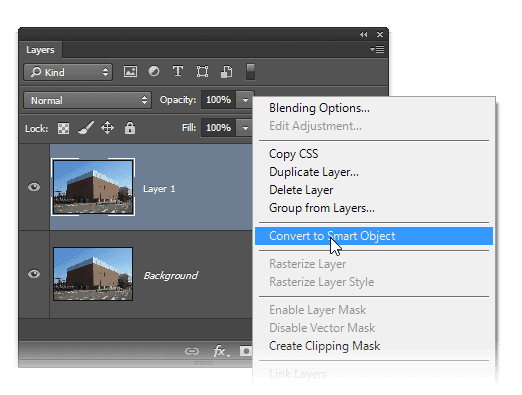
Here’s how to do it. First duplicate your layer by pressing Ctrl/Cmd+J then convert it to a Smart Object by right-clicking on the layer and choosing “Convert to Smart Object”. By converting the layer to a Smart Object, we can apply the Perspective Warp nondestructively and go back to edit the settings at any time.
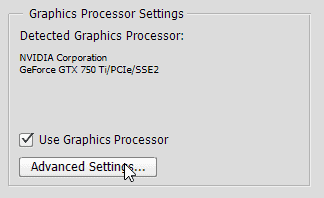
Next, go to Edit > Perspective Warp. If you don’t see this, make sure that you have the latest version of Photoshop CC installed. If it’s grayed out, then go to Edit > Preferences > Performance. Make sure that the “Use Graphics Processor” option is enabled. Note that your graphics processor must have at least 512 MB of video RAM to use this feature.
Once you have the Perspective Warp tool activated, click anywhere to create a grid. Drag the points on the grid to create a grid that covers the perspective of the building. You can also click on a point and use the arrow keys on your keyboard to move them around. Pay attention to the grid lines and make sure that they are parallel with any lines on your building.
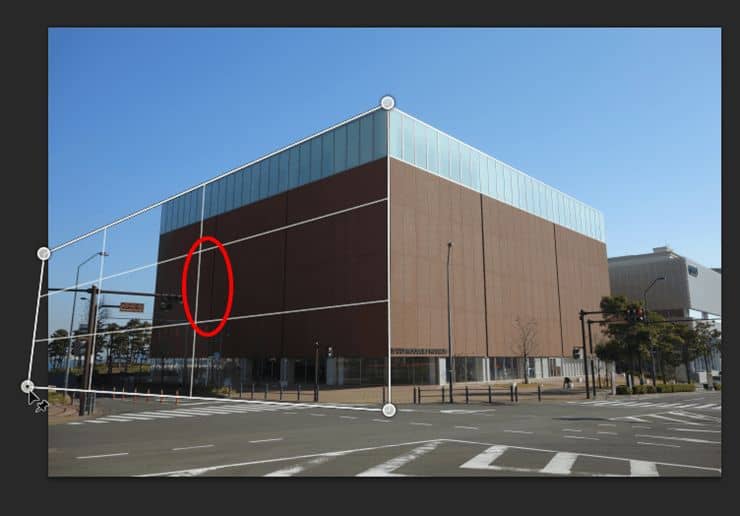
Click anywhere on the image to create another grid. This time, drag one of the points towards the corner of the grid you created earlier. Release your mouse when you see two lines highlighted in blue. This will merge the points together.
28 comments on “4 Useful Ways to Use Perspective Warp”
yes, prespective wrap not active for me...i tried many times...please let me know what to do?
Go to Edit > Preferences > Performance and enable the "Use Graphics Processor" setting.
Without the "Use Graphics Processor" setting, Perspective Warp will be grayed out in the menu.
Screenshot: https://i.imgur.com/9z7vHcu.png
This is the best guide I've read on perspective warp. You're the only one who showed why it's useful.
Thanks
Oh yes, thanks for this one!
The fourth example was a STUPID. Architects and designers need to know how to take an image in perspective into elevation. You failed miserably.
Thanks for this!
Cool tech but only works on some photos. And expect a lot of warped areas. The road in your example picture made the straight lines curved. Photoshop needs to implement AI into this for better rendering.
It's really amazing tutorial.Thanks for sharing.
Thanks
Hell yeah!<3
:D
Thanks so much for that:D
Any one can tell the name of the software. ..
Selvam its Photoshop
Is it adobe 7. Or cc
Hell yeah!:D
Thanks !
dope
Yes!:D
Update me all your. Tutorial
Agreed... Cool post thanks
Hey will u make a tutorial on mocha AE for my motion tracking. I have a little. Problem solved
To solve
:D
vanishing point is cool to point out but alpha channels are for what now?
For the first image. Were is link for downloading?
Your image works beautifully with the mask Nancy!