
Preview of Final Results
This image was created to mimic the comic book fonts but in 3D. You will learn how to create this 3D effect by duplicating layers and by adding halftones to give it that comic feel. This tutorial was created with Photoshop CC.
Tutorial Resources
- Halftone Brushes DeviantArt – Gregkmk
- Komika Axis DaFont – Vigilante Typeface Corporation
Step 1
Open Photoshop and create a new document by clicking . I made my document 2000 px by 2000 px (it doesn’t matter the resolution since we’re using pixels). I titled my document “Comic Book Text Effect”.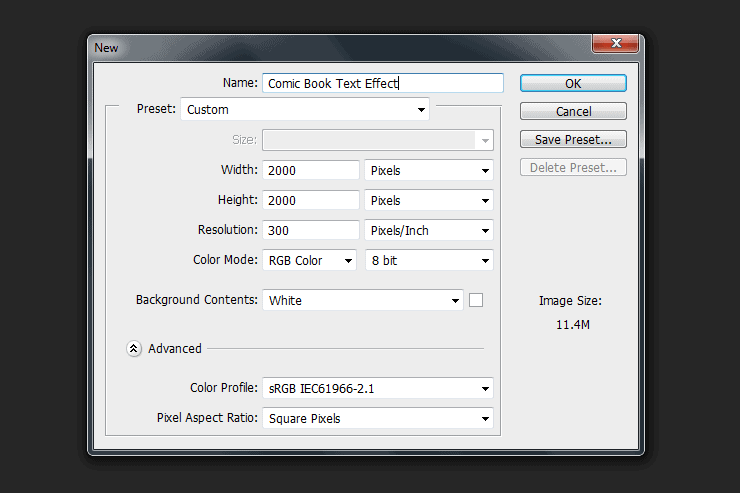
Step 2
Now it’s time to add a gradient to your background. Double-click your background layer to bring up the layer style window and apply this setting.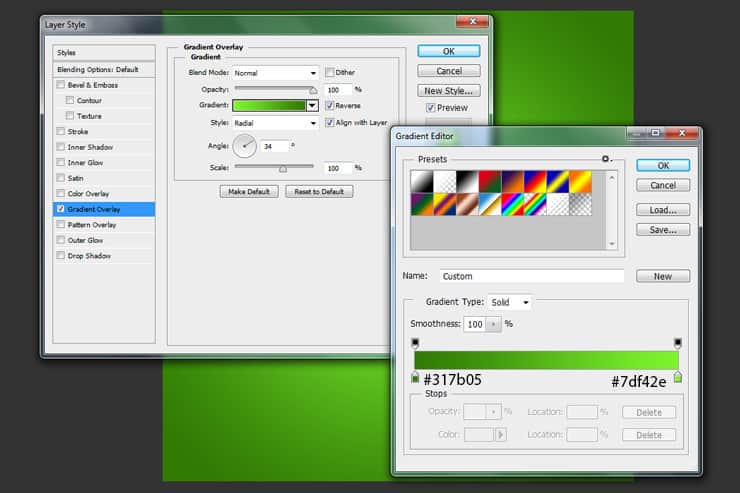
Step 3
Create a new layer. Fill it with any color and change the fill to 0%. Double-click this layer to bring up the layer style window and apply this pattern.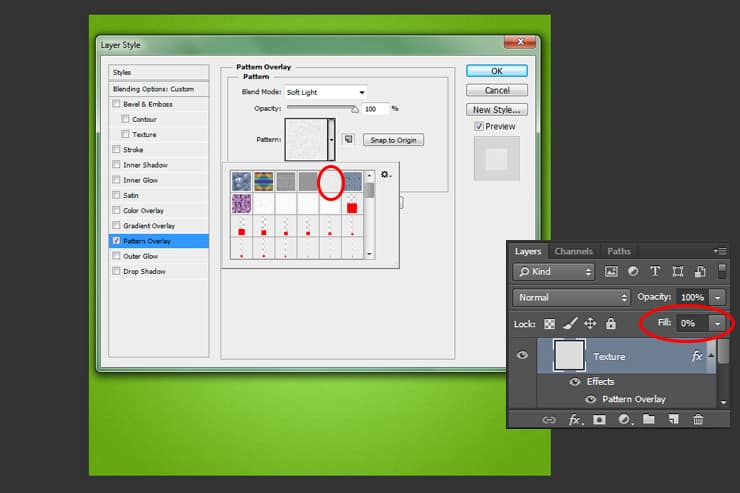
Step 4
Create a New Layer. Select the Brush tool (B) then set the brush size to 1957 pixels. You can use whatever color you want. Now place your halftone in the center of your document as shown in the image below. Also, change your layer to Luminosity with a Fill of 16%.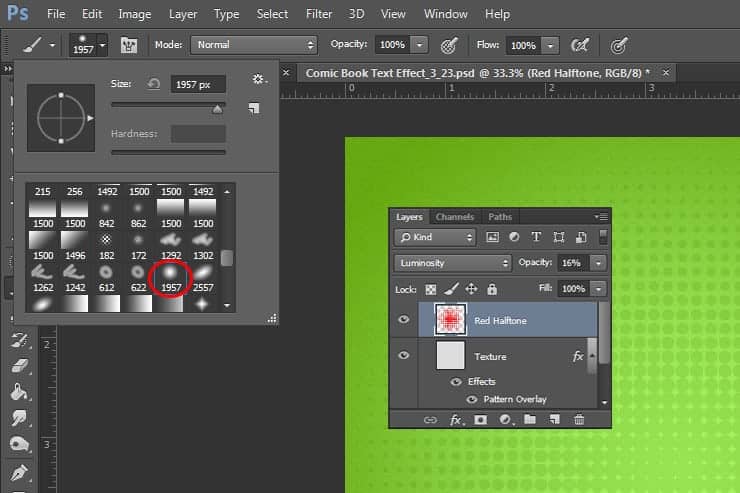
Step 5
Create a New Layer. Grab your Pen tool (P) and create a shape as shown in the image below.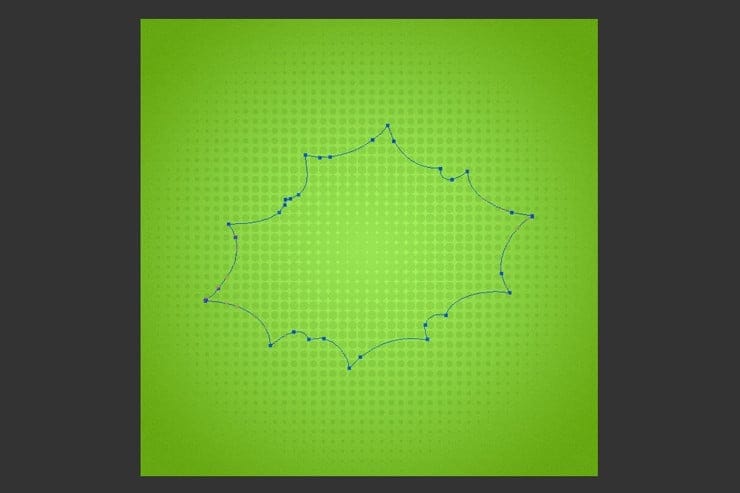
Step 6
Go to your Paths tab and right-click the path you just created and click Make Selection. Click ‘ok’.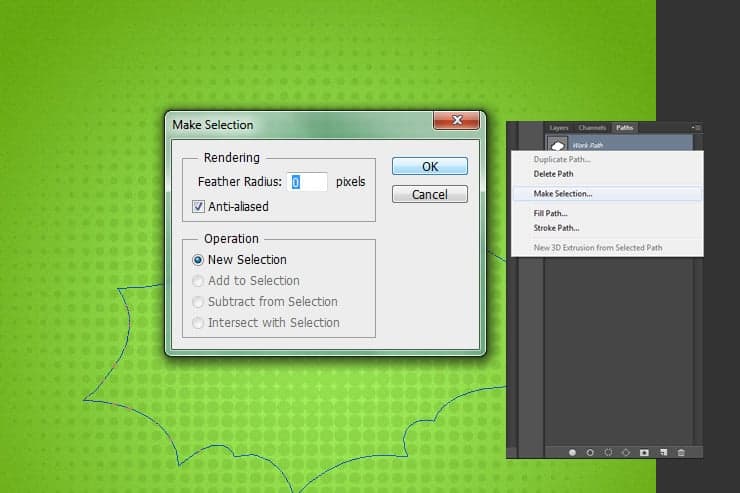
Step 7
Fill this selection with whatever color you want. Then double-click this layer to apply a Color Overlay and a Drop Shadow.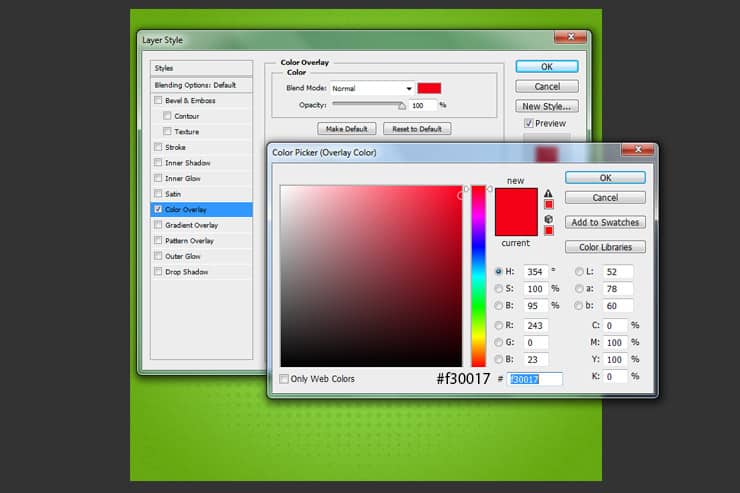
Step 8
Add Drop Shadow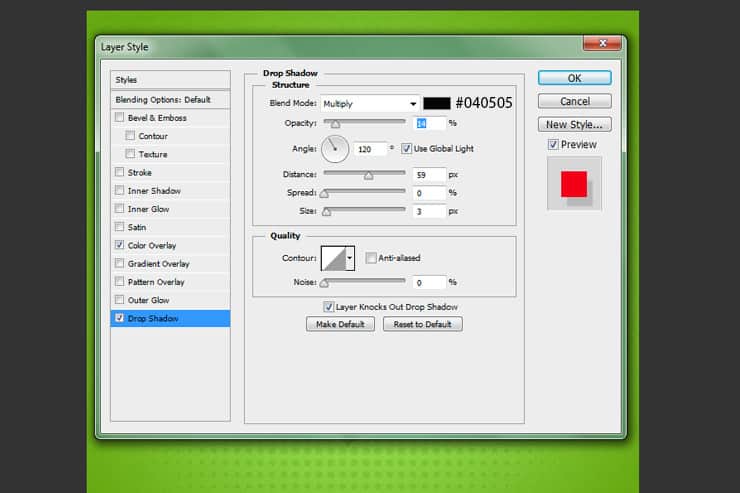
Step 9
Create a New Layer. Make a selection from your previous layer by clicking Ctrl and selecting the thumbnail image. Grab your Brush tool again and use the halftone brush and place it in your document as shown below. You can use whatever color you wish.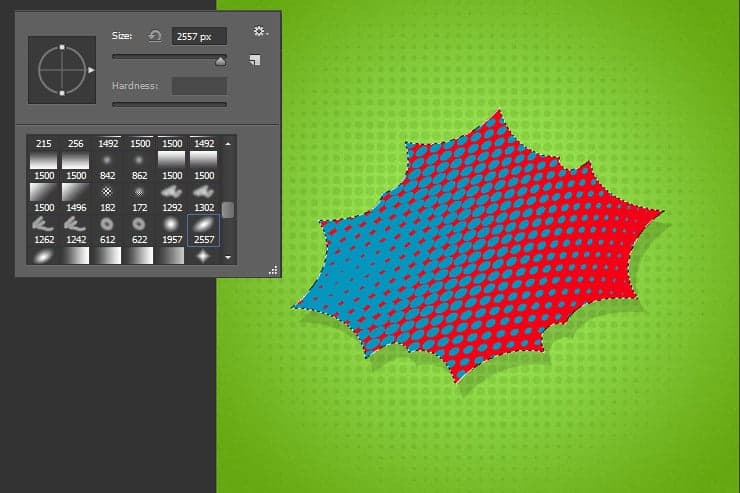
Step 10
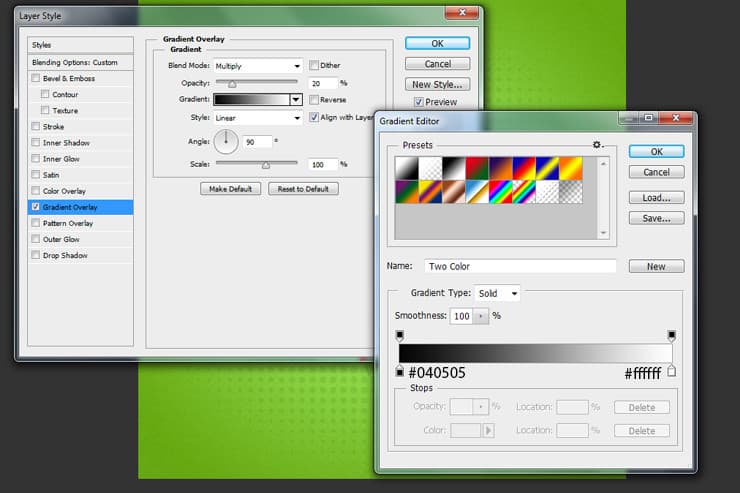
Double-click this layer and add this Gradient Overlay. Make sure your Fill is at 0%.