Make skin look perfect in one-click with these AI-powered Photoshop actions.
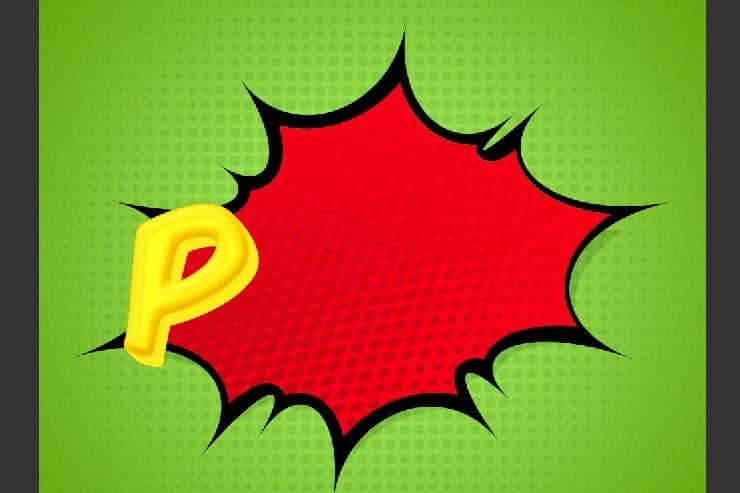
Step 20
Put the 5 duplicated "P" layers in a Group and apply these layer styles.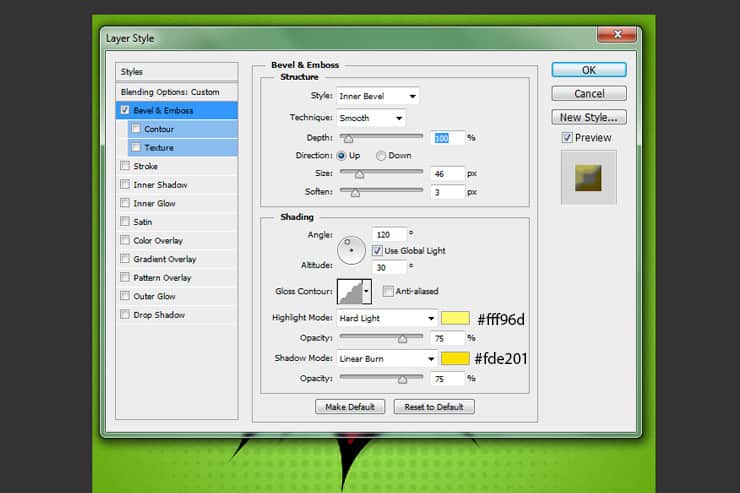
Step 21
Add Inner Shadow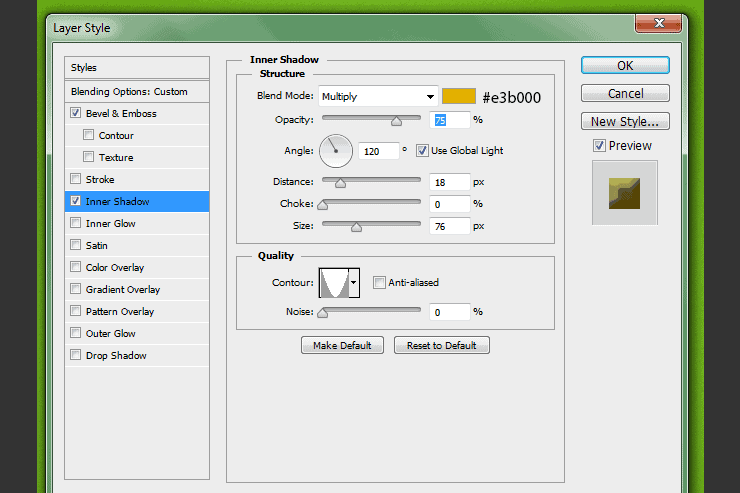
Step 22
Add Satin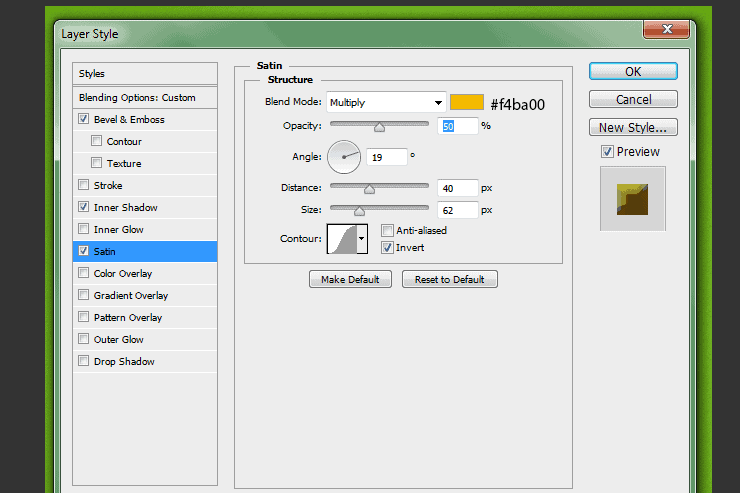
Step 23
Add Gradient Overlay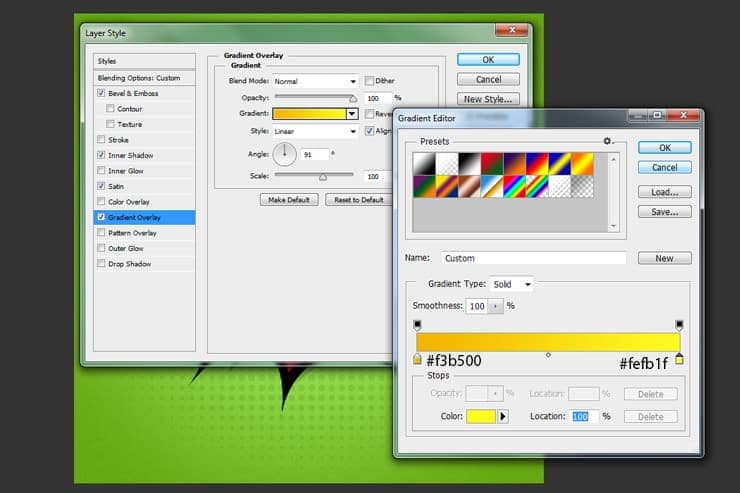
Step 24
Add Outer Glow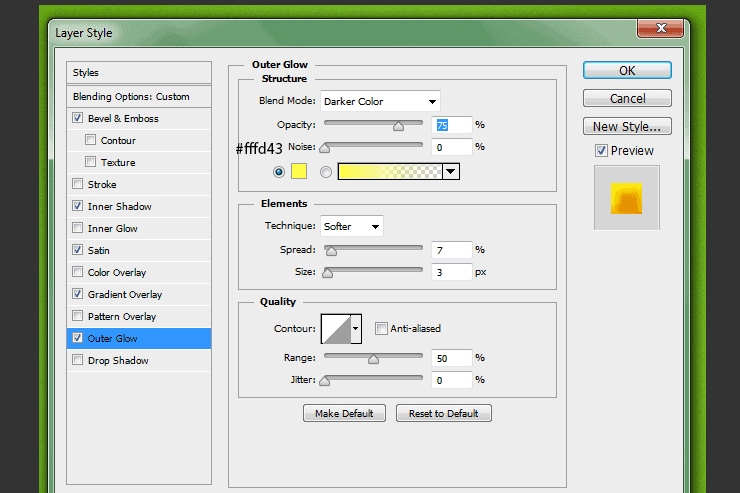
Step 25
Your letter "P" should look like this.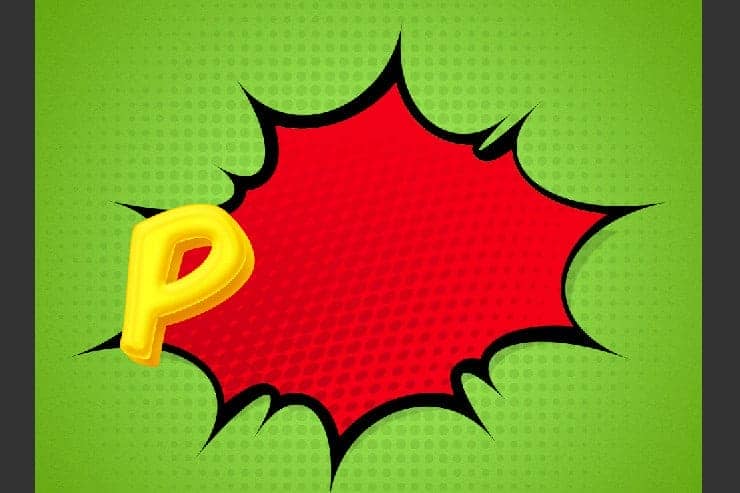
Step 26
Now we will add some halftone brushes to the letter "P". Go to your original layer "P", make a selection from it. Create a new layer and grab your Brush tool. I'm using #000000, place your halftones on your letter as shown in the image below.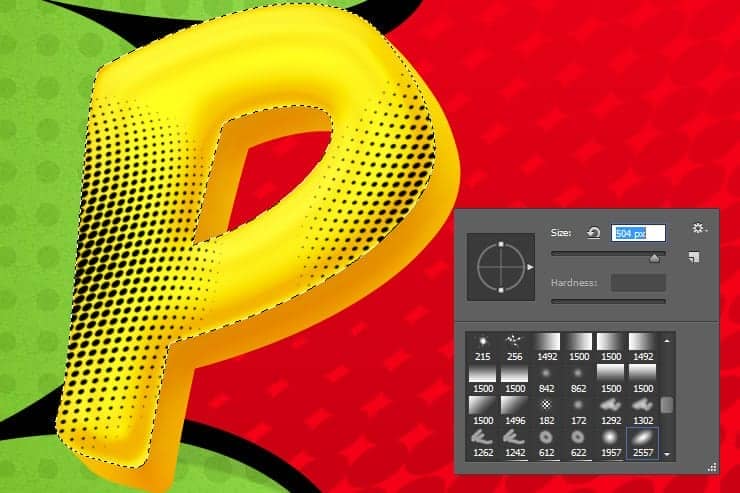
Step 27
Change this layer to Overlay.
Step 28
Repeat these same steps for the O,W and exclamation point.
Step 29
Create a New Layer and make a selection from all of the first and last P, O, W and exclamation point layers by pressing and holding the Ctrl and Shift keys. Fill this layer with black.
Step 30
Add a Bevel and Emboss effect to this layer.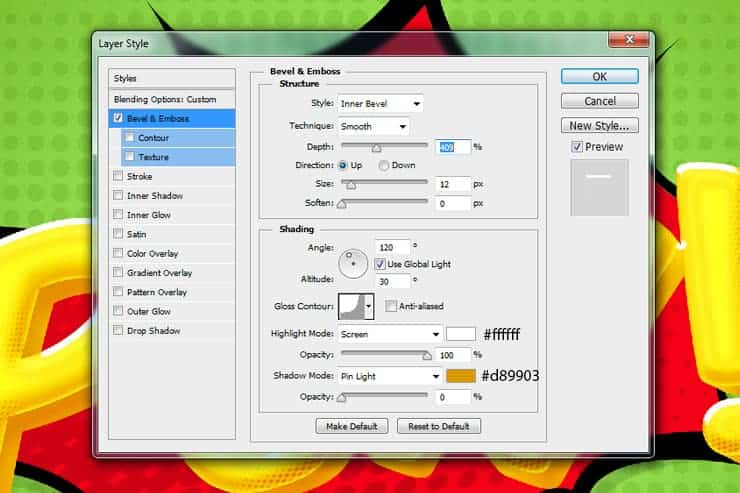
Step 31
Fill this layer with 0%.
Step 32
Now we're going to repeat step 29 to add the stroke. Create a New Layer and place it below all of your text layers. Make a selection from all of the first and last P, O, W and exclamation point layers by pressing and holding the Ctrl and Shift keys. Fill this layer with black. Add a black Stroke to this layer.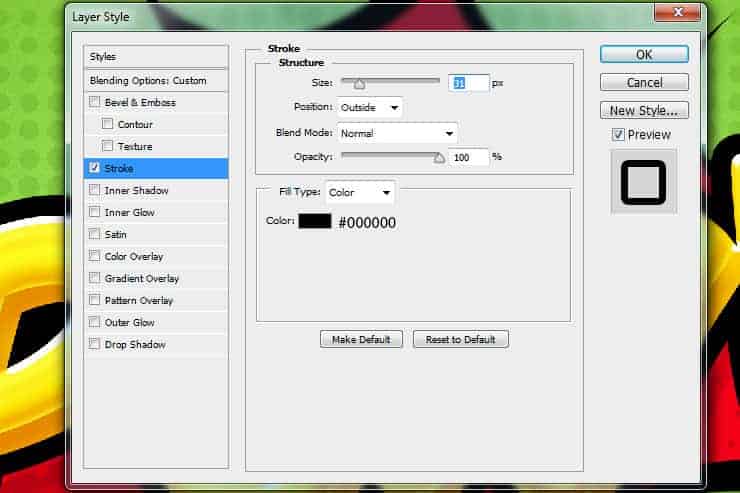
Step 33
Convert this layer to a smart object by right-clicking this layer and selecting Convert to Smart Object. Add a Drop Shadow.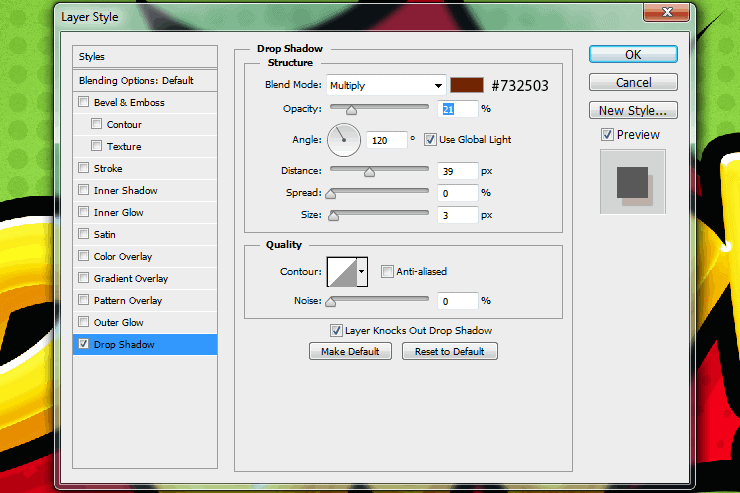
Final Results

Download the PSD
Comic Book Text.zipTutorial by Ashlee Harrell


10 comments on “How to Create a Comic Book Text Effect in Photoshop”
great
excellent!
Non si vedono le immagini
Muito bom!!!
Obrigado por compartilhar
the images of this page is always broken when I enter in this particular page.....I tried many times but it always be same
Thanks for letting us know! The tutorial images have been fixed.
Great tutorial! Thank you for inspiring creativity! #YourMindisYourGreatestDesign
Can anyone help me understand the step 29??????
It is fantastic Ashlee. thank for your efforts
Nice tutorial, thank you!
Just a couple of suggestions:
1. Save Layer styles for the step 28 (I don't know, maybe it's just being assumed?), in order not to apply all the effects manually.
2. For the step 32, instead of repeating step 29 we could just save selection earlier and then load it.
Thank you, it was a very informative tutorial!