In this tutorial, you will learn how to create 3D text in Illustrator then transfer it to Photoshop to apply the effects. You’ll learn how to apply styles to regular 3D text to create a stunning design.
Preview of Final Result

Dazzling 3D Text Effect Photoshop Tutorial
Step 1 – Create a New Document
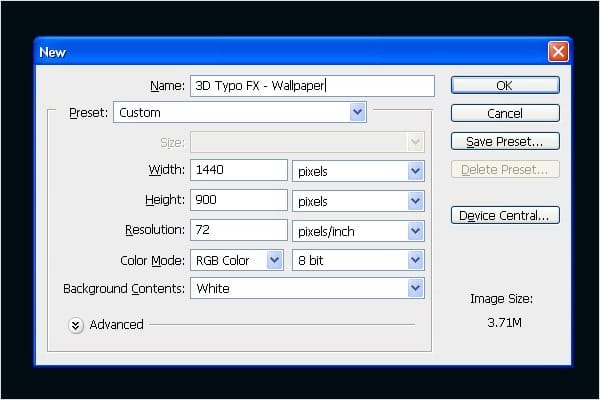
Open Photoshop. Choose File > New or press Ctrl/Command + N. I’m using wallpaper size of 1440px (width) X 900px (height) but you can use any size you wish.
Step 2 – Creation of 3D Text
We are going to start creating 3D text with the help of Illustrator. First you need to type the text in Illustrator. You can use any text you want. I’m just using the text “FX”. Open Illustrator, select the Type Tool and write the text. After typing change the font to “Hobo Std Medium“.

Step 3 – Coloring the Text
Change the color of the text. For “F” use blue (#094569) and for “X” use dark orange (#AB7D1B). Your image should look like the one below.

Step 4 – Adding 3D Effect to the Text
You need to create 3D solid text. To do that go to Menu > Effect > 3D > Extrude & Bevel…

Set the dialog similarly as on the picture below.

Step 5 – Placing the Background Color
Once you´re done with the 3D text move back to Photoshop and change the background color to blue (#000b12).

Step 6 – Placing 3D Text in Photoshop
In this step you’re going to place the 3D text in Photoshop. Copy the text from Illustrator and paste it in Photoshop. Select the layer with the text, right click on it and choose Rasterize Layer.

Step 7 – Separating Text
Now you are going to separate the text into two parts. Select the Rectangular Marquee Tool (M) and make selection of the letter “X”. Press Ctrl + X to cut and Ctrl + V to paste the letter. Align the text accordingly.

Step 8 – Dodge Tool Settings
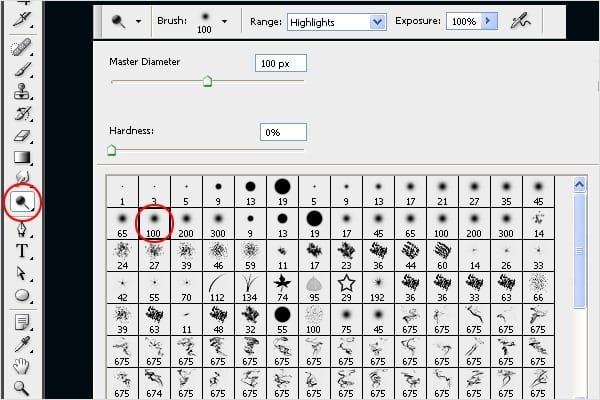
You need to create highlights on the text. Select the Dodge Tool (O) from tools and follow the brush settings as you can see in the image below.
Step 9 – Adding Highlights
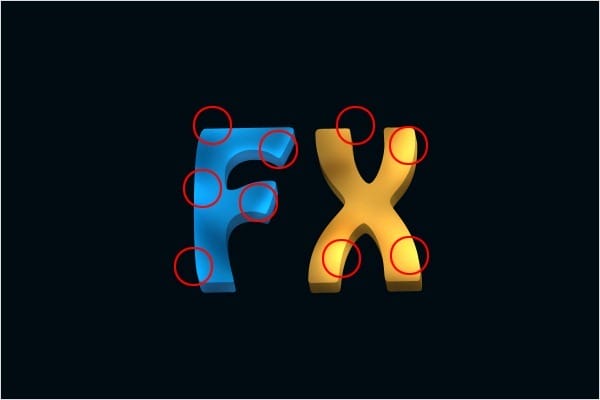
Paint with the Dodge Tool over the areas you want to highlight. You can get inspiration from the image bellow.

Step 10 -Adding More Highlights
Follow the step 9 and create more highlight spots on the circled areas.
Step 11 – Adding Shadows
Once you´re done with highlights, you need to create shadows on the opposite side of the shape. Select the Burn Tool (O) from the tools and paint the shadows.
6 responses to “Create This Dazzling 3D Text Effect in Photoshop”
-
Please help me as soon as posible
-
Step 43 – Adding Colors:
Grab the Brush Tool (B), change the Mode on Color and paint to get similar result as on the picture below.
I didn’t get it.
-
i need how to insert fire image in 3d text
-
I don’t get it
Step 42 – Placing the Brush
Increase the brush size and paint with it on a new layer -
3d effect in photoshop
-
OK. this is a good tutorial. thanks


Leave a Reply