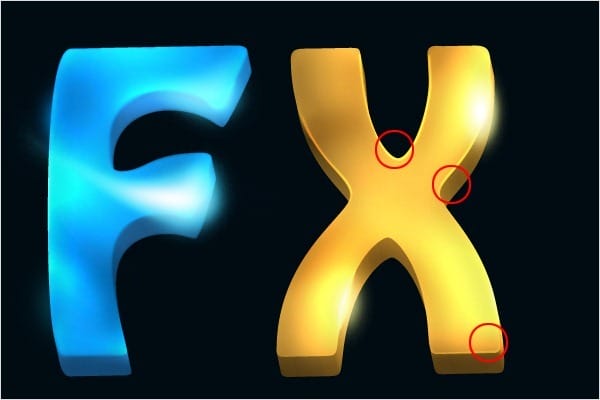
Step 25 – Adding Brush Stroke
Choose the option Brush from the list and press OK.

Step 26 – Adding More Stroke Path
Repeat the steps 22 – 25 to add more strokes.

Step 27 – Creating Highlights in the Areas with Shadows
In this step you´re going to add some glow in the dark areas to create a reflection. Choose the Pen Tool (P) and make a path as you see in the image below. Press Ctrl + Enter to make a selection and fill it with brown color (#614717).

Step 28 – Changing the Blending Mode
Now group the selected layer with the text. To do that place the layer above text layer & press Ctrl+Alt+G to group the layer inside the text layer. Once we done go to layer blending mode & choose “Color Dodge”

Step 29 – Erasing the Corners
Select the Eraser tool (E). Choose some soft round brush and set Master Diameter on 100px. Erase the corners of the shape. See image below.

Step 30 – Adding More Stroke Path
Continue with adding more strokes by following the steps 22 – 25.

Your image should be similar to the picture below after these steps.

Step 31 – Adding Stroke Path to “F”
Let’s focus on the letter “F” again. Follow the steps 22 – 25 again to add strokes to that letter.

Step 32 – Creating the Spotlight in the Background
In the following steps we will focus on the background. You´re going to add light under the letters. To do that choose the Brush Tool (B). Select soft round brush and set Master Diamter on 300px. Pick blue color (#546876). Create a new layer below the layers with text and paint one big dot. You can see what I mean in the picture below.

Step 33 – Transforming the Dot
Press Ctrl+T and transform the layer to the shape which can be seen below. Press Enter.

Step 34 – Adding the Shadow
Create a new layer under the layers with the text. Ctrl + click on the thumbnail of the layer with the letter “F” to activate mask of that layer. Then click on the layer you’ve just created and grab the Gradient Tool (G). Pick the black color and fill the mask with it.
Do the same with the letter “X”.
Then press Ctrl + T and transform this layer with black letters as on the picture bellow. Press Enter.

Step 35 – Adding Gaussian Blur
The shadow should have more blur to look realistic. To fix it go to Menu > Filter > Blur > Gaussian Blur…and set Radius on 5.0px. Press OK.

You should have your image similar to the image below.

Step 36 – Creating Star Glow
In this step you’re going to add some star glow. To do that select the Pen Tool (P) and create a path as you can see in the image below. Right click on the screen and choose Stroke Path… Select the option Brush and check the box Simulate Pressure. Press OK.
6 responses to “Create This Dazzling 3D Text Effect in Photoshop”
-
Please help me as soon as posible
-
Step 43 – Adding Colors:
Grab the Brush Tool (B), change the Mode on Color and paint to get similar result as on the picture below.
I didn’t get it.
-
i need how to insert fire image in 3d text
-
I don’t get it
Step 42 – Placing the Brush
Increase the brush size and paint with it on a new layer -
3d effect in photoshop
-
OK. this is a good tutorial. thanks


Leave a Reply