Luminar AI lets you turn your ideas into reality with powerful, intelligent AI. Download the photo editor and see how you can completely transform your photos in a few clicks.

Step 12 - Adding More Shadows
Follow the step 11 and continue with adding even more shadows into the circled areas.

Step 13 - Increasing Intensity
To add more contrast to the text select the Dodge Tool (O). Increase the brush size to 800px and click over the whole letter "F" and then over the "X" to get the same result as in the image below.

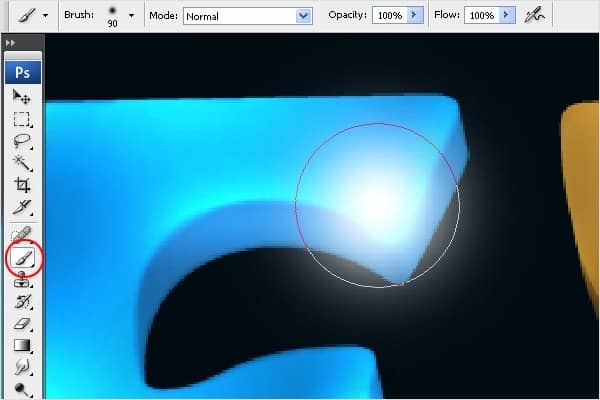
Step 14 - Adding Corner Spotlights
Now you are going to add some spotlights to make the corners of the text shining. Select the Brush Tool (B). Select soft round with Master Diameter on 90px. Choose white foreground color and create a new layer. Paint over the corners of the text. See image below how it should look.
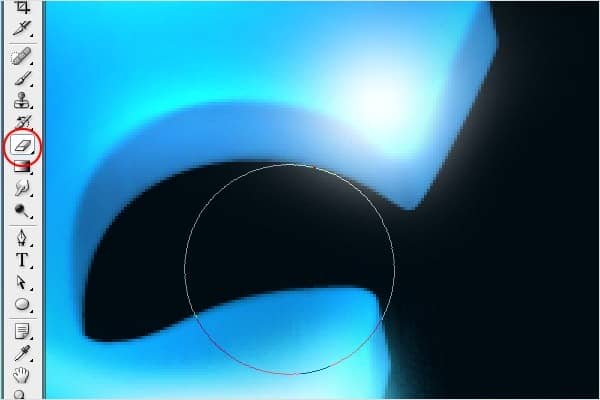
Step 15 - Erasing Feather
Erase parts of the glow which are not in the text but in the background.
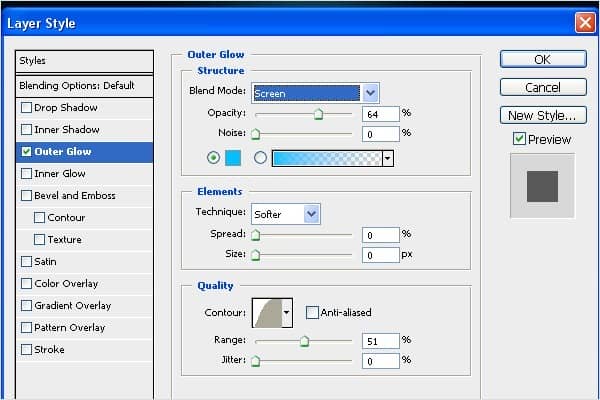
Step 16 - Adding Outer Glow
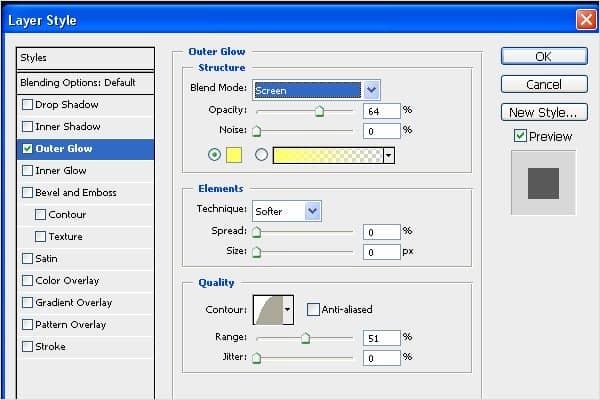
To add Outer Glow to the spotlights click on the button Add a layer style. You can find that button in the bottom part of your Layers palette. If you don´t see the palette simply press F7 and it will appear. Select the option Outer Glow and make following settings. Press OK.
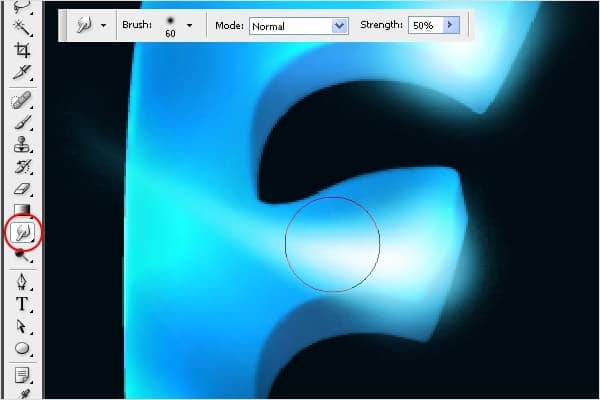
Step 17 - Duplicating Spotlight Glow
Now duplicate the glow you’ve created in the step 14. Select the Smudge tool (R) and drag the brush from right to left, so the glow spreads over the text. See image below to know what I mean.
Step 18 - Blending the Glow
Select the Smudge Tool (R) and drag the glow around the text corners. See image below.
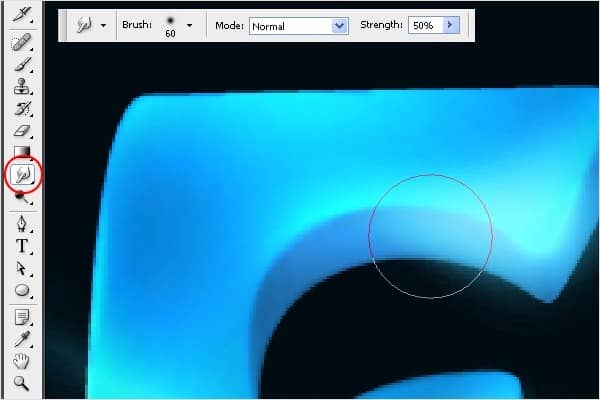
Your image should look like the one bellow so far.

Step 19 - Adding the Feather Glow
Now you are going to add some glow to the corners of the text. Select the Brush tool (B). Choose soft rounded brush and set the Master Diameter on 90px. Create a new layer and paint some glow around the edges as you can see bellow.
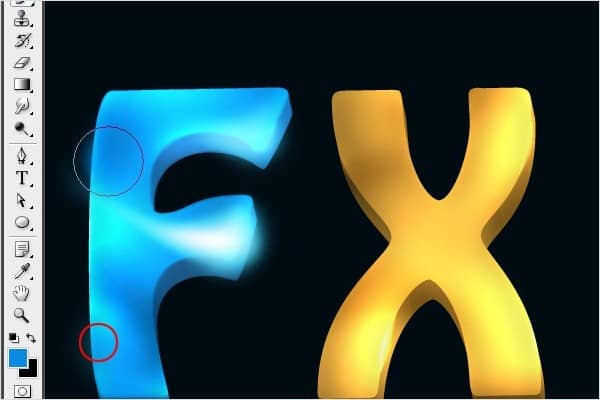
Step 20 - Placing Highlights to "X"
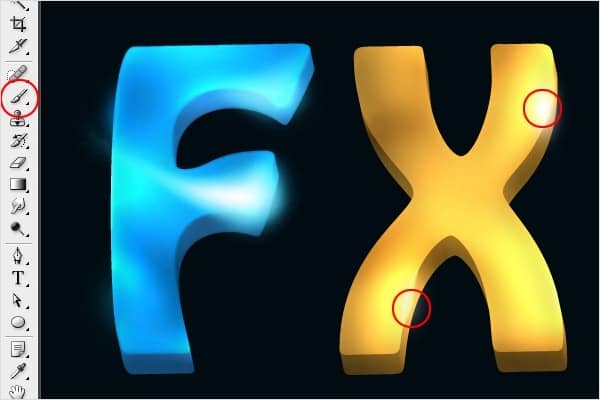
In this step we will focus on the letter "X". Place the spotlights. Do it the same way as you did it in the step 14 and 15. See the image below for a reference.
Step 21 - Adding Outer Glow
Add Outer Glow to the spotlights. Click on the button Add a layer style, select Outer Glow and make following settings.
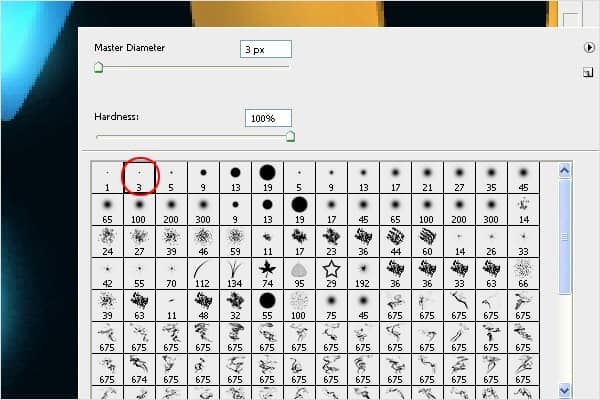
Step 22 - Choosing the Brush
Select the Brush Tool (B). Choose hard round brush and set the Master Diameter on 3px. You will need it in following steps.
Step 23 - Creating Path
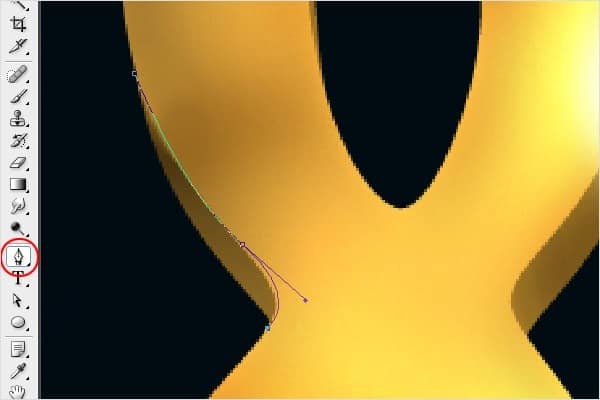
Grab the Pen Tool (P) and create a path as you can see in the image below.
Step 24 - Adding Stroke Path
Now right click on the screen and choose the option Stroke Path...


6 comments on “Create This Dazzling 3D Text Effect in Photoshop”
Please help me as soon as posible
Step 43 – Adding Colors:
Grab the Brush Tool (B), change the Mode on Color and paint to get similar result as on the picture below.
I didn't get it.
i need how to insert fire image in 3d text
I don't get it
Step 42 – Placing the Brush
Increase the brush size and paint with it on a new layer
3d effect in photoshop
OK. this is a good tutorial. thanks