Turn any photo into a dot grid artwork with these Photoshop actions. You'll get great results with dots that change size. They get larger in brighter areas and smaller in darker areas. Free download available.
In this tutorial, I'll show you how to create a fantasy fish scene using a variety of photo manipulation techniques. You'll learn how to combine different stock images into a cohesive scene using blending, adjusting colors, masking, and brush. You'll learn also how to focus on the details, work with lighting, manage your layers, and more.
What you'll be creating
We'll start this tutorial by setting up a sky scene from three stock images. Then we'll add the boat, tree, model, fishes, and blend them using adjustment layers, masking, and brush. Later we'll adjust the color, light, contrast, and finish it up with an adjustment layer. You should use Photoshop CS3 or newer to follow this tutorial properly.

Tutorial Resources
Step 1
Create a new document in Photoshop with the following settings:
![fish34-final[1] fish34-final[1]](https://cdn.photoshoptutorials.ws/wp-content/uploads/2014/08/fish1.jpg?strip=all&lossy=1&quality=70&webp=70&avif=70&w=1920&ssl=1)
Step 2
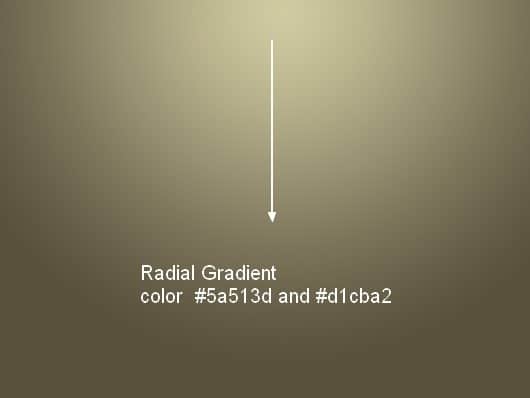
Press Cmd/Ctrl+Shift+N to make a new layer. Active the Gradient Tool (G), choose Radial Gradient with the color #5a513d and #d1cba2. Drag a line from the top center to the bottom:
Step 3
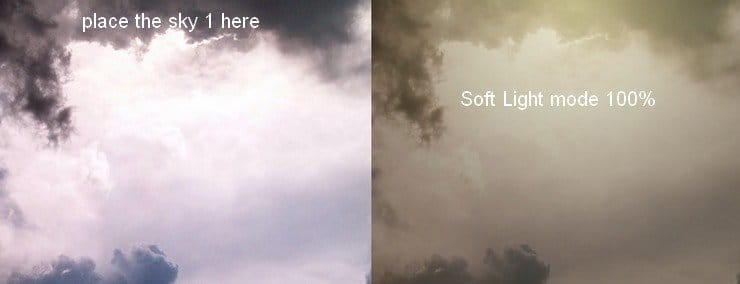
Open the sky 1 image. Use the Move Tool (V) to drag it into our canvas and change the mode to Soft Light 100%:
Step 4
To make this sky look smoother, go to Filter > Blur > Gassian Blur and set the radius to 2 px:

Step 5
I used an adjustment layer with Clipping Mask to change the color of the sky. Go to Layer > New Adjustment Layer > Curves:


Step 6
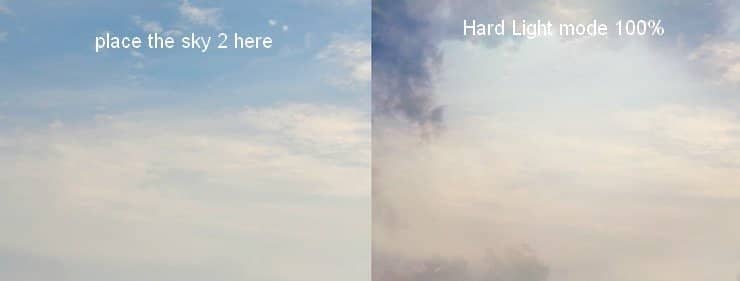
Place the sky 2 image over the sky 1 and change the mode to Hard Light 100%:
Step 7
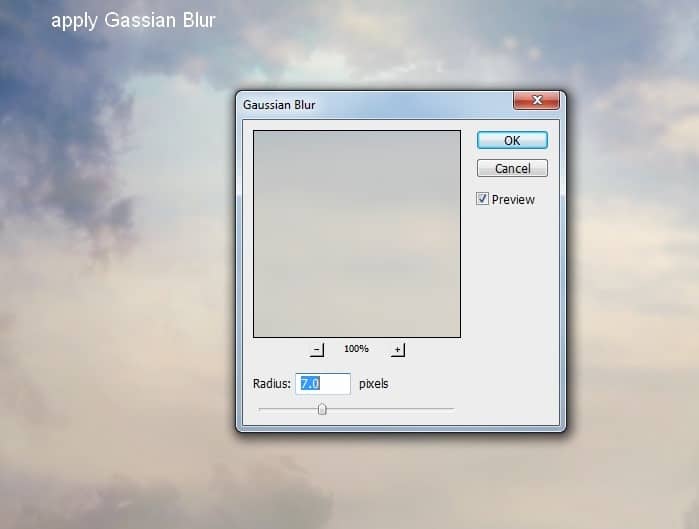
Apply Gaussian Blur with 7 px to this sky layer:
Step 8
I used a Color Balance adjustment layer (Clipping Mask) to change the color of the sky 2:
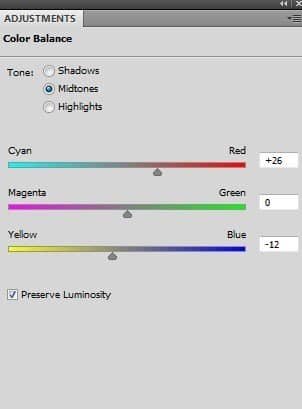
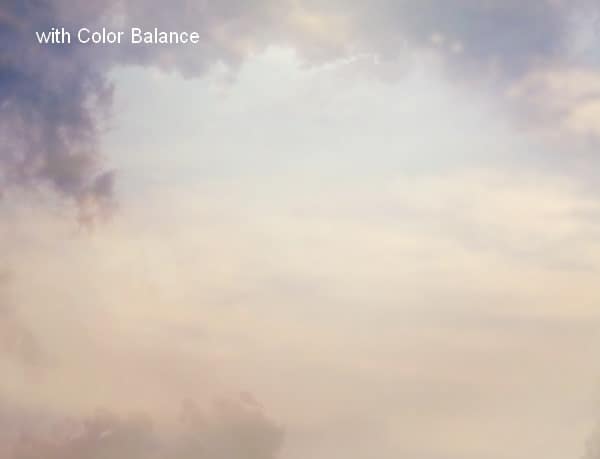
Step 9
Drag the clouds image into our working document and use the Cmd/Ctrl+T key to rotate it as shown below:
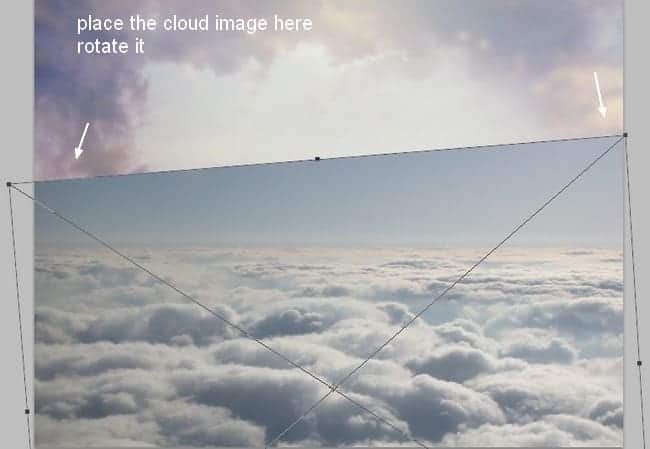
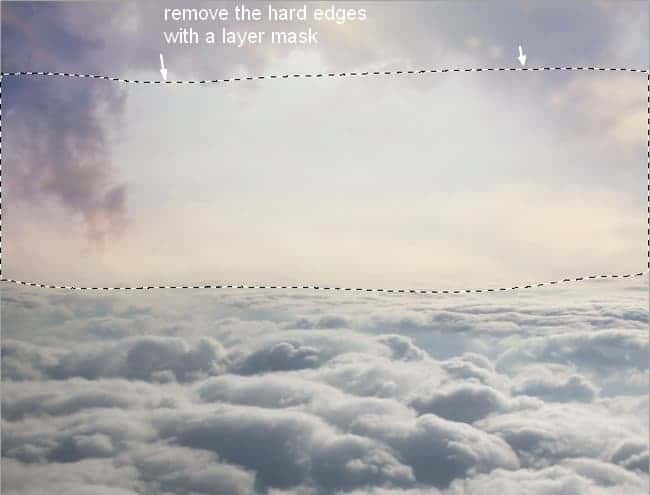
Click the second button at the bottom of the Layers Panel to add a mask to this layer. Use a basic, soft brush with black color to remove the hard edges of this clouds image:
Step 10
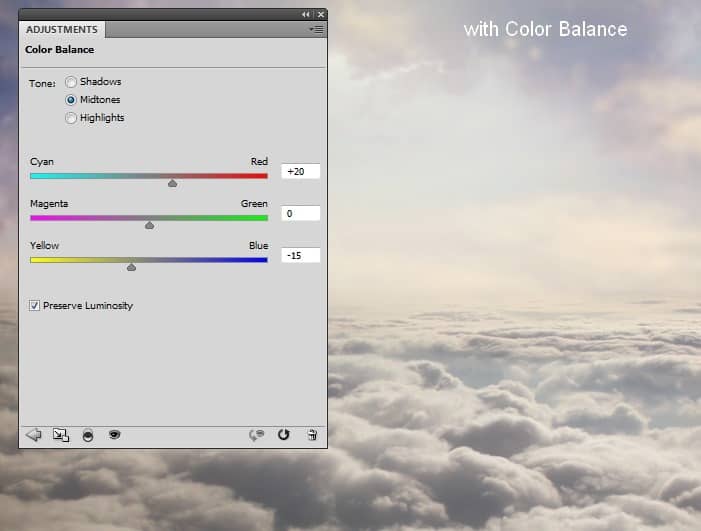
I used Color Balance to add some warm color to these clouds:
Step 11
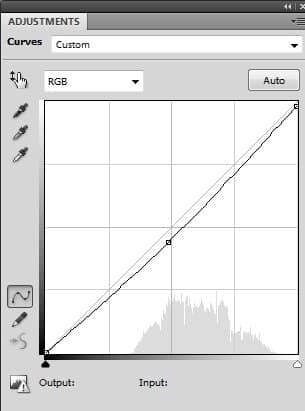
I used Curves to darken the foreground edges a little:
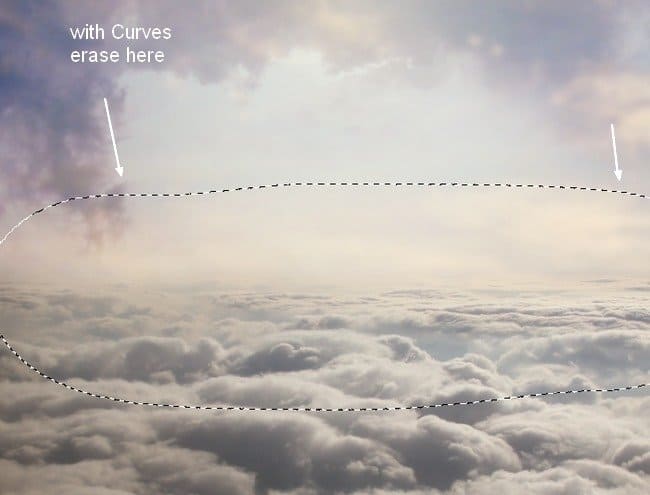
On this layer mask use a soft black brush to erase the part near the horizon (I aim to add light there).
Step 12
Open the images pack contained the boat. Isolate it from the white background and position it at the middle of the clouds:


17 comments on “Create a Fantasy Fish Scene above the Sky”
perfect👍
Thank you for this... I learnt a while lot
Love this Photoshop Tutorial.
Beautiful lesson
can someone please tell me the settings at step 5 ?
kerrreeeeennn....
Very interesting, easy and useful for everyone. Thanks for sharing.
I tried before but not properly.. here is the link of my image
https://www.facebook.com/subalsoralphotography/photos/pb.149123138581845.-2207520000.1413461335./332247193602771/?type=3&src=https%3A%2F%2Fscontent-b.xx.fbcdn.net%2Fhphotos-xpa1%2Ft31.0-8%2F10575186_332247193602771_2526318132910514335_o.jpg&smallsrc=https%3A%2F%2Fscontent-b.xx.fbcdn.net%2Fhphotos-xpa1%2Fv%2Ft1.0-9%2F10670152_332247193602771_2526318132910514335_n.jpg%3Foh%3Dc5a8132b562f38e5bb61a73de1c646e2%26oe%3D54F421B1&size=2048%2C1152&fbid=332247193602771
I am a photographer and want to do something new like this
Has anyone ever tried this? I have CS3 and CS4 can I do this tutorial in either one of these?
I think I know, masking already stated to change on evry enterface ie face! Working with layer manupulation can sort your background too.
I LIKE this tut! Can't wait to give it a try!
I wanted to share a link for goldfishes if anyone is interested:
http://artistengg.deviantart.com/art/Goldfish-Stock-216387973
Su
I just read that this file is to be used only on DeviantArt, so, my apologies!
Thank you for this tutorial fantanstique I had fun doing:
http://cartes-mireilled.eklablog.com/montage-scene-imaginaire-couleur-pastel-a112633738
Nice Tutorial..
очень нежная работа!!!!!!
I l!ke blending, masking, adjsuting colors using CS4 photoshop too, keep us uptodate then,, I like ambigious pictures u know.
do u know any good background changer app?