
Add a mask to this layer and use a hard black brush to erase the bottom of the dress and make her look like sitting inside the boat:

Step 25
I used a Hue/Saturation adjustment layer to reduce the child saturation:

Step 26
Make a Color Balance adjustment layer to add some color to the child:

Step 27
I used Curves to brighten this little girl:

Step 28
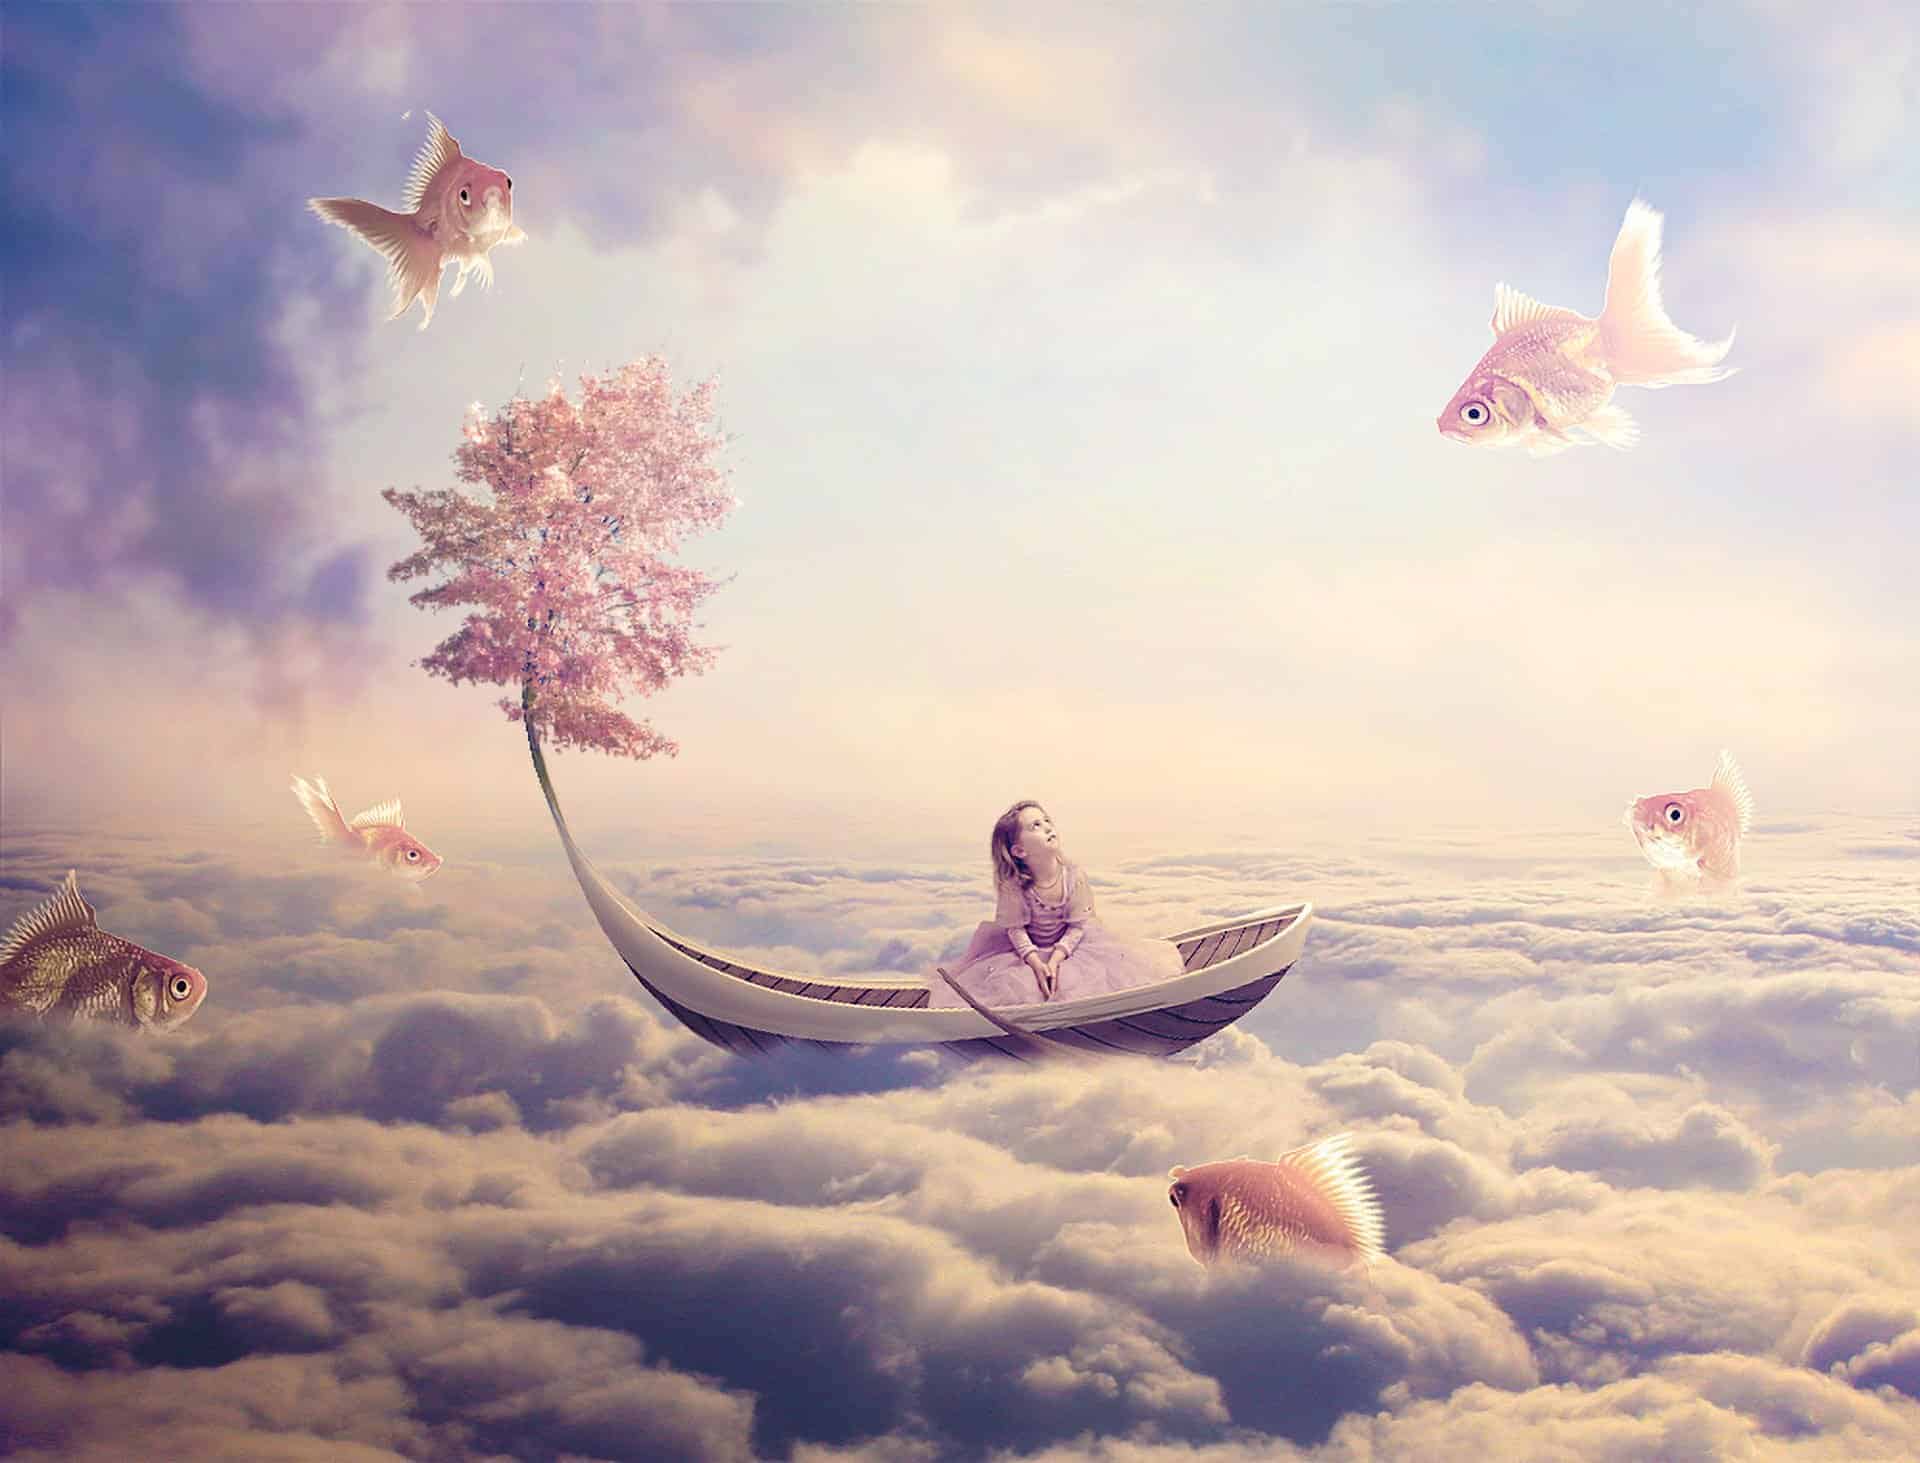
Open the fishes image (feel free to use your own) and isolate them from the white background. Take the fishes you like and arrange them around the boat and girl.

Add a layer mask to the fishes on the clouds. Use a soft black brush to make the fishes look like swimming in these clouds:

Step 29
I used Curves to darken two fishes at the left edge:


Step 30
Make a group for the fish layers and their related ones (Cuves) as done with the tree. Use a Hue/Saturation adjustment for the fishes:


Step 31
Add some color to them with Color Balance:
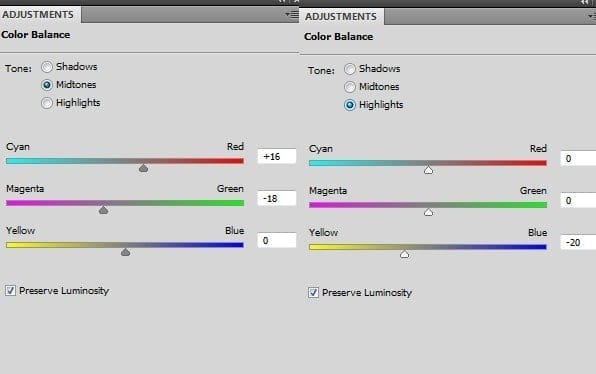

Step 32
Brighten the fishes with a Curves adjustment layer:

On this layer mask apply brushing to decrease the light on some of the fishes:

Step 33
Right click the fishes group, choose Duplicate Group. Right click the duplicated group, choose Merge Group. Now we have the selection of the fishes on a separate layer. Turn it off.

Step 34
Make a new layer on the top. Hold Cmd/Ctrl while clicking the fishes copy thumbnail layer to load its selection:
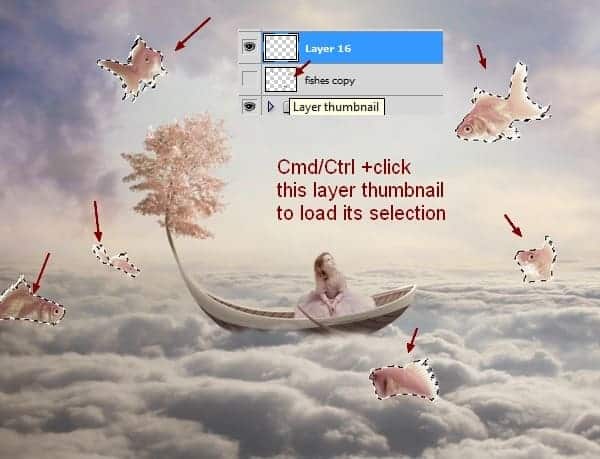
Use a soft brush with the color #ebe7da to paint on some parts of them to create more light there. Change this layer mode to Soft Light 100%:

Step 35
Create a Gradient Map adjustment layer on the top of all layers:
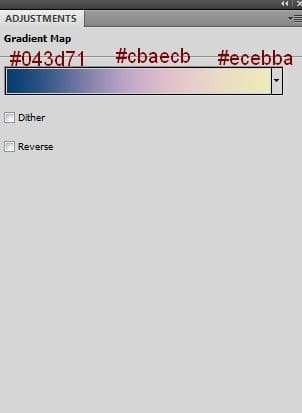
Lower the opacity of this layer to 20% and apply brushing on its mask:

Step 36
Use Color Balance to add some warm color to the scene:

Lower this effect by brushing on the layer mask as shown below:


Step 37
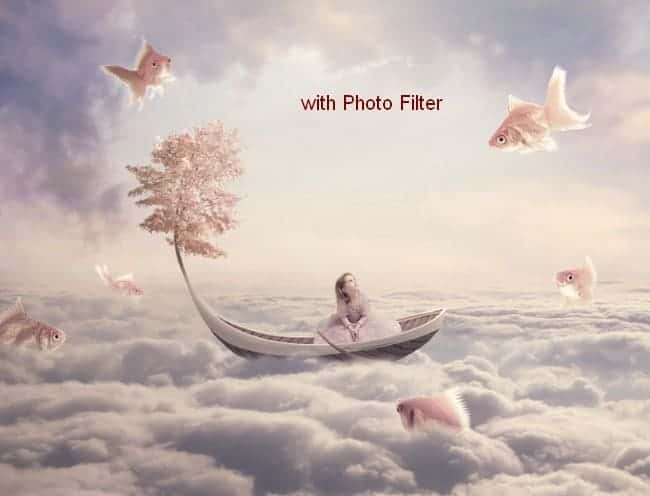
Add two Photo Filter adjustment layers to the top of all layers:

Step 38
To change the light focus, make a new layer, use the Gradient Tool with Radial option and default colors (black and white).
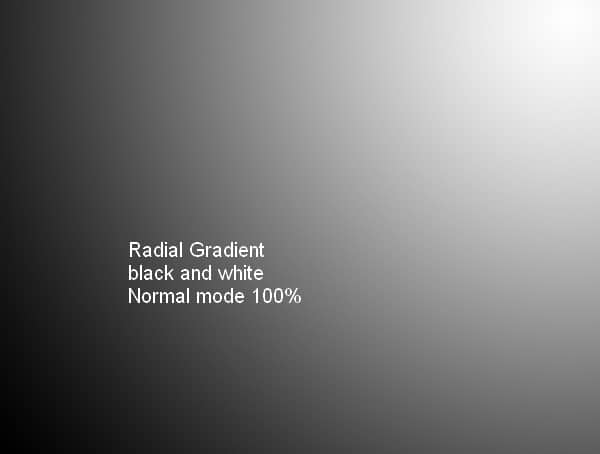
Change this layer mode to Soft Light 100% and use a layer mask to reduce the dark effect on the top left of the pic:

Step 39
Create a new layer and use a soft brush with the color #825111 to paint on the right edge. Alter this layer mode to Color 10% to add more warm color to this area:
17 responses to “Create a Fantasy Fish Scene above the Sky”
-
perfect👍
-
Thank you for this… I learnt a while lot
-
Love this Photoshop Tutorial.
-
Beautiful lesson
-
can someone please tell me the settings at step 5 ?
-
kerrreeeeennn….
-
Very interesting, easy and useful for everyone. Thanks for sharing.
-
I tried before but not properly.. here is the link of my image
I am a photographer and want to do something new like this
-
Has anyone ever tried this? I have CS3 and CS4 can I do this tutorial in either one of these?
-
I think I know, masking already stated to change on evry enterface ie face! Working with layer manupulation can sort your background too.
-
I LIKE this tut! Can’t wait to give it a try!
I wanted to share a link for goldfishes if anyone is interested:http://artistengg.deviantart.com/art/Goldfish-Stock-216387973
Su
-
I just read that this file is to be used only on DeviantArt, so, my apologies!
-
-
Thank you for this tutorial fantanstique I had fun doing:
http://cartes-mireilled.eklablog.com/montage-scene-imaginaire-couleur-pastel-a112633738 -
Nice Tutorial..
-
очень нежная работа!!!!!!
-
I l!ke blending, masking, adjsuting colors using CS4 photoshop too, keep us uptodate then,, I like ambigious pictures u know.
-
do u know any good background changer app?
-

Leave a Reply