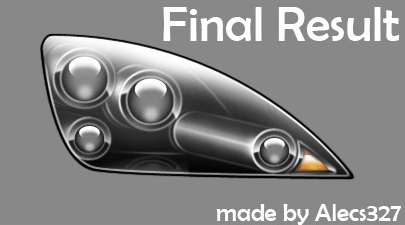
Learn how to paint this headlight that can be used for concept car illustrations. This tutorial will show you techniques such as shading, creating reflections, etc. A high detail PSD download is included with this tutorial.
Preview of Final Results

Paint Concept Art Styled Headlights Photoshop Tutorial
- Program: Adobe Photoshop CS3
- Version: 10.0 Extended
- Difficulty: Intermediate
- Estimated Completion Time: ~20-30 minutes
- Include: A .psd with headlight’s shape A .psd with black circular light A .psd with orange triangle light
Step 1
Create a new file with Transparent Background, and size, the size that you need. In this tutorial I’m using 405px width and 225px height. Take Paint Bucket Tool (G) and fill the background with this color #888888. We start making the shape. The easiest way is to take the car’s headlight, and follow it’s basic lines. So, make a new group and name it Shape. The make a new layer. Pick Pen Tool (P), a green color and having the Brush Tool (B) at 2px, after every completed path stroke it. Then make a new layer and pick a different color, ex. orange, and do the same. Also I’ve included this shape with the tutorial.

Step 2
In this tutorial every selection is made with feather 0.3. Now, make a selection around the headlight, using Pen Tool (P) or Polygonal Lasso Tool (L) or Lasso Tool (L). Create a new group and name it Headlight. In this group make a layer and name it Base. Then pick the Paint Bucket Tool (G) and fill the selection. Now, make a selection like that and having selected the Base layer, go to Layer > Layer New via copy. Go to Blending Options, and at the Inner glow, set these values. Then following the shape make a path like that, using Pen Tool, and stroke it having the Brush at 2px, and a light grey color. Take the Erase Tool (E) with a big size and the hardness 0%, and erase it a bit. Then, low the layer opacity at about ~ 80%. Now, make a new layer, and do the same for the other line. Make a selection like that on headlight’s bottom, and having a non-hardness brush at a big size, fill it a bit, with a light grey color. If is needed low the layer’s opacity.

Step 3
So it’s play time ! Let’s start by making a new group. Name it Lamp1. Create a new layer, and make a selection like that, following the initial shape, and fill it with black color. Having picked the Polygonal Lasso Tool (L), right click on the lamp, and click on Reselect. Create a new layer and having a non-hardness brush, make a point like that with #FFFFFF color. Then pick the Smudge Tool (R), and smudge it until it’ll be aproximately like this. Low the layer’s opacity at 59%.


Leave a Reply