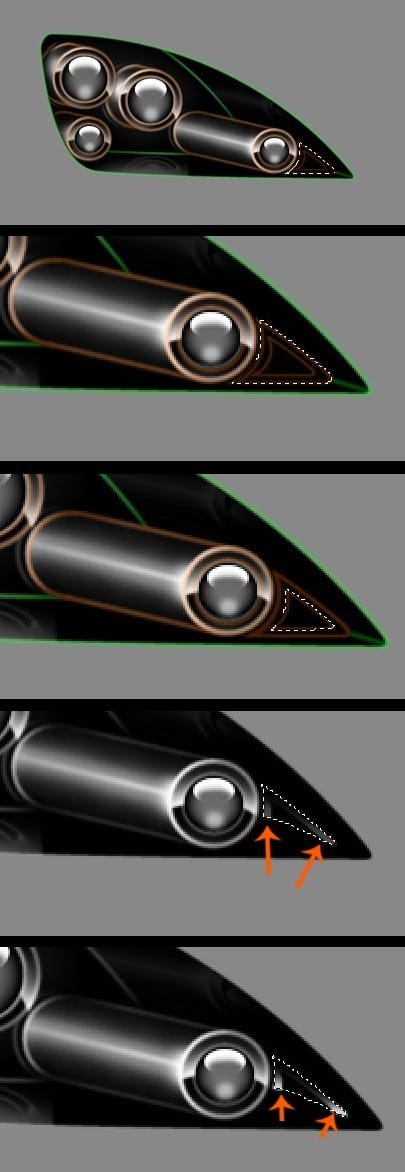
Step 14
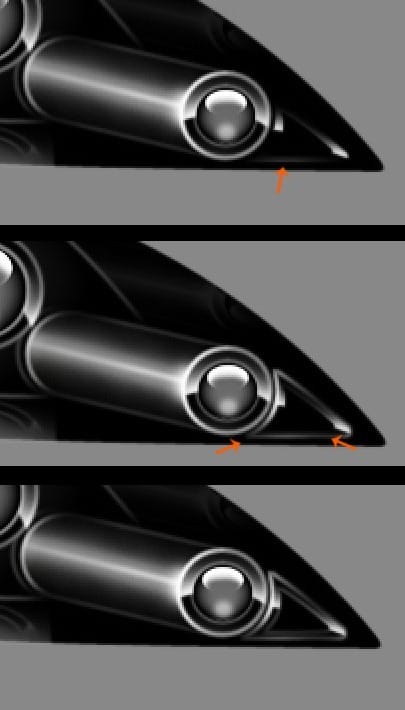
Create a new layer, reselect the blinker, and having the same brush and white color fill a bit the selection from the bottom. Then low the layer’s opacity at about ~30%. After that, reselect the blinker, and create a new layer. Go to Edit > Stroke, and stroke it with 2px, white color, and location Center. Use Erase Tool, like I did. Then reselect the small triangle, and create a new layer. Go to Edit > Stroke, and stroke it with 2px, white color, and location Center. Low the layer’s opacity at about ~21%.
Step 15
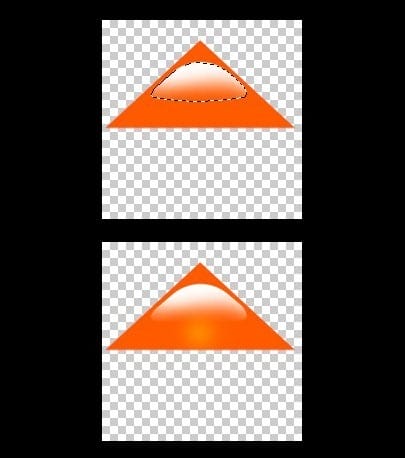
Create a new file with dimensions 200×200 and Transparent Background. Make a triangle selection, create a new layer and fill it with orange #FF5A00 color. Go to layer’s Blending Options, at Inner Glow, and set those values. Te Inner Glow’s color is #FFB400

Step 16
After that, create a new layer, and make a selection like this. Pick the Brush Tool, white color and having a non-hardness brush at about ~100px, fill it smoothly from the top. Then, create a new layer and with a ~50px non-hardness brush and white color, make a point in the triangle’s bottom, ste the layer at Overlay and low the layer’s opacity at about ~49%. Merge all these layers, select the triangle, and copy it.
Step 17
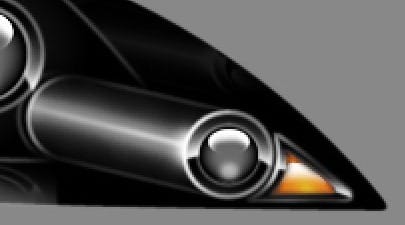
Now, returning to the blinker, select the small black triangle, that you have created previously, and go to Edit> Paste Into. Immediately go to Edit> Transform, and play there until it fits perfectly in the triangle. After this step you’ve finished the blinker.
Step 18
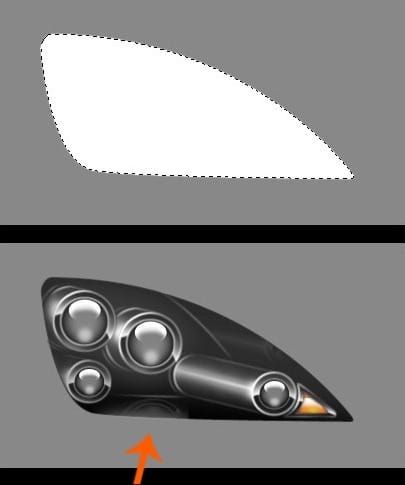
It’s time to make the glass. Create a new group and name it Glass. Create a new layer, make a selection around the whole headlight, and having white color picked fill it. Low the the layer’s opacity, at about ~17%, and pick the Erase Tool, with a big non-hardness brush, and erase a bit on the bottom.
Step 19
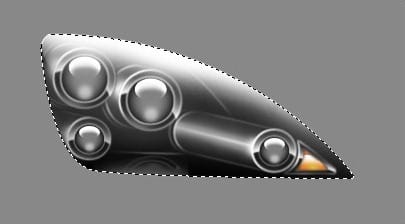
Then, reselect the headlight, create a new layer, and having picked a big non-hardness brush and white color, fill it on the top, like I did.
Step 20
Finally, create a new layer, reselect once again the headlight, and go to Edit > Stroke. There set these values, respectively, Stroke : 2px, color white, Location : Inside, and after that, take Erase Tool and erase it a bit and smoothly. Then create for the last time a new layer, reselect the headlight, go Edit > Stroke. There set these values, respectively, Stroke : 2px, color black, Location : Outside. Now, you’ve finished a brushed car headlight. I hope that this tutorial helped you. Good Luck !


Leave a Reply