

Luminar AI lets you turn your ideas into reality with powerful, intelligent AI. Download the photo editor and see how you can completely transform your photos in a few clicks.

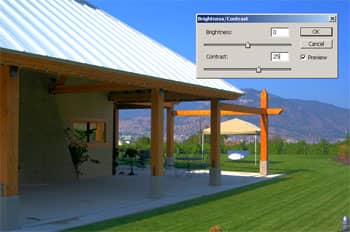
Step 10
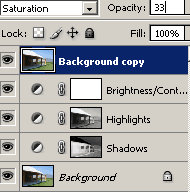
Duplicate (Ctrl+J) the Background layer and move it to the top in the Layers pallet. Change the blending mode to Saturation and adjust the opacity to adjust the strength of this layer.
Final Results
Before and After
Rollover the image below to see the before and after effect.

Shadows/Highlights tool vs. Faux Dynamic Range Increase
Rollover the image below to see the difference between the two techniques.

The Shadow/Highlights tool produces lower quality results with halos between high contrast edges.