
From a simple sketch to full blown colored artwork you will learn how create an Illustration of a Sleeping Moon. A drawing tablet isn’t necessary for this tutorial but it can make things go little smoother. Before I touch Photoshop I draw a series of sketches for my Moon design and select the best one I like. In the creation of my sketch I research real moons as well as other illustrations of moons from various artists. This is only to build up ideas on how I want my moon to look. You can draw your own sketch or right click and save the one I made and place it in your Photoshop canvas.
Final Results
Tutorial Resources
Step 1
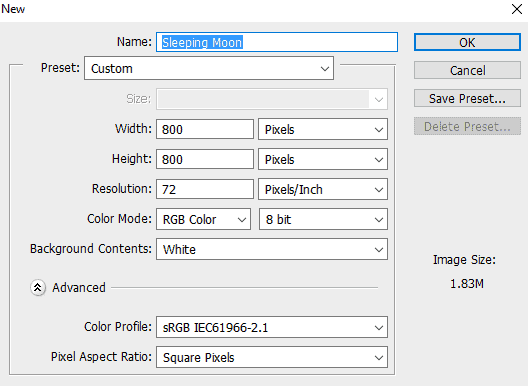
Open Photoshop and create a new document, it can be 900 x 800 pixel 72 dpi like mine. Make sure your sketch is centered in the middle of your canvas.
Step 2
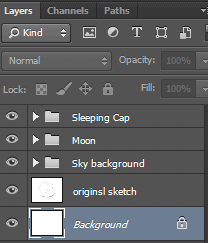
In your layers menu create 3 groups. Rename the first group “Sky background”, the second group “Moon” and the third group “Sleeping Cap”. This just to help keep things organized for our design.
Step 3
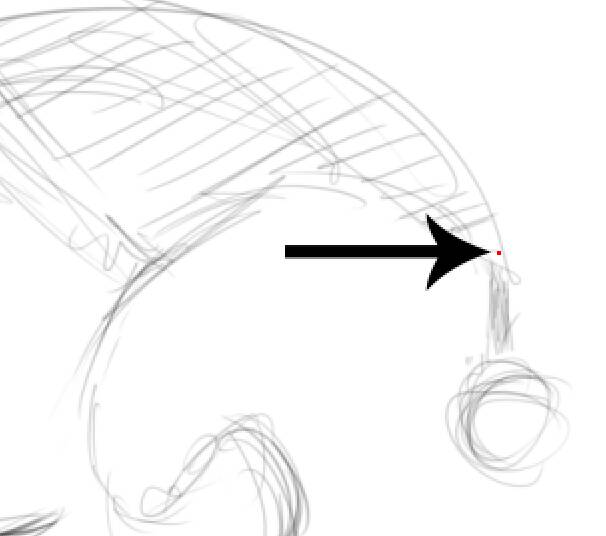
If you’re really knowledgeable with the Pen Tool then this part and many others parts should be breeze for you. Select your Pen Tool (P), make sure your fill color is set on yellow (#ffff00). Click on the top outer edge of the moon as you see in the image below. This will drop an anchor point.
Doing this automatically creates a new layer for you. Now before doing anything else we’re going to bring the opacity down to 40%. Doing this will make it easier to see the sketch below it for us to trace. And also double click your layer and rename it “Moon”.
Step 4
Now what we’re going to do is select the top left part of the moon to make a curve. Click and drag out our anchor point to curve it. Now hold down Alt + Click Hold which will change you Pen Tool into the Convert Point Tool. And drag the left control handle back into the anchor. You’re going to do this for every new anchor the moon.


Step 5
Continue to trace around the edges.

Step 6
Now its time to breath more life into our crescent moon and give it some lighting and shading using our “Blending Options”. Double click or right click the moon layer and select Blending Options. Set the Bevel and Emboss settings to the same settings in the screenshot below.
Leave a Reply