Luminar AI lets you turn your ideas into reality with powerful, intelligent AI. Download the photo editor and see how you can completely transform your photos in a few clicks.
Learn how to create a super cool illuminated text effect using Photoshop's 3D Layers. We'll make your text really stand out by making it glow. Read on to find out how.
What you'll be creating
In this tutorial we are going to create a super cool illuminated text effect using Photoshop's 3D Layers. The key to making your Layers glow lies in exploring the hdr based Illumination property, and in providing another item mesh from which light can then be reflected. Firstly we'll be creating 3D layers from Text and then merging 3D layers to create a single unified scene. Once we've done that we'll create a wireframe, adjust the UV Scale and wrap and then work with roughness and reflection to get the glow effect just right. You'll need Photoshop CS6 or newer to follow this tutorial.

Step 1
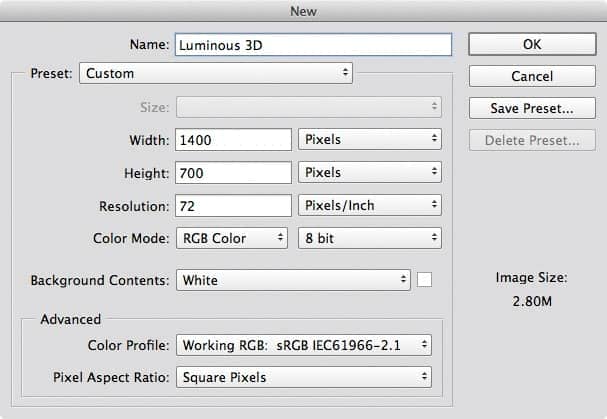
Use Cmd / Cntl +N to create a new document. In the dialog box, set the following properties: Width x Height: 1400 x 700 pixels Color Mode: RGB Background Color: White
Step 2
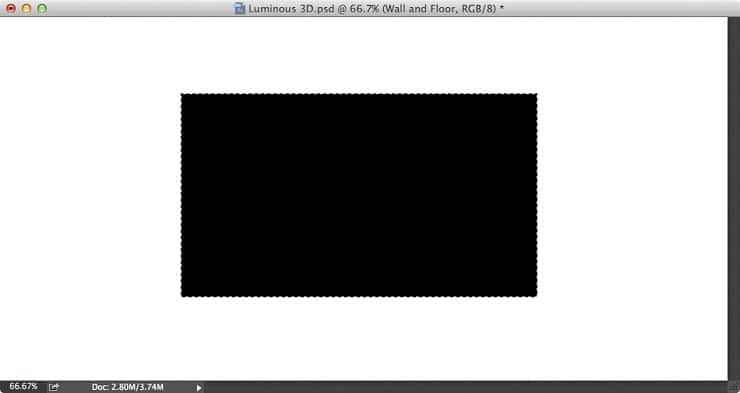
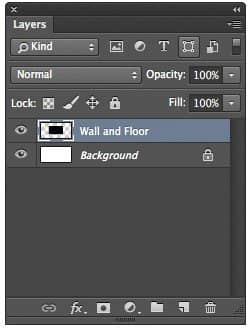
First we'll create the background environment for our scene a simple 'L' shaped profile. Use the shortcut Cmd/Cntl + Shift + N to create a New Layer. Name it 'Wall and Floor'. Select the Rectangular Marquee tool (M) and draw a rectangle shaped selection, centred in the canvas. Press 'D' to reset the toolbox colors and use the shortcut Alt. /Option + Backspace to fill the selection with black.
Step 3
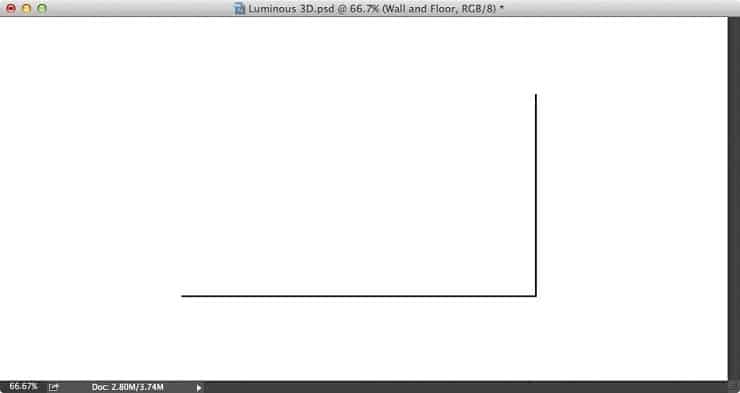
Use the keyboard arrow keys to nudge the selection 3 pixels up and 3 pixels left. Press Backspace to delete the selected area, and use the shortcut Cmd / Cntl +D to drop the selection
Step 4
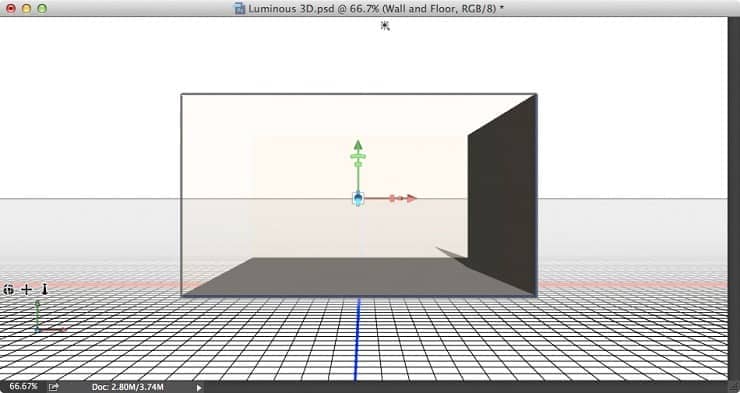
Next we'll turn the L shaped profile into a 3D Extrusion. Go to the 3D menu > New 3D Extrusion from Selected Layer command:

Step 5
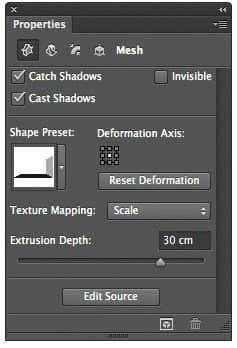
The initial 3D extrusion will need a little more depth. Go to the Window menu > 3D Panel and select the Mesh item in the list. In the Window menu > Properties Panel, increase the Extrusion Depth slider to 30 cm:
Step 6
We'll now add some text as another 3D Layer. Select the Type Tool (T) and click on the document to create a Text Layer. Set the character attributes and colour using the Options bar. In our example, we've used the font Chalet Tokyo, 200 px size and colour R0 G0 B0. Enter your text and press Cmd / Cntl + Enter to create the Type Layer



7 comments on “Create Luminous Text Using Photoshop 3D Layers”
you didn't explain how to even make those lines in step 3.
Those lines are created from the rectangle. You should already have a selection of the rectangle. Press UP and LEFT 3 times, and then Backspace/Delete and you should get the two lines.
i cant find the 3d menu
nice tutorial, but you need to be more clear, when i zoon in my text gets pixelated. from step 11 to 18 i´ve followed every steps but i didn´t get the same results, hope you help me
It's an OK tutorial, but you need to cover everything you do. In step 6 I had no idea how to the lighting. In step 5 you used centimeters you need to clear up for others
I can't get access to the page anymore
I found an issue with tutorial. In my color picker settings I cannot find the intensity options (I have photoshop 6.1.1). Help would be appreciated