Make your artwork look like they're from an alternate universe. These Cyberpunk presets work with Photoshop (via the Camera Raw filter) and Lightroom. Download all 788 presets for 90% off.
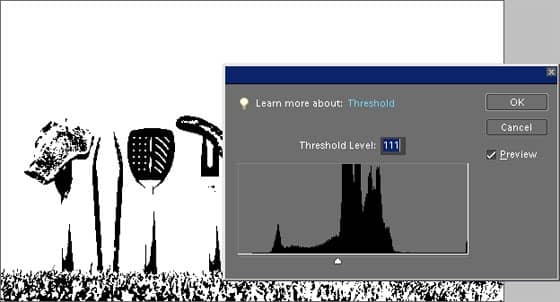
Step 11: Create a selection of the whites
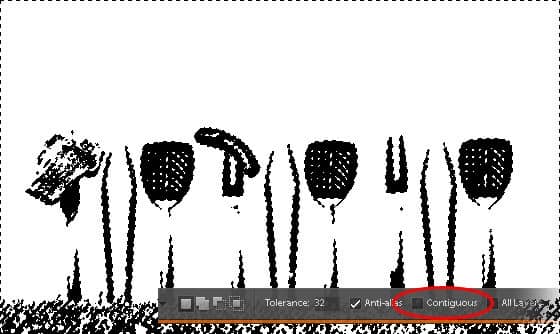
Select ![]() from the toolbar on the left. In the options bar on the top, uncheck the Contiguous option. Click on any white area in the image. You should now have a selection of the white areas of the image.
from the toolbar on the left. In the options bar on the top, uncheck the Contiguous option. Click on any white area in the image. You should now have a selection of the white areas of the image.
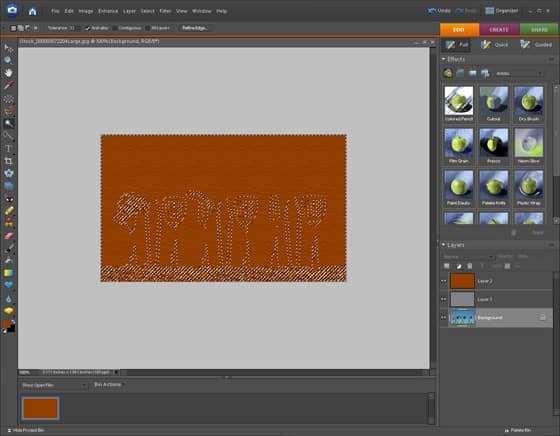
Step 12: Delete the current layer and make the two hidden layers visible
Delete the Background copy layer then click on the visible option on the left of Layer 1 and Layer 2 to make them visible. There should be two ![]() beside Layer 1 and Layer 2 to indicate that they are visible.
beside Layer 1 and Layer 2 to indicate that they are visible.
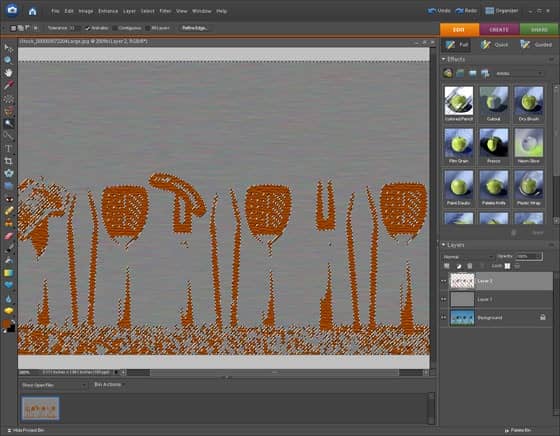
Step 13: Select Layer 2 then delete the selected area
Select Layer 2 then choose Edit > Delete to clear the selected area. Then, choose Select > Deselect to remove the selection.
Step 14: Add lighting effects
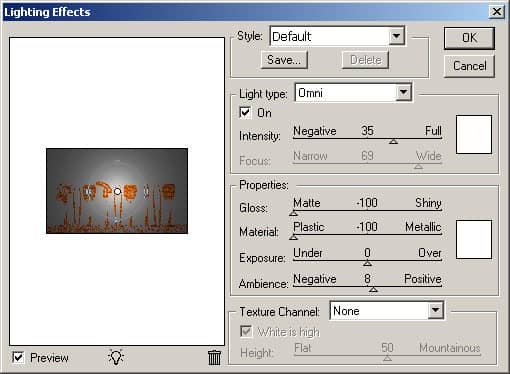
You now have a metal and rust artwork but it looks flat. To make the work look more realistic, we'll be adding lighting effects. Select Layer 2 with the rust texture then choose Filter > Render > Lighting Effects. Copy the settings from the image below then click OK.
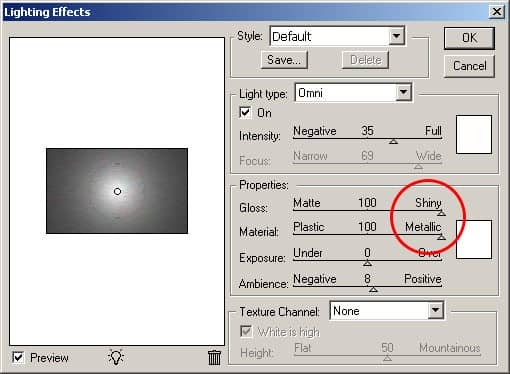
Select Layer 1 with the metal texture and choose Filter > Render > Lighting Effects. It should load the settings used previously. Change the gloss and material setting to 100 then click OK.
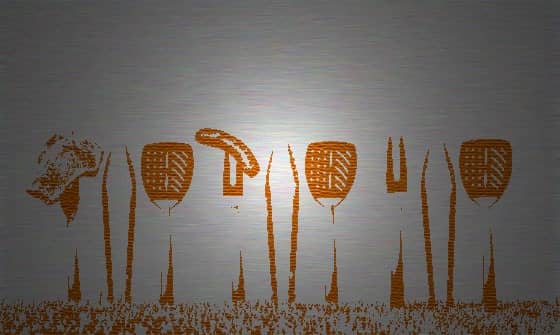
Metal Rust Art Final Results

One comment on “Rusted Metal Art”
good tutorial