

Step 12
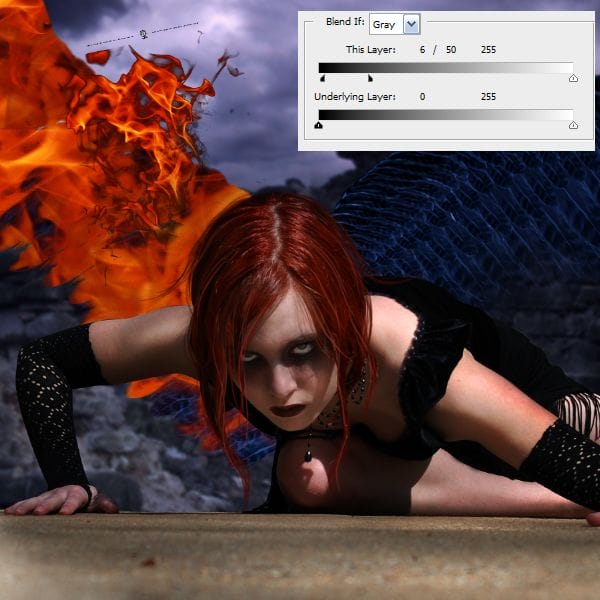
Just underneath the layer with the flame set on screen blending mode, you can paint with a low opacity black color to create more dimension and lessen the transparency.

Step 13
Just add more flames around the wing.

Step 14
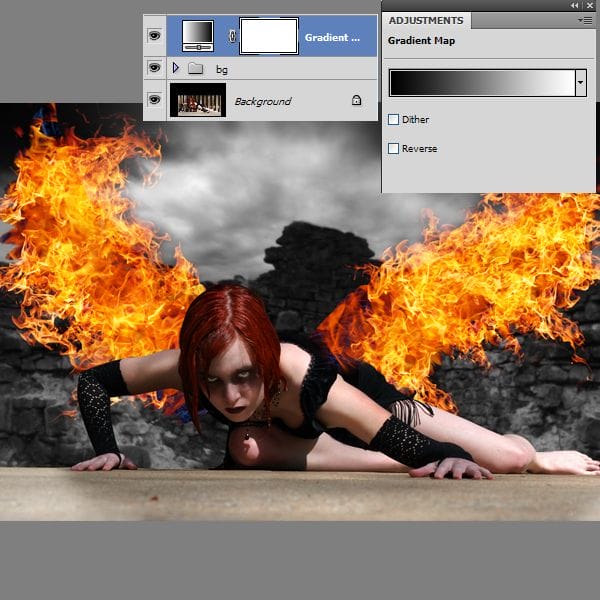
When you have something you like, and most of the dark wing is hidden, flatten all the flame layers (or group them) and duplicate it. Use Transform and Flip Horizontal on the copy layer and arrange it. This will look too symmetrical, but it’s a good shortcut and we will fix the symmetry in a second by adding more flames.

Step 15
For a better contrast i used a normal black/white Gradient Map –Adjustment Layer just above the background folder containing my wall and sky stock.

Step 16
Don’t forget to add flames over the model layer so it wont look static and fake. I used some small flames over her hand but under the painted hair layer and over her back. I used layers on screen blending mode. Add flames one on top of the other to create a more accentuated fire.

Step 17
Create a new layer and paint with an orange color over the model’s skin to create the bright light coming from the fire. Then set this layer to Overlay blending mode.

Step 18
Add some fire debris using the brush i created for you (download). Just choose an orange color and paint around the flames. If you create too many particles, just create a layer mask and brush some away.


Step 19
Add more contrast using a curves adjustments layer.

Step 20
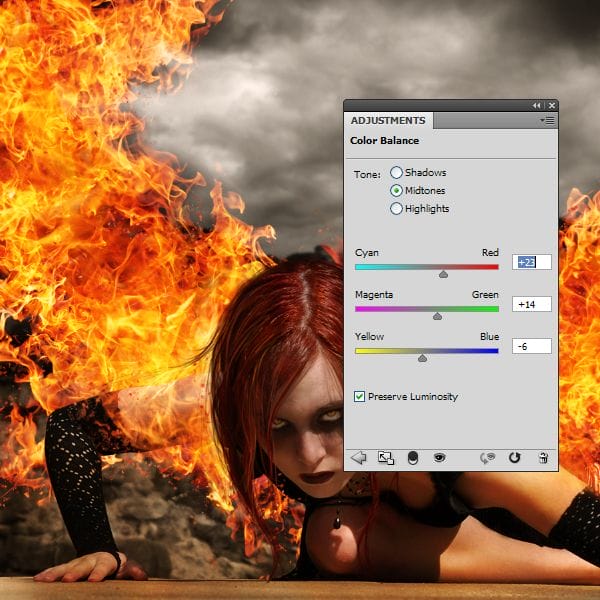
In this step we’ll add some adjustment layers so our composition will blend in well. First go to Adjustment Layers –Color Balance twice. Make the presets like you see in the images below.


Adjustment Layers –Levels.

Layers > New Adjustment Layer > Gradient Map. (opacity at 40 %).

Step 21
Create a new layer and select the brush tool. Add some black shadows in the corners. If it’s to dark , decrese the layer’s opacity.

Step 22
Go to Filter > Blur > Radial Blur and and make the presets like in the image below. We’ll use this on the edges.

Step 23
Next go to Filter > Sharpen > Unsharp Mask. (see the presets below).

Step 24
This is optional. Add a texture to her face so it will look more dark.
9 responses to “Create an Intense “Wings of Fire” Photo Manipulation”
-
Great tutorial. thanks
-
Hi my is Ebrahim zarghoon i wont which you show me how can macked like you photos in photoshop thangs
-
thanks sir, for your tutorials really its wonderful. with hope that you will give us more tutorial.
thank you once again -
Really a nice work hope you will uplode more in the future.
-
Hello Loredana Papp,
You are simple Awsome. I don’t have words to praise you. I become a huge fan of yours now. Thanks again for sharing your wonderful and creative art :)
-
Very interesting, I Love this tutorial!
-
Awesome!!! Wings of Fire” Photo Manipulation
Thanks -
u rock its reallly nice concept ( flaming wings )…really nice work
-
Model – rammkitty-stockBackground – ro-stock
dosnt exist :(


Leave a Reply