Make your artwork look like they're from an alternate universe. These Cyberpunk presets work with Photoshop (via the Camera Raw filter) and Lightroom. Download all 788 presets for 90% off.
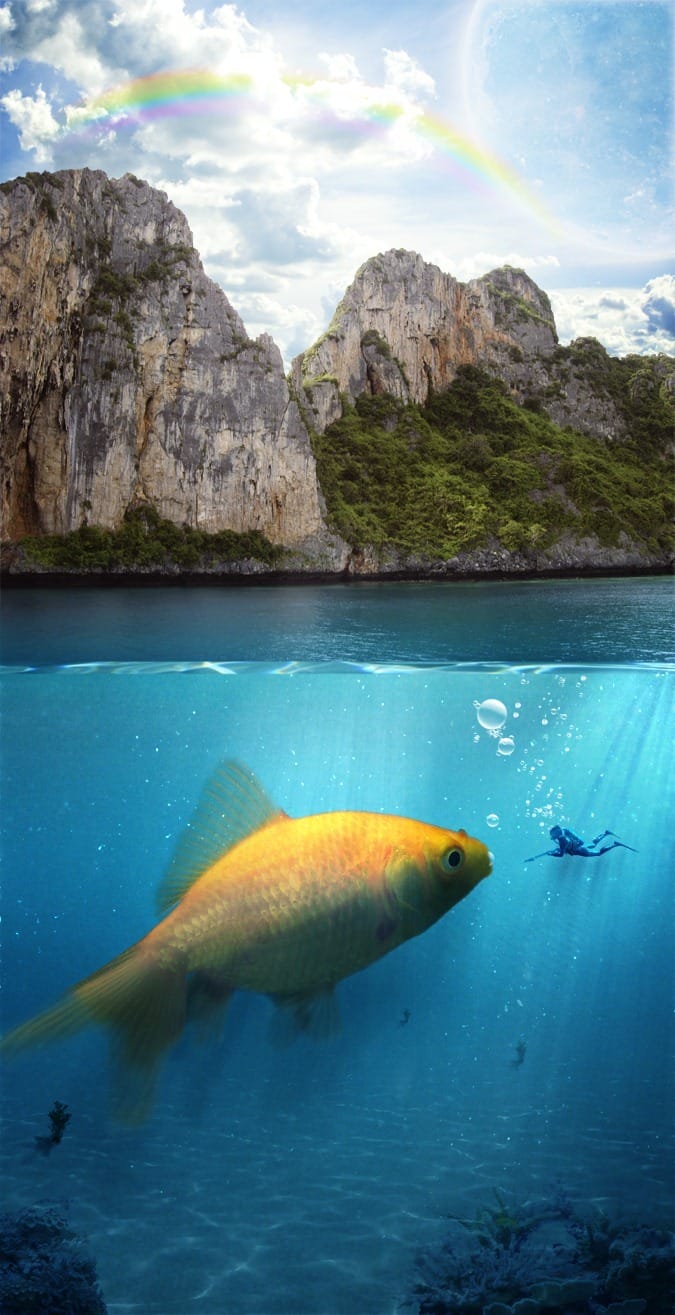
In this tutorial we will create a cool underwater scene with a big fish. We will use some basic selection tools and adjustments to achieve a great result.
Preview of Final Results

Tutorial Resources
Sky(Alternative)- Moon
- Underwater
- Fish
- Plants Pack
- Coral
- Diver
- Island Pack
Water Caustics(Alternative)- Light Brushes
- Bubbles Brushes
Step 1
Create a new document 2150x4187px.

Step 2
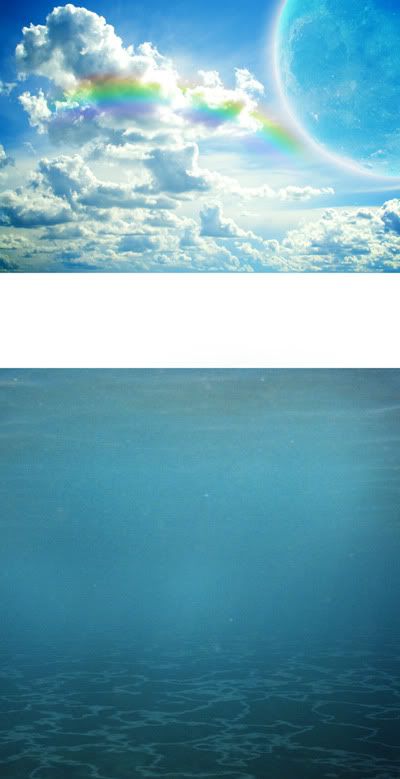
Open file “Sky” and select all (Ctrl + A). Copy all (Ctrl + C) and paste into our document (Ctrl + V). Press Ctrl + T to Free Transform and position the document like shown below.

Step 3
Open file “Sky” and using the Elliptical Marquee Tool make a selection of the moon.

Step 4
Copy and paste it into our document. Press Ctrl + T to Free Transform the moon like in the image below. Change the layer blend mode to Overlay.

Step 5
Double-click the moon layer to enter Advanced Blending options and add the following styles to make the moon look more realistic.

Step 6
Duplicate the moon layer by pressing Ctrl + J and Ctrl-click on the layer to make a selection of the moon. Fill this selection with black (with black as foreground color press Alt + Backspace) and apply a 250px Gaussian Blur. Change the layer blend mode to Multiply and lower the Opacity to 23%.

Step 7
Add a Curves Adjustment layer and change the Blue and Red channel as shown below. This step will add a nice blue hue to the image.


Step 8
In this step we will create the rainbow. Create a new layer and using the Rectangular Marquee Tool create a selection like shown below.

Step 9
Select the Gradient Tool (G) and in the upper toolbar double-click to open the gradient editor.

Step 10
To replicate a rainbow colors add the following colors in the gradient editor: red, orange, yellow, green, blue, indigo, magenta. When you are finished press OK.

Step 11
Hold Shift and drag with the Gradient Tool in the selection you created at step 8. Press Ctrl + D to deselect and proceed to next step.

Step 12
Use the Eraser tool to erase the margins of the gradient and apply a 20px Gaussian Blur.

Step 13
With the rainbow layer selected press Ctrl + T to enter Free Transform. Right-click on the rainbow and choose Warp. From the upper drop down menu select Arch.

Step 14
You can see the results of our transformation below. Now it starts to look like a real rainbow.

Step 15
Change the rainbow layer blending mode to Color and lower the Opacity to 37%. Place the rainbow closer to the moon like shown below.
Step 16
Open file “Underwater” and select all (Ctrl + A). Copy then paste into our document. Use Free transform to resize and position the layer like shown below.

Step 17
Paste the “Underwater” file again by pressing Ctrl + V and resize it like shown below.

Step 18
Add a layer mask (Layer > Layer Mask >Hide All) and using a round white soft brush at 30% Opacity paint in the layer mask to reveal some of the center area of this layer.

Step 19
Add a Curves Adjustment layer and drag the curve downwards to darken the scene. But because we want to apply this effect selectively we will mask some of the darkening effect in the next step.

Step 20
Press D to set default colors and select the gradient tool (G). Click on the layer mask than hold the Shift key and drag from bottom part towards the upper part. This will darken the bottom of the sea and will make the underwater scene look more realistic because if you look at underwater scenes you will notice that the part near the bottom of the sea it is darker.

Step 21
In this step we will create the caustic reflection of water on the bottom of the sea. First create a new layer (Ctrl + Shift + Alt + N) and choose Filter > Render > Clouds. Make sure you have default colors set (press D to set default colors).

Step 22
With the same layer selected choose Filter > Render > Difference Clouds. This step will give us this interesting effect shown below.

Step 23
Press Ctrl + I to invert the colors because we want our underwater reflection to be white.

Step 24
Let’s increase the contrast a bit and make the caustic water reflection more pronounced. Add a Curves adjustment by choosing Image > Adjustments > Curves and drag the left slider towards the center.

Step 25
As you can see in the image below the effect looks much cleaner. This image could also be used to create Lightning effects. If you want to create Lighting effects in your other projects simply change the layer blend mode to Screen and the black parts will disappear leaving you with a nice Lightning effect. After that simply add a layer mask and hide the unwanted parts. But let’s continue with our underwater scene and proceed to the next step.

Step 25
Change the layer blend mode to Soft Light and press Ctr + T to enter Free Transform. Resize and position this layer like shown below and press Enter after your finished. Starts to look better and better, ehh?

Step 26
Add a layer mask (Layer > Layer Mask > Reveal All) and with a black round soft brush at 80% Opacity gently mask away the upper edges to make the reflection fade away in the distance and blend it seamlessly with the scene. Remember, in scenes where you want to achieve realism hard edges are your enemy, especially if you are doing nature scenes.

Step 27
Open file “Fish” and using your favorite selection tool make a selection of the fish. Copy and paste this selection into our document. Position the fish like show below and using layer mask or the Eraser Tool at 50% Opacity partially erase the tail and the upper membrane. Fish membranes are usually semitransparent so this step will bake the fish blend with the scene better.

Step 28
Duplicate the “Fish” layer and Ctrl-click on the layer to make a selection. Fill this selection with black and press Ctrl + D to deselect. Apply a Motion blur to this layer to mimic the shadow below the fish.

Step 29
Change the blend mode of this layer to Multiply and lower the Opacity to 56%. Add a layer mask and erase all the unnecessary parts (the areas above the fish) by painting with a round soft black brush tool at 100% Opacity.

Step 30
In our scene the light is coming from the upper left side so let’s add some lights and shadows to our fish to make him integrate into the scene. We will add some darkness first. Add a Curves Adjustment Layer and modify the curve like shown below.

Step 31
Add another Curves adjustment layer and modify the curve like in the image below. This will further darken the scene.

Step 32
Now for the lightness part add a Curves Adjustment layer but this time drag the curve upwards to lighten the scene.

Step 33
Now that we have the lightness and darkness layers created simply fill all their layer masks with black. Next select a round soft white brush at 80-100% Opacity and start painting in the layer mask to reveal the desired effects. Paint with white in the layer mask of Lighten layer to add light to the scene and paint with black in the layer mask of Darken1 or Darken 2 to add darkness to the scene. This step it is more about experimenting and trusting your inner artistic eye than about precise adjustments. You can see the results I achieved below but don’t worry if you don’t have the same result. Just keep on experimenting until you achieve the effect you desire.

Step 34
As a final step to color correct the fish let’s add a Hue/Saturation Adjustment layer and decrease the saturation a bit.

Step 35
Obviously we will take advantage of the layer masking and so we will apply the desired effect selectively. Fill the layer mask of the Hue/Saturation Adjustment Layer with black and using a white round soft brush tool at 50% Opacity paint the bottom part of the layer to make this effect visible just in the lower part of the scene.
![image037[1] image037[1]](https://cdn.photoshoptutorials.ws/images/stories/607466939882_14168/image0371.png?strip=all&lossy=1&quality=70&webp=70&avif=70&w=1920&ssl=1)
Step 36
Let’s add some aquatic plants to increase the scene’s variety. From the aquatic plants pack select a plant you like then copy and paste it into our scene. Resize the plant and place it on the bottom of the sea. Change the layer blend mode to Multiply.

Step 37
Duplicate the plant layer and Ctrl-click on it to make a selection. Fill this selection with black (with black as foreground color press Alt + Backspace) and use Free Transform to resize and position the shadow to the left of the plant. Change the blend mode to Multiply and lower the Opacity to 79%.

Step 38
Add a layer mask to the shadow layer (Layer > Layer Mask > Reveal All) and using a black round soft brush at 80% Opacity mask away the outer edges of the shadow.

Step 39
Group the plant and the shadow layer (Ctrl-click on both layers and press Ctrl + G). Duplicate this group a couple of times (Layer > Duplicate Group) and place the newly created plants and shadows like shown below. Lower the opacity of the plants that seem further away.

Step 40
Because the lower part of our scene seems empty let’s add some corals. Open the file “Corals” and select a coral you like. Copy then paste into our scene. Resize the coral as in the image below than change the blend mode to Multiply. Use the Eraser tool or paint with black in the layer mask to soften the hard edges.

Step 41
Repeat the step above but this time select another coral for variety.

Step 42
Open file “Diver” and using the Ctrl-click an the background layer to load a selection of the diver. Copy and paste into our document. Use Free Transform (Ctrl + T) to make the diver small and place him in front of the fish. Change the layer blend mode to Overlay. With every small element added the scene look better.

Step 43
Repeat the process from steps 28-29 to create a shadow underneath the diver.

Step 44
Use Winrar or 7zip to unpack the “Island Pack” somewhere on your hard drive. Open the file “SNV32362.JPG”. Make a selection of the island and the sea using the Quick Selection Tool and press Ctrl + J to make a new layer from selection. As you can see the Quick Selection tool did a pretty good job so in the next step we will place the island in our scene.

Step 45
Copy and paste the Island selection into our scene then use Free Transform to position it like shown in the image below. Add a layer mask (Layer > Layer Mask > Reveal All) and with black as foreground color create some jagged edges in the upper left part of the mountain using the standard Chalk brush tool or another hard edged brush.

Step 46
Open file “Water Caustics” and using the Rectangular Marquee Tool make a selection like shown below.

Step 47
Copy and paste the selection into our document. Use the Free Transform to resize and position the selection like shown below. Apply a 5px Gaussian Blur to this layer to make it blend seamlessly with our scene.

Step 48
First create a new layer.Then use the Preset Manager to import the Light brushes and with a light of your choice create a light above the fish and a light above the diver. To each light add a layer mask (Layer > Layer Mask > Reveal All) and using a black round soft brush at 100% Opacity hide the unwanted parts. Try to achieve something like the scene shown below. You can change the light layers blend mode to Linear Light or Color Dodge and lower the Opacity to 60-70%.

Step 49
Create a new layer and import the Bubbles Brushes. With white as foreground color paint some bubbles at various sizes coming from the fish mouth and around the diver. Obviously the bubbles should be smaller above the diver and bigger above the fish.

Step 50
The element that will define the underwater scene will be debris. Notice various underwater pictures and look at the amount of debris (plankton, dirt, little white spots) floating. We will try to replicate that effect in our scene.
To do this we will first create a new layer and fill it with black. Than we will add some noise (Filter > Noise > Add Noise).

Step 51
You can see the result of the noise filter below. In the further steps we will further increase the contrast.

Step 52
Add a 5 px Gaussian Blur (more blur means bigger debris) to the debris layer.

Step 53
Add a Curves Adjustment to make the white debris pop and darken the rest (drag the left and the right slider towards the middle until you obtain something like a star field).

Step 54
Change the debris layer blend mode to Color Dodge and voila, you have debris. Now you should add a layer mask (Layer > Layer Mask > Reveal All) and with a black round soft brush hide some of the debris and try to achieve randomness. Remember to show more debris in the lighted areas and hide it more in the dark areas. And of course don’t let the debris floating above water level.

Step 55
After you’re done masking the first layer of debris you can repeat the steps 34 to 36 to create additional debris layers. To achieve larger debris simply increase the amount of Gaussian Blur you apply at step 35. After you’re done adding the debris layers right click on each debris layer and choose Convert To Smart Object. Then apply a 2-4px Gaussian Blur.

Step 56
In Smart Filters Layer mask (not the Layer Mask) use a black round soft brush to hide some of the blurring effect. All in all try to achieve randomness.

Step 57
The scene element are all in their place so it’s time for the post processing techniques. Add a Curves Adjustment layer and drag the curve upwards to lighten the scene.

Step 58
Set the default colors (D) and using the Radial Gradient Tool drag from the top of the image towards the bottom to apply the Curves effect only to the upper half of the scene. You can see how my layer mask looks below.

Step 59
You can see that the above adjustment make the scene looks better. But we will not stop here. Let’s proceed to the next step and further refine our scene.

Step 60
Add a Curves adjustment layer but this time drag the curve downwards to darken the scene.

Step 61
Fill the layer mask with black (select it and with black as foreground color press Alt + Backspace) and with a white round soft brush tool reveal the darkening effect to the left and right sides of the scene. Take a look at my layer mask below.

Step 62
And that’s the result of two steps above. The difference may not be very noticeable but in my opinion subtle effects and details make a scene better.
![image062[1] image062[1]](https://cdn.photoshoptutorials.ws/images/stories/607466939882_14168/image0621.png?strip=all&lossy=1&quality=70&webp=70&avif=70&w=1920&ssl=1)
Step 63
To increase the contrast of the mountains and the sky add a Gradient Map adjustment layer and select the default Black to White Gradient.

Step 64
Change the layer Blend mode to Soft Light and lower the Opacity to 60%.
Step 65
In the layer mask use the Linear Gradient Tool to limit the effects of this layer to the upper part of the scene. Take a look at my layer mask below. Remember that in a layer mask white reveals and black conceals.

Step 66
And here is how the image is looking now.

Step 67
To shift the hue to a cooler blue add a Color Balance Adjustment layer and use the settings shown below.

Step 68
Here is the effect of Color Balance Adjustment from above.

Step 69
Add a Hue/Saturation adjustment layer and drag the saturation slider towards left to decrease the saturation.

Step 70
Use the Linear Gradient Tool in the layer mask to limit this effect to the lower part of the scene (where the bottom of the sea it is supposed to be).

Step 71
Below is the effect of the Hue/Saturation Adjustment layer we did in the steps above.

Step 72
The surface of the sea seems a bit too dark and too blue and it doesn’t really match the underwater color. Let’s correct this by adding a Color Balance Adjustment layer .

Step 73
Paint with a round soft white brush tool in the layer mask to apply this effect only to the surface of the water. By now you should appreciate the effects of selective masking and be quite familiar with the use of layer masks. That’s a good thing because layer masks are invaluable to a non-destructive editing technique.

Step 74
And here’s the result of our Color Balance adjustments.

Step 75
The image look very nice and unified but I decided to add a little hue contrast by making the scene above water more orange. Orange is the opposite of blue on the color wheel so we will have a nice contrast and some beautiful colors. Add a Color Balance Adjustment layer with the settingsh shown below.

Step 76
In the layer mask use the Linear Gradient Tool to limit the effect only to the upper part of the scene. This is how my layer mask looks.

Step 77
And this is how the scene looks now. One more step and we are done.

Step 79
As a final adjustment I decided to make the underwater color a little more cyan and intense so I added another Color Balance Adjustment Layer.

Step 80
…using the Linear Gradient Tool and the layer mask I limited the effect only to the lower part of the scene.

Step 81
And this is where I decided to step with my adjustments. Off course you can continue to add little details and elements to improve your image but in my case I consider the scene looks complete.

Final Results

25 comments on “Create an Underwater Scene of a Giant Goldfish in Photoshop”
I hate you!
-Joshua Gragas
alguno de los tutoriales estan en video para mi es mejor en video gracias
I would definitely be interested in getting that set!Thanks for sharing.
This is really fantastic. The unlimited access makes it even better
Fantastic idea. I especially like the water surface.
Either I'm blind and don't see what happened to the "ripples" layers after Step 25 or there are steps missing. There's no way they go from the jagged-edged difference render to smooth realistic ripples by just blending the edge in with a brush. Clearly there is more manipulation needed to make that layer looks like it does in Step 26.
What's the point of having the already-completed project available for download? I can't access DeviantArt and would love it if the zip file just contained the images and brushes so that I can actually DO the project. Thanks
hi
Tutorial is great. It helps me so much. Thanks
You are awesome.
Thank you so much.
nice work guys........ its awesome
Hi
I reached the point where i should get a nice ripply light on the bottom of the sea .. i did everything just the way it was illustrated but all i get is this ..
http://i1124.photobucket.com/albums/l567/abdelrahman11/abdelrahmans%20album%202/194081.jpg
what should i do ?
Don't you See the next pages
I like It. Good Job. Thanx
You are awesome.
Thank you so much.
The best tutorials!
Sir need can you send pictures in zip file? My email is .
What is it>>???
TRYING to learn the basics, here bro.
The eye was not hidden. I know to check that much.
An explanation WHY something works is how a lot of people learn, not just me. I wasn't complaining or blaming, just wishing there was more to it.
OK I'm ****ing sorry about that bro
I wish you could say WHY certain things are done (so I can understand when I might need to use them in the future) and so I can understand what the outcome is supposed to look like.
For instance... I don't understand why we need a layer mask in Step 18 and why we are painting in white over the top of it...
Since it doesn't seem to want to let me do it as stated (I get an error, "Could not use the brush tool because the target layer is hidden"), I have no idea what the outcome is supposed to be and can't figure out how to get to the next step without just skipping Step 18.
your fault for not knowing the basics. Dont blame the tutorial bro. You can't paint because your layer is hidden. Click on the EYE icon. Layer mask is like a mask to show\hide what is visible on the layer.
This is so beautiful but please tell me, do I really have to pay for those images? :(
no you dont because sxc is a free site
wow...an amazing photoshop tutorial about create a rainbow.