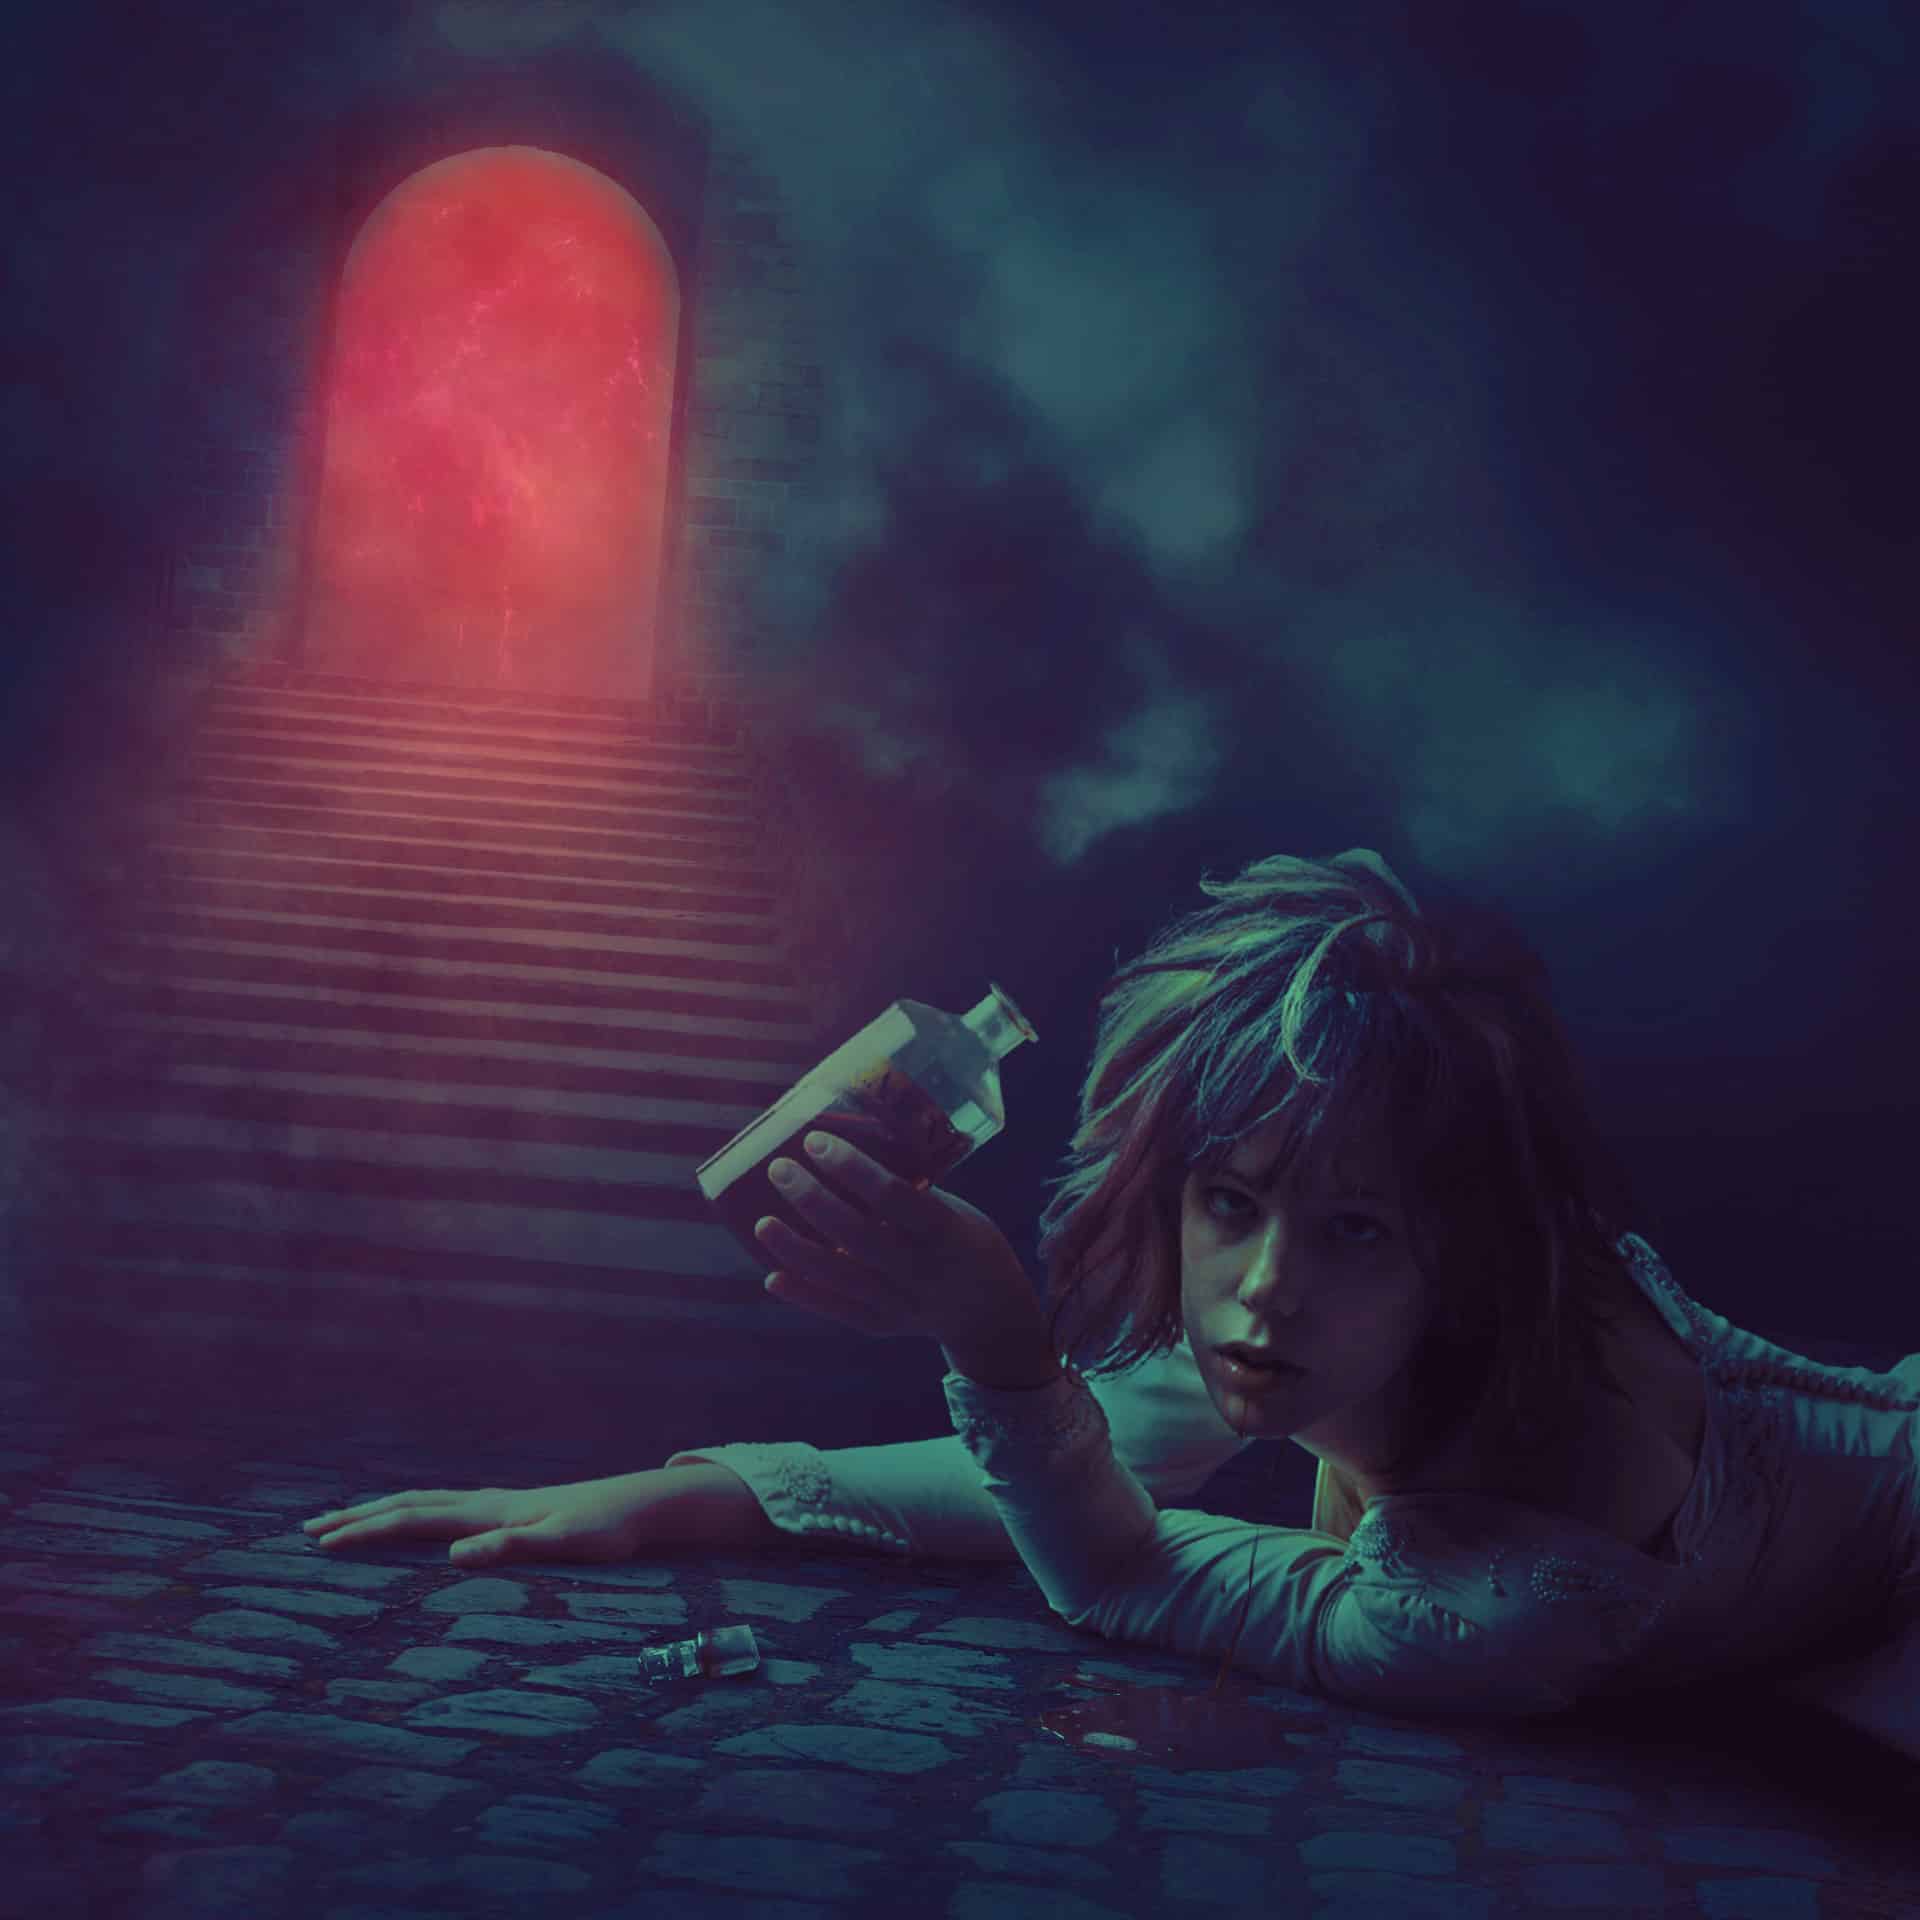
Turn any photo into a dot grid artwork with these Photoshop actions. You'll get great results with dots that change size. They get larger in brighter areas and smaller in darker areas. Free download available.
![drunk12[4] drunk12[4]](https://cdn.photoshoptutorials.ws/wp-content/uploads/2014/07/drunk124.jpg?strip=all&lossy=1&quality=70&webp=70&avif=70&w=1920&ssl=1)
Step 13
Make the model, shadow, cap, blood layers selected then press Cmd/Ctrl+G to create a group for them. Change the mode of this group from Pass Through (default group mode) to Normal 100%. On the top of the layers within this group, make a Curves adjustment layer to darken the model and the relevant details:
![drunk13[4] drunk13[4]](https://cdn.photoshoptutorials.ws/wp-content/uploads/2014/07/drunk134.jpg?strip=all&lossy=1&quality=70&webp=70&avif=70&w=1920&ssl=1)
On this layer mask use a soft black brush to reduce the darkness on some parts shown below:
![drunk13a[4] drunk13a[4]](https://cdn.photoshoptutorials.ws/wp-content/uploads/2014/07/drunk13a4.jpg?strip=all&lossy=1&quality=70&webp=70&avif=70&w=1920&ssl=1)
Step 14
I used Hue/Saturation to reduce the saturation of the layers in this group:
![drunk14[4] drunk14[4]](https://cdn.photoshoptutorials.ws/wp-content/uploads/2014/07/drunk144.jpg?strip=all&lossy=1&quality=70&webp=70&avif=70&w=1920&ssl=1)
![drunk14a[4] drunk14a[4]](https://cdn.photoshoptutorials.ws/wp-content/uploads/2014/07/drunk14a4.jpg?strip=all&lossy=1&quality=70&webp=70&avif=70&w=1920&ssl=1)
Step 15
Create a Curves adjustment layer to increase the lightness on the model a bit:
![drunk15[4] drunk15[4]](https://cdn.photoshoptutorials.ws/wp-content/uploads/2014/07/drunk154.jpg?strip=all&lossy=1&quality=70&webp=70&avif=70&w=1920&ssl=1)
On this Curves layer mask use a soft black brush to erase the parts we don't want to be affected by this adjustment layer:
![drunk15a[6] drunk15a[6]](https://cdn.photoshoptutorials.ws/wp-content/uploads/2014/07/drunk15a6.jpg?strip=all&lossy=1&quality=70&webp=70&avif=70&w=1920&ssl=1)
![drunk15a[7] drunk15a[7]](https://cdn.photoshoptutorials.ws/wp-content/uploads/2014/07/drunk15a7.jpg?strip=all&lossy=1&quality=70&webp=70&avif=70&w=1920&ssl=1)
Step 16
Open the smoke image (feel free to use your own). Choose Channels in the Layers Panel then right click Red, choose Duplicate Channel:
![drunk16[4] drunk16[4]](https://cdn.photoshoptutorials.ws/wp-content/uploads/2014/07/drunk164.jpg?strip=all&lossy=1&quality=70&webp=70&avif=70&w=1920&ssl=1)
On Red channel copy, press Cmd/Ctrl+L to open the Levels window. Change the shadows and highlight value to get a stronger contrast:
![drunk16a[4] drunk16a[4]](https://cdn.photoshoptutorials.ws/wp-content/uploads/2014/07/drunk16a4.jpg?strip=all&lossy=1&quality=70&webp=70&avif=70&w=1920&ssl=1)
Here is the result:
![drunk16b[4] drunk16b[4]](https://cdn.photoshoptutorials.ws/wp-content/uploads/2014/07/drunk16b4.jpg?strip=all&lossy=1&quality=70&webp=70&avif=70&w=1920&ssl=1)
Press Cmd/Ctrl+Option/Alt+6 to load the smoke selection:
![drunk16c[4] drunk16c[4]](https://cdn.photoshoptutorials.ws/wp-content/uploads/2014/07/drunk16c4.jpg?strip=all&lossy=1&quality=70&webp=70&avif=70&w=1920&ssl=1)
Select the RGB channel, right click the selection and choose Layer via Copy. We have the smoke on a new layer:
![drunk16d[4] drunk16d[4]](https://cdn.photoshoptutorials.ws/wp-content/uploads/2014/07/drunk16d4.jpg?strip=all&lossy=1&quality=70&webp=70&avif=70&w=1920&ssl=1)
Step 17
Put the extracted smoke over our working image and flip it horizontally by clicking Edit > Transform > Flip Horizontal:
![drunk17[4] drunk17[4]](https://cdn.photoshoptutorials.ws/wp-content/uploads/2014/07/drunk174.jpg?strip=all&lossy=1&quality=70&webp=70&avif=70&w=1920&ssl=1)
Add a mask to this layer and use a soft black brush to reduce the smoke intensity and make other details visible:
![drunk17a[4] drunk17a[4]](https://cdn.photoshoptutorials.ws/wp-content/uploads/2014/07/drunk17a4.jpg?strip=all&lossy=1&quality=70&webp=70&avif=70&w=1920&ssl=1)
Step 18
I used Curves to darken this effect:
![drunk18[4] drunk18[4]](https://cdn.photoshoptutorials.ws/wp-content/uploads/2014/07/drunk184.jpg?strip=all&lossy=1&quality=70&webp=70&avif=70&w=1920&ssl=1)
Apply masking on this Curves layer mask using a soft black brush with a very low opacity (10-15%):
![drunk18a[4] drunk18a[4]](https://cdn.photoshoptutorials.ws/wp-content/uploads/2014/07/drunk18a4.jpg?strip=all&lossy=1&quality=70&webp=70&avif=70&w=1920&ssl=1)
![drunk18b[4] drunk18b[4]](https://cdn.photoshoptutorials.ws/wp-content/uploads/2014/07/drunk18b4.jpg?strip=all&lossy=1&quality=70&webp=70&avif=70&w=1920&ssl=1)
Step 19
Extract the blood from its background then use the Lasso Tool (V) to choose a blood trail. Place it beside the model mouth and tweak it using the Warp Tool (Edit > Transform > Warp):
![drunk19[4] drunk19[4]](https://cdn.photoshoptutorials.ws/wp-content/uploads/2014/07/drunk194-1-1.jpg?strip=all&lossy=1&quality=70&webp=70&avif=70&w=1920&ssl=1)
![drunk19a[4] drunk19a[4]](https://cdn.photoshoptutorials.ws/wp-content/uploads/2014/07/drunk19a4.jpg?strip=all&lossy=1&quality=70&webp=70&avif=70&w=1920&ssl=1)
Step 20
Add a mask to this layer and use a soft black brush to blend the blood with the model lips corner and the blood on the ground:
![drunk20[4] drunk20[4]](https://cdn.photoshoptutorials.ws/wp-content/uploads/2014/07/drunk204.jpg?strip=all&lossy=1&quality=70&webp=70&avif=70&w=1920&ssl=1)
Step 21
I used Curves to darken this blood:
![drunk21[4] drunk21[4]](https://cdn.photoshoptutorials.ws/wp-content/uploads/2014/07/drunk214.jpg?strip=all&lossy=1&quality=70&webp=70&avif=70&w=1920&ssl=1)
Step 22
Create a Curves adjustment layer on the top of all layers to darken the whole scene:
![drunk22[4] drunk22[4]](https://cdn.photoshoptutorials.ws/wp-content/uploads/2014/07/drunk224.jpg?strip=all&lossy=1&quality=70&webp=70&avif=70&w=1920&ssl=1)
On this layer mask use a soft black brush to erase the gate as we'll be adding some light to it later:
![drunk22a[4] drunk22a[4]](https://cdn.photoshoptutorials.ws/wp-content/uploads/2014/07/drunk22a4.jpg?strip=all&lossy=1&quality=70&webp=70&avif=70&w=1920&ssl=1)
Step 23
Use Color Balance to give the scene some magenta tone:
![drunk23[4] drunk23[4]](https://cdn.photoshoptutorials.ws/wp-content/uploads/2014/07/drunk234.jpg?strip=all&lossy=1&quality=70&webp=70&avif=70&w=1920&ssl=1)
![drunk23a[4] drunk23a[4]](https://cdn.photoshoptutorials.ws/wp-content/uploads/2014/07/drunk23a4.jpg?strip=all&lossy=1&quality=70&webp=70&avif=70&w=1920&ssl=1)
Step 24
I used a Photo Filter adjustment layer to add some cyan to the scene:
![drunk24[4] drunk24[4]](https://cdn.photoshoptutorials.ws/wp-content/uploads/2014/07/drunk244.jpg?strip=all&lossy=1&quality=70&webp=70&avif=70&w=1920&ssl=1)
![drunk24a[4] drunk24a[4]](https://cdn.photoshoptutorials.ws/wp-content/uploads/2014/07/drunk24a4.jpg?strip=all&lossy=1&quality=70&webp=70&avif=70&w=1920&ssl=1)
Step 25
Continue coloring the picture with a Color Fill layer (Layer > New Fill Layer > Solid Color):
![drunk25[4] drunk25[4]](https://cdn.photoshoptutorials.ws/wp-content/uploads/2014/07/drunk254.jpg?strip=all&lossy=1&quality=70&webp=70&avif=70&w=1920&ssl=1)
Change the mode of this layer to Exclusion 40%:
![drunk25a[4] drunk25a[4]](https://cdn.photoshoptutorials.ws/wp-content/uploads/2014/07/drunk25a4.jpg?strip=all&lossy=1&quality=70&webp=70&avif=70&w=1920&ssl=1)
Step 26
I used another Color Balance adjustment for this picture:
![drunk26[4] drunk26[4]](https://cdn.photoshoptutorials.ws/wp-content/uploads/2014/07/drunk264.jpg?strip=all&lossy=1&quality=70&webp=70&avif=70&w=1920&ssl=1)
![drunk26a[4] drunk26a[4]](https://cdn.photoshoptutorials.ws/wp-content/uploads/2014/07/drunk26a4.jpg?strip=all&lossy=1&quality=70&webp=70&avif=70&w=1920&ssl=1)
Step 27
I used a Vibrance adjustment to boost the color:
![drunk27[4] drunk27[4]](https://cdn.photoshoptutorials.ws/wp-content/uploads/2014/07/drunk274.jpg?strip=all&lossy=1&quality=70&webp=70&avif=70&w=1920&ssl=1)
On this layer mask use a soft black brush with a very low opacity (20%) to reduce the redness on the model face:
![drunk27a[4] drunk27a[4]](https://cdn.photoshoptutorials.ws/wp-content/uploads/2014/07/drunk27a4.jpg?strip=all&lossy=1&quality=70&webp=70&avif=70&w=1920&ssl=1)
Step 28
To reduce the redness more I used Hue/Saturation and change the Red settings only:
![drunk28[4] drunk28[4]](https://cdn.photoshoptutorials.ws/wp-content/uploads/2014/07/drunk284.jpg?strip=all&lossy=1&quality=70&webp=70&avif=70&w=1920&ssl=1)
![drunk28a[4] drunk28a[4]](https://cdn.photoshoptutorials.ws/wp-content/uploads/2014/07/drunk28a4.jpg?strip=all&lossy=1&quality=70&webp=70&avif=70&w=1920&ssl=1)
Step 29
Since this step we'll take care of the gate and stair. On the top of all layers use the Lasso Tool to create a selection around the gate, set the feather for it to 70 (depends on your picture size):
![drunk29[4] drunk29[4]](https://cdn.photoshoptutorials.ws/wp-content/uploads/2014/07/drunk294.jpg?strip=all&lossy=1&quality=70&webp=70&avif=70&w=1920&ssl=1)
Go to Layer >New Adjustment Layer > Channel Mixer:
![drunk29a[4] drunk29a[4]](https://cdn.photoshoptutorials.ws/wp-content/uploads/2014/07/drunk29a4.jpg?strip=all&lossy=1&quality=70&webp=70&avif=70&w=1920&ssl=1)


11 comments on “Create an Anti-Alcohol Concept Artwork with Photoshop”
Once again, just an awesome tutorial. So easy to follow along with~!
the best i know right i am doing it right now
This is actually a very beautiful idea, I'm actually looking to use an anti-alcohol graphic for a work project. This tutorial has given me some great tips, nice one...
SO cool I actually need to do an anti-alcohol graphic for a project right now! I won't use this verbatim obviously, but this tutorial has given me some GREAT ideas!
WoW ! excellent tutorial that is. Your writing quality is really easy to understanding. Thank You for sharing....
very impressive ! love this post! keep up!
Pagal Pura pi
wooooooow i like this one
thats was very wonderful, I tried to do it my self it was an epic fail
Thanks for your nice artwork. Really is it very helpful for me. because I am new worker about it.
Thank you so much! I've been following your work on Deviantart & I'm a huge fan!