Make your artwork look like they're from an alternate universe. These Cyberpunk presets work with Photoshop (via the Camera Raw filter) and Lightroom. Download all 788 presets for 90% off.
![drunk29b[4] drunk29b[4]](https://cdn.photoshoptutorials.ws/wp-content/uploads/2014/07/drunk29b4.jpg?strip=all&lossy=1&quality=70&webp=70&avif=70&w=1920&ssl=1)
Now on the Channel Mixer layer mask use a soft black brush to refine the red light, make it flow along the stair from the gate. Here is my result on the mask and on the picture:
![drunk29c[4] drunk29c[4]](https://cdn.photoshoptutorials.ws/wp-content/uploads/2014/07/drunk29c4.jpg?strip=all&lossy=1&quality=70&webp=70&avif=70&w=1920&ssl=1)
![drunk29d[4] drunk29d[4]](https://cdn.photoshoptutorials.ws/wp-content/uploads/2014/07/drunk29d4.jpg?strip=all&lossy=1&quality=70&webp=70&avif=70&w=1920&ssl=1)
Step 30
Apply the same technique on a new Curves adjustment layer as I wanted to brighten the red effect:
![drunk30[4] drunk30[4]](https://cdn.photoshoptutorials.ws/wp-content/uploads/2014/07/drunk304.jpg?strip=all&lossy=1&quality=70&webp=70&avif=70&w=1920&ssl=1)
![drunk30a[4] drunk30a[4]](https://cdn.photoshoptutorials.ws/wp-content/uploads/2014/07/drunk30a4.jpg?strip=all&lossy=1&quality=70&webp=70&avif=70&w=1920&ssl=1)
Step 31
Create a new layer on the top. Use a soft brush with the color #af696c to paint on the gate area. change the mode of this layer to Hard Light 100%:
![drunk31[4] drunk31[4]](https://cdn.photoshoptutorials.ws/wp-content/uploads/2014/07/drunk314.jpg?strip=all&lossy=1&quality=70&webp=70&avif=70&w=1920&ssl=1)
Step 32
On a new layer use the same brush to paint again on the top of the gate but set the mode to Overlay 100%:
![drunk32[4] drunk32[4]](https://cdn.photoshoptutorials.ws/wp-content/uploads/2014/07/drunk324.jpg?strip=all&lossy=1&quality=70&webp=70&avif=70&w=1920&ssl=1)
Step 33
I used a new layer and a soft white brush with the opacity about 40% to brighten the red light. Change this layer mode to Overlay 100%:
![drunk33[4] drunk33[4]](https://cdn.photoshoptutorials.ws/wp-content/uploads/2014/07/drunk334.jpg?strip=all&lossy=1&quality=70&webp=70&avif=70&w=1920&ssl=1)
Step 34
Open the nebula image. To give it more "fiery" effect, I duplicated this layer and used the Liquify Tool to bend it. Go to Filter > Liquify and choose the Forward Warp Tool:
![drunk34[4] drunk34[4]](https://cdn.photoshoptutorials.ws/wp-content/uploads/2014/07/drunk344.jpg?strip=all&lossy=1&quality=70&webp=70&avif=70&w=1920&ssl=1)
Use this tool to tweak the nebula in the way you want. Here is my result:
![drunk34a[4] drunk34a[4]](https://cdn.photoshoptutorials.ws/wp-content/uploads/2014/07/drunk34a4.jpg?strip=all&lossy=1&quality=70&webp=70&avif=70&w=1920&ssl=1)
Step 35
Drag the result onto the gate after resizing it down and change the mode to Overlay 100%:
![drunk35[4] drunk35[4]](https://cdn.photoshoptutorials.ws/wp-content/uploads/2014/07/drunk354.jpg?strip=all&lossy=1&quality=70&webp=70&avif=70&w=1920&ssl=1)
To remove the dark edges of this nebula image, double click this layer, choose Blending Options. Hold down the Alt/Option key while dragging the black slider of This Layer until most of the dark edges disappear:
![drunk35a[4] drunk35a[4]](https://cdn.photoshoptutorials.ws/wp-content/uploads/2014/07/drunk35a4.jpg?strip=all&lossy=1&quality=70&webp=70&avif=70&w=1920&ssl=1)
![drunk35b[4] drunk35b[4]](https://cdn.photoshoptutorials.ws/wp-content/uploads/2014/07/drunk35b4.jpg?strip=all&lossy=1&quality=70&webp=70&avif=70&w=1920&ssl=1)
Step 36
Add a mask to this layer and use a soft black brush to remove the remained edges:
![drunk36[4] drunk36[4]](https://cdn.photoshoptutorials.ws/wp-content/uploads/2014/07/drunk364.jpg?strip=all&lossy=1&quality=70&webp=70&avif=70&w=1920&ssl=1)
Step 37
I used Hue/Saturation to change the color of this effect:
![drunk37[4] drunk37[4]](https://cdn.photoshoptutorials.ws/wp-content/uploads/2014/07/drunk374.jpg?strip=all&lossy=1&quality=70&webp=70&avif=70&w=1920&ssl=1)
![drunk37a[4] drunk37a[4]](https://cdn.photoshoptutorials.ws/wp-content/uploads/2014/07/drunk37a4.jpg?strip=all&lossy=1&quality=70&webp=70&avif=70&w=1920&ssl=1)
Step 38
To make the effect more visible I used a Levels adjustment:
![drunk38[4] drunk38[4]](https://cdn.photoshoptutorials.ws/wp-content/uploads/2014/07/drunk384.jpg?strip=all&lossy=1&quality=70&webp=70&avif=70&w=1920&ssl=1)
On this Levels layer mask use a soft black brush to reduce the visibility on a part of the effect:
![drunk38a[4] drunk38a[4]](https://cdn.photoshoptutorials.ws/wp-content/uploads/2014/07/drunk38a4.jpg?strip=all&lossy=1&quality=70&webp=70&avif=70&w=1920&ssl=1)
Step 39
I used Vibrance to enhance the final effect:
![drunk39[4] drunk39[4]](https://cdn.photoshoptutorials.ws/wp-content/uploads/2014/07/drunk394.jpg?strip=all&lossy=1&quality=70&webp=70&avif=70&w=1920&ssl=1)
On this layer mask use a soft black brush to reduce the redness on the raising hand of the model:
![drunk39a[4] drunk39a[4]](https://cdn.photoshoptutorials.ws/wp-content/uploads/2014/07/drunk39a4.jpg?strip=all&lossy=1&quality=70&webp=70&avif=70&w=1920&ssl=1)
Final Results
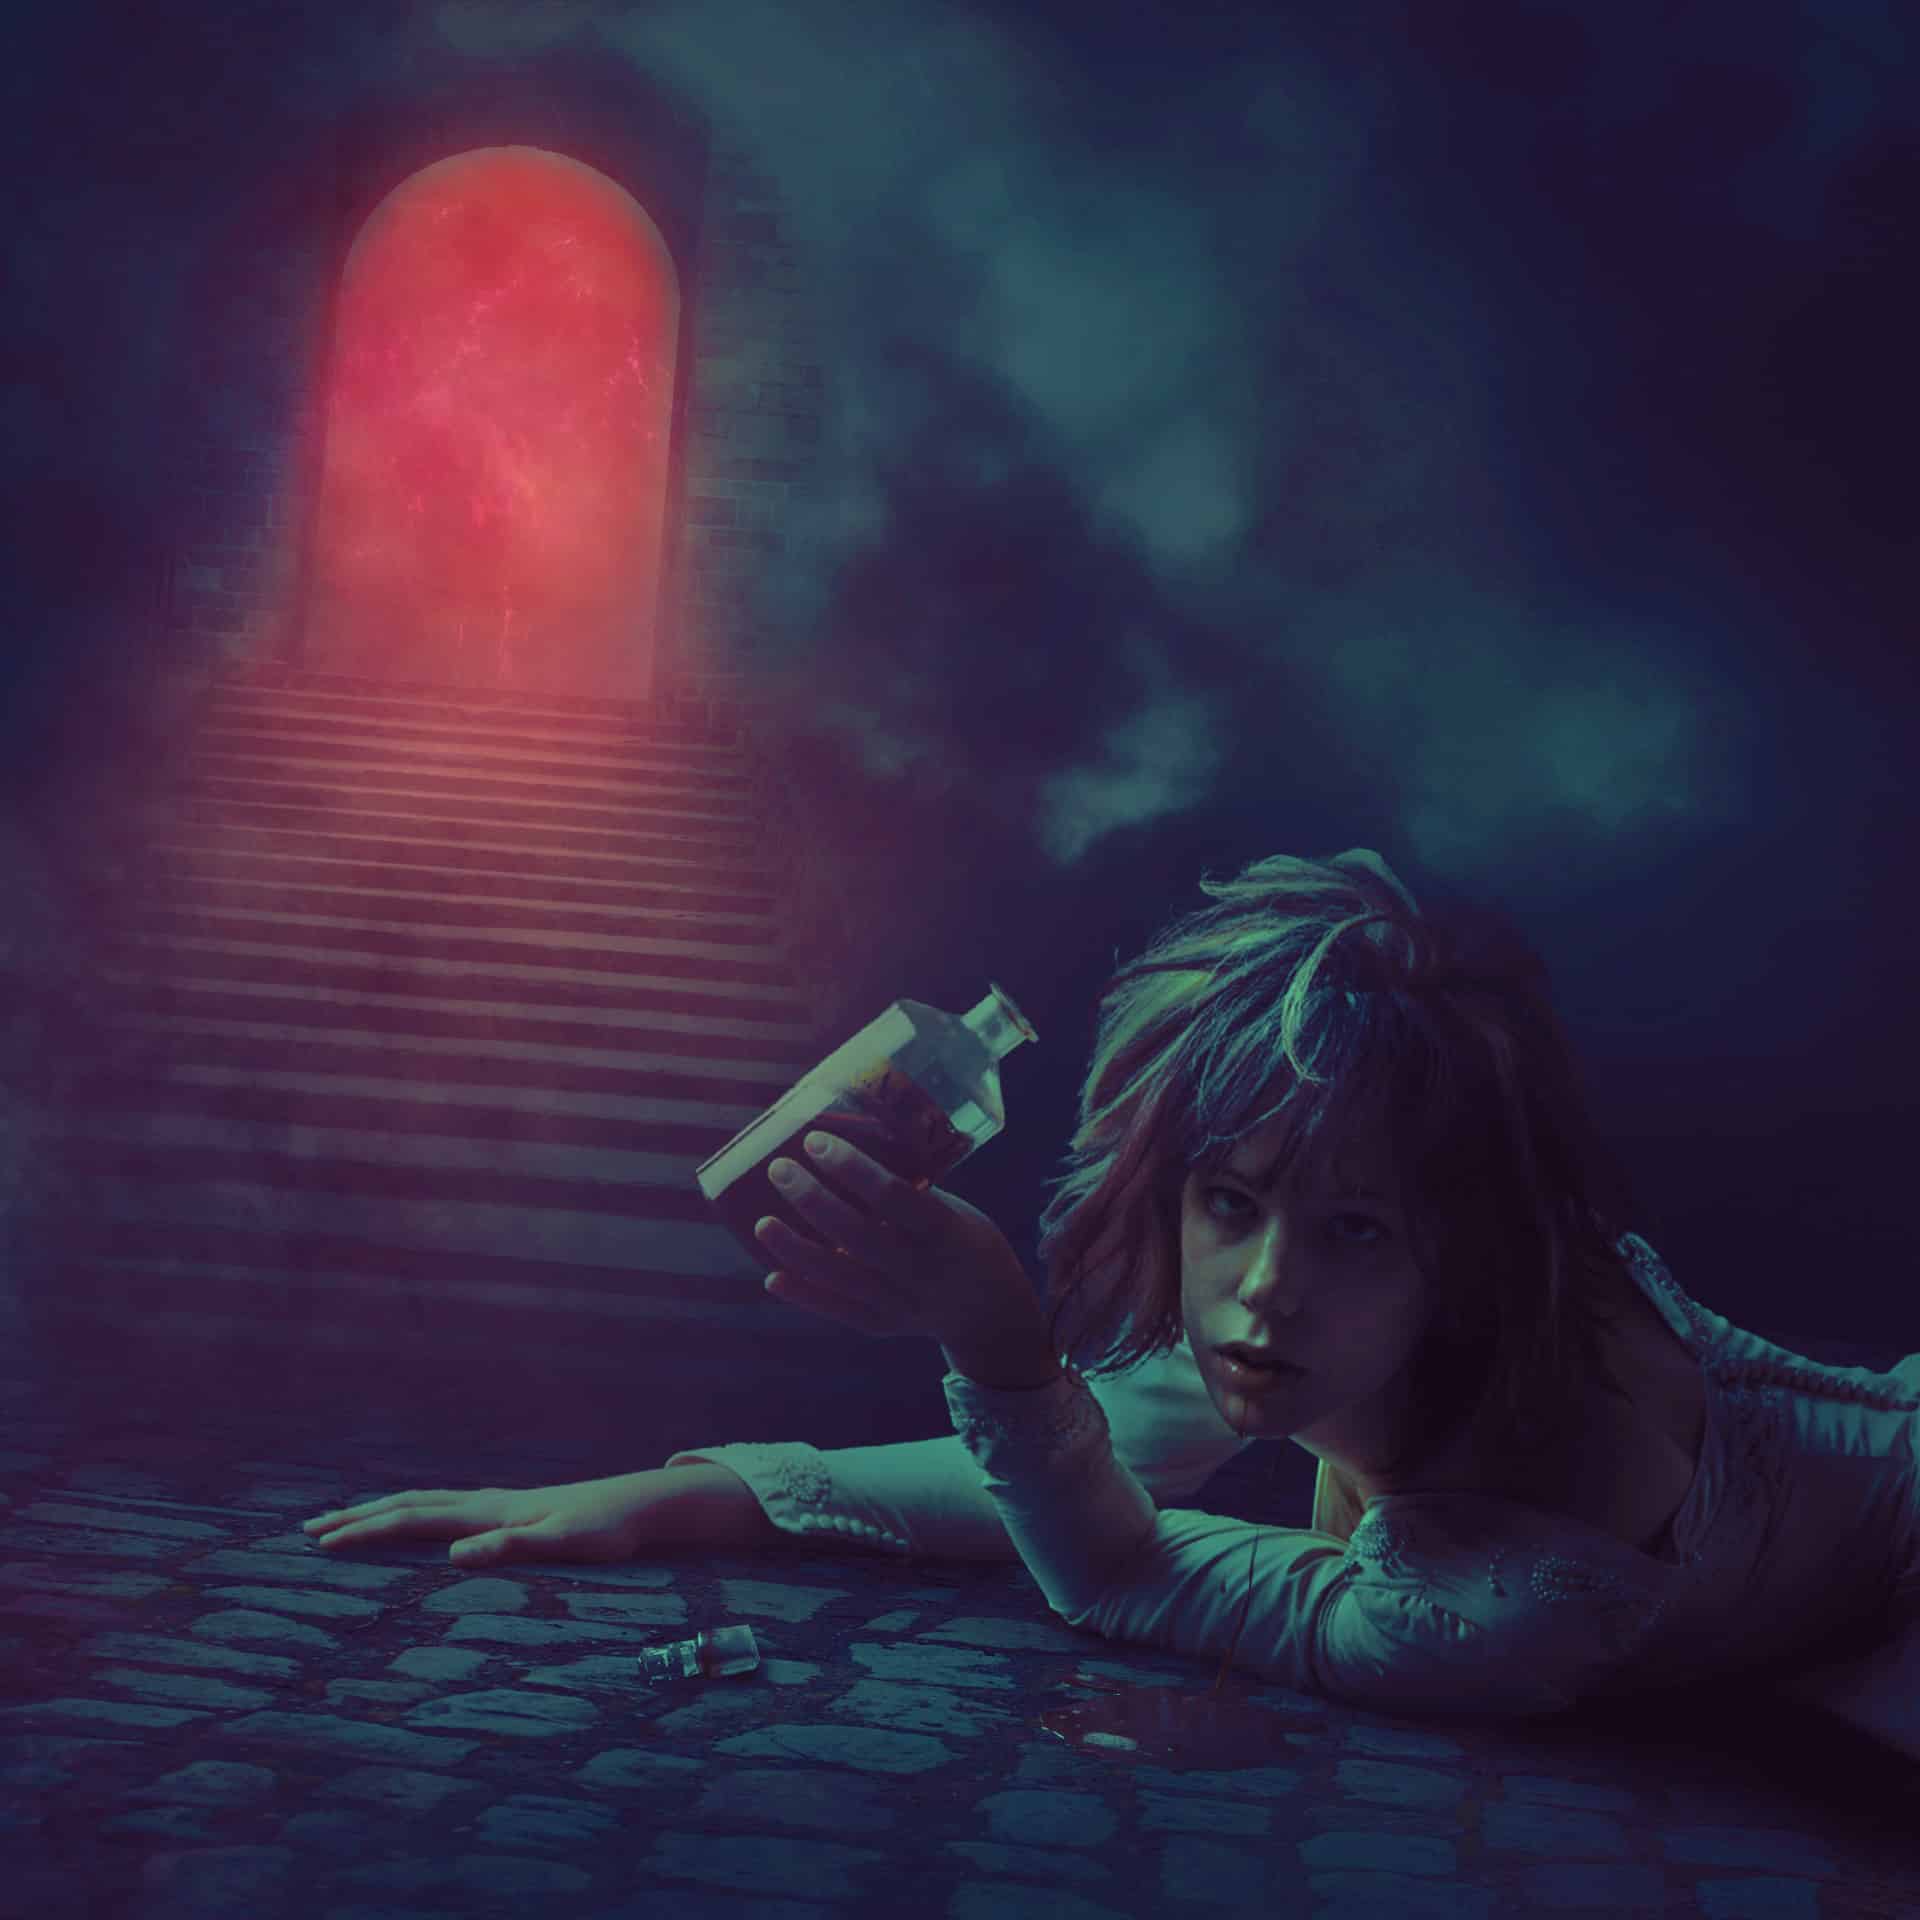
![drunk39-final[7] drunk39-final[7]](https://cdn.photoshoptutorials.ws/wp-content/uploads/2014/07/drunk39-final7.jpg?strip=all&lossy=1&quality=70&webp=70&avif=70&w=1920&ssl=1)
Download the PSD
Tutorial by Jenny Le
Thank you for reading this tutorial, I hope that you enjoyed it. If you want to view my other arts and tutorials you can follow me on Facebookor look at my Deviantart page .
- Jenny


11 comments on “Create an Anti-Alcohol Concept Artwork with Photoshop”
Once again, just an awesome tutorial. So easy to follow along with~!
the best i know right i am doing it right now
This is actually a very beautiful idea, I'm actually looking to use an anti-alcohol graphic for a work project. This tutorial has given me some great tips, nice one...
SO cool I actually need to do an anti-alcohol graphic for a project right now! I won't use this verbatim obviously, but this tutorial has given me some GREAT ideas!
WoW ! excellent tutorial that is. Your writing quality is really easy to understanding. Thank You for sharing....
very impressive ! love this post! keep up!
Pagal Pura pi
wooooooow i like this one
thats was very wonderful, I tried to do it my self it was an epic fail
Thanks for your nice artwork. Really is it very helpful for me. because I am new worker about it.
Thank you so much! I've been following your work on Deviantart & I'm a huge fan!