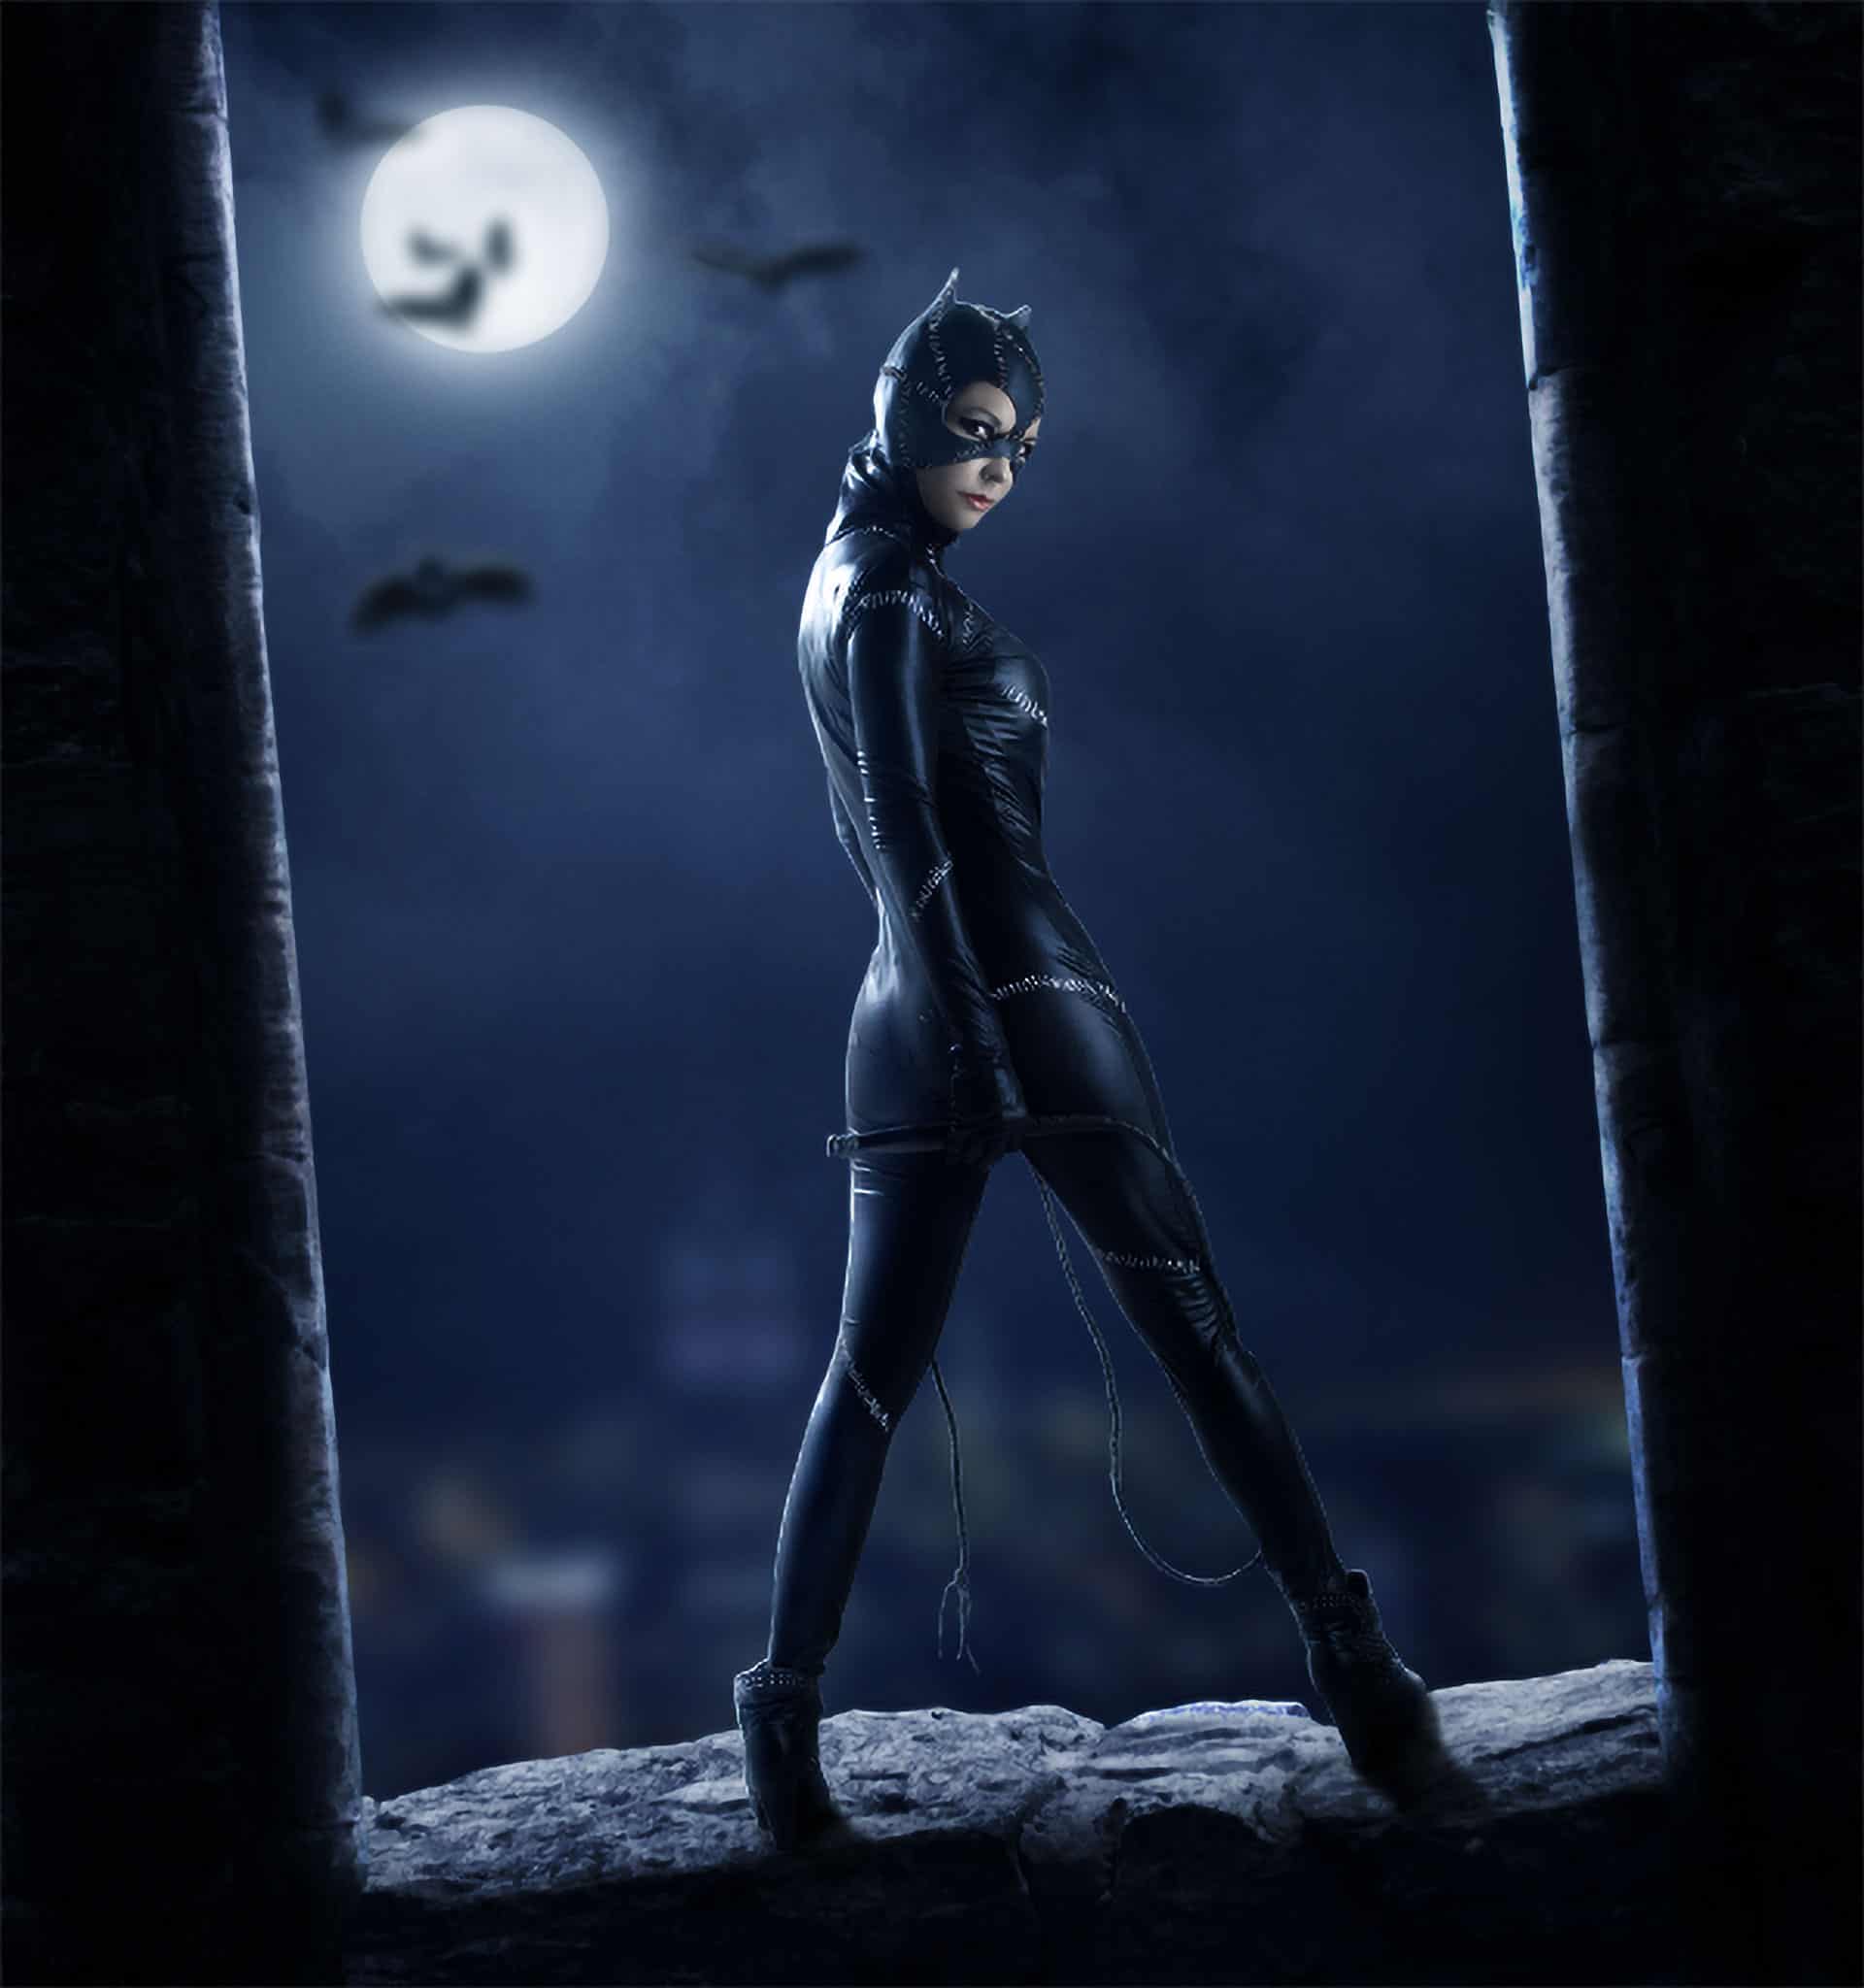
In this tutorial, I’ll show you how to create a Catwoman artwork using a range of photo manipulation techniques. You’ll learn how to create a dark night city scene from several stock images, practice some retouching techniques as well as enhance the light and contrast of the scene.
What you’ll be creating
We’ll start this tutorial by combining a sky and a city image using adjustment layers, masking, and brush. Then we’ll add the moon and create a glowing light for it. Later we’ll add the walls and blend them together using the same previous techniques. After that, we’ll add the model and do some retouch on her. We’ll use the bat brushes to increase the dark atmosphere for the image. We’ll add several adjustment layers to enhance the final effect. You’ll need Photoshop CS3 or newer to follow this tutorial.
Tutorial Resources
Step 1
Create a new document in Photoshop with the given settings:

Step 2
Open the sky image. Drag it into our white canvas using the Move Tool:

Step 3
Use a Hue/Saturation adjustment layer and set it as Clipping Mask to desaturate the sky color.


Step 4
Use a Curves adjustment layer (set as Clipping Mask) to darken the sky:

Step 5
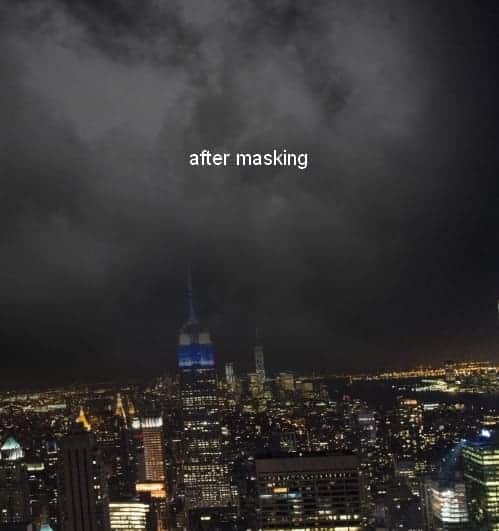
Place the city image in the our working document and rotate it a little using the Free Transform Tool (Cmd/Ctrl+T).

Click the second icon at the bottom of the Layers Panel to add a mask to this layer. Use a basic, soft brush with black color to remove the sky part in the city image to reveal the existing sky:
Step 6
Go to Filter > Blur > Gaussian Blur and set the radius to 6 px:

This step is too add some depth to the scene.
Step 7
Use a Hue/Saturation adjustment layer (set as Clipping Mask) to remove the blue of the big building at the background:

Step 8
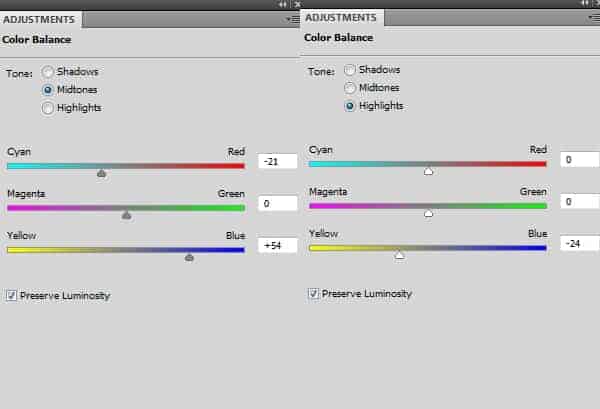
Use a Color Balance adjustment layer to change the scene color:

Step 9
Place the moon image onto the top left of the sky and remove its background using a layer mask. Change the mode of this layer to Screen 100%.
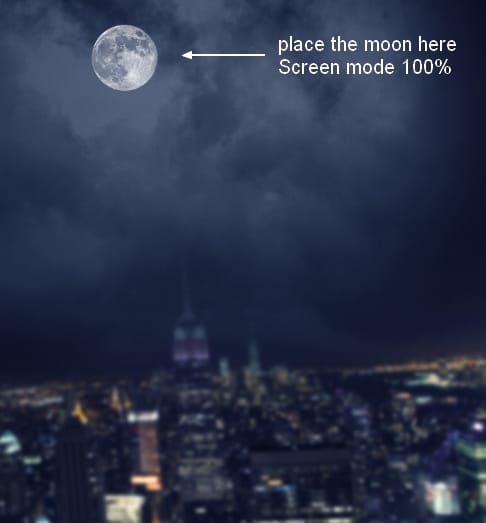
Go to Filter > Blur > Gaussian Blur and change the radius to 4 px:

Step 10
To add some light to the moon, double click the moon layer, choose Outer Glow and Inner Glow:


Step 11
To add more light to the moon, make a new layer and use a soft brush with the color #d5dae2 to paint over the moon area. Change the mode to Screen 100%:
12 responses to “How to Create a Catwoman Poster in Photoshop”
-

un hermoso tutorial lo he hecho y es precioso ,gracias .Donde te puedo seguir?
-
Too Good…
-
thanks a million I enjoyed this tut a lot. Put it on my facebook page and also put the link to your tutorial.
-
-
nice design
-
nice design
-
How much of all this can be done with Photoshop Elements 11 (12, 13 ..)?
-
Thanks
Nice Tutorials -
Pretty cool tutorial.
-
very nice ..! thanks
-
I like this! Thanks! ^^
-
cool than qqq
-
Awesome !
Thanks…
Leave a Reply to GOKULRAJCancel reply