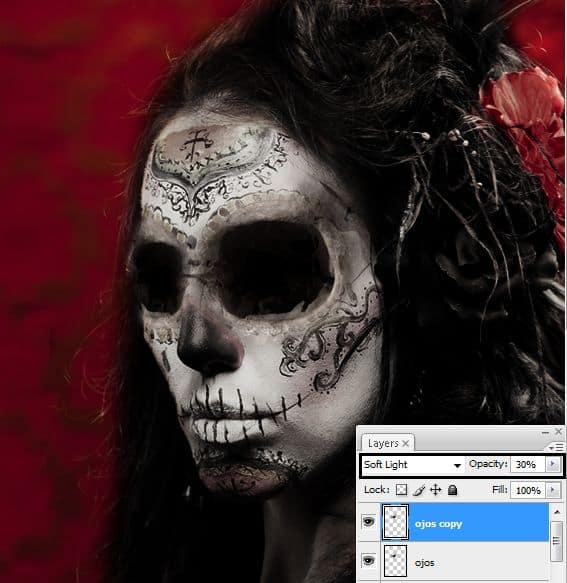
Step 18- Finding the nose
Pick the nose from another skull, and select it with the lasso tool, press Ctrl+J to copy the selection.

Step 19- reduce the nose
Make the nose smaller with free transform (Ctrl+T).

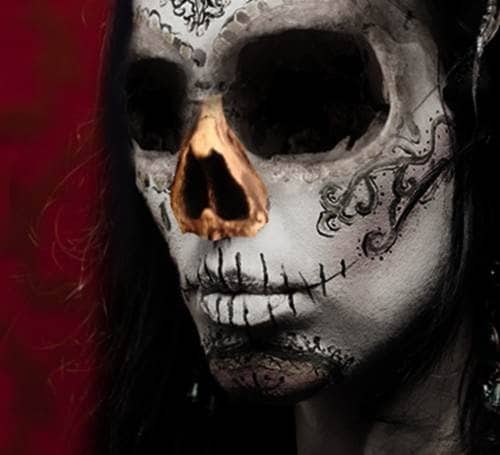
Step 20- less saturation
Reduce the saturation of the nose (Ctrl+U) or Image- Adjustments- Hue/ Saturation. In the option Saturation: -70.

Step 21- more details
Fix the nose with the smudge tool.
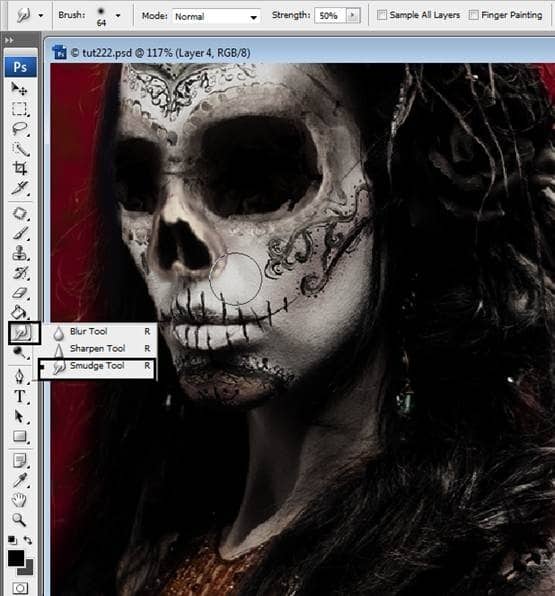
Step 22- Working with Colors
Go to the original layer of the model. And Duplicate (Ctrl+J). Change the color of that layer pressing (Ctrl + U) or go to Image- Adjustments – Hue/ Saturation.Change the Hue at 233 to get a purple tone.Then press ok to save the changes.

Step 23- Change the opacity of the layer.
Reduce de opacity of the layer to 40% to get this result.
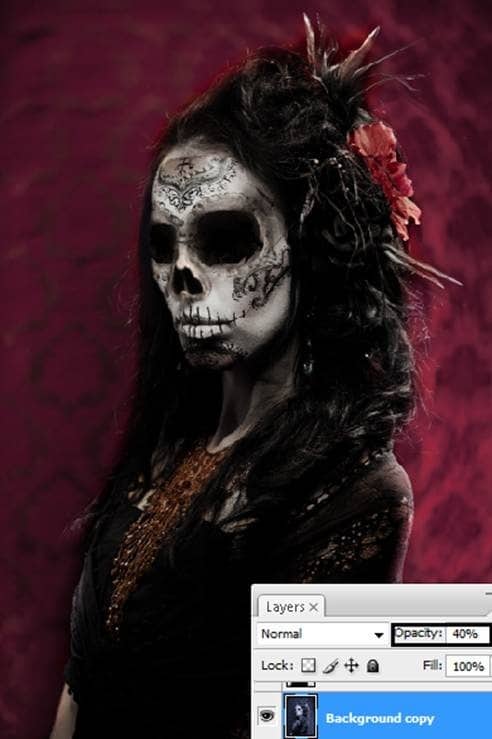
Step 24- Another Layer.
Duplicate that layer (Ctrl+J) and change the color (Ctrl+U) or Image – Adjustment – Hue/ Saturation. In the option Hue put 200. You have to be in the colorize option. To save changes press ok.

Step 25- Use the layer in soft light mode.
Change the layer mode to soft light to get this result:
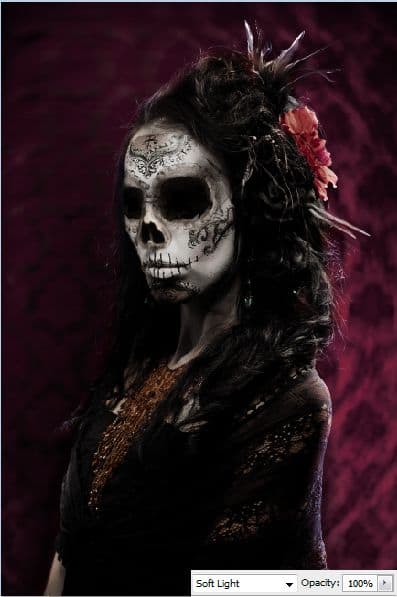
Step 26 – make the model stand out
Add a new layer (Shift+ Ctrl + N) and paint it with a soft brush using white, black and violet like this:

Step 27- Add some blur
Use Gaussian Blur – Filter – Blur – Gaussian Blur: 150 of radius.

Step 28- Changing layer order.
Put the layer under the model’s layer and change the mode from normal to soft light.
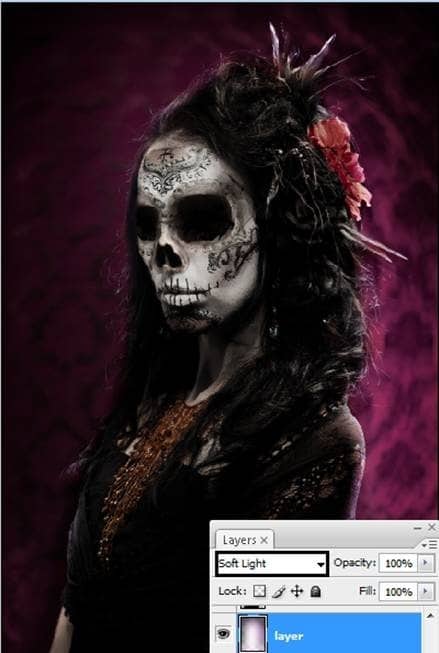
Step 29 – Add some webs
You can used spider-webs brushes. Create a new layer (Shift+ Ctrl+ N) then reduce the opacity to 50%. Select the brushes and paint over the new layer.

Step 30- Add some fog
To create the fog you can used brushes of clouds of foggy brushes. Paint over the layer and then change the opacity of the layer to 80%.

Step 31- More fog.
Add another foggy layer but in this case change the layer’s mode to Color Dodge to get something like this:

Step 32- Crazy Layer
Add a Layer like this one:

Step 33 – More effects
Change the layer color (ctrl + u) or Image – Adjustments – Hue/ Saturation. Use the menu In colorize option. Then in Hue change it to: 260 and Saturation at: 40.
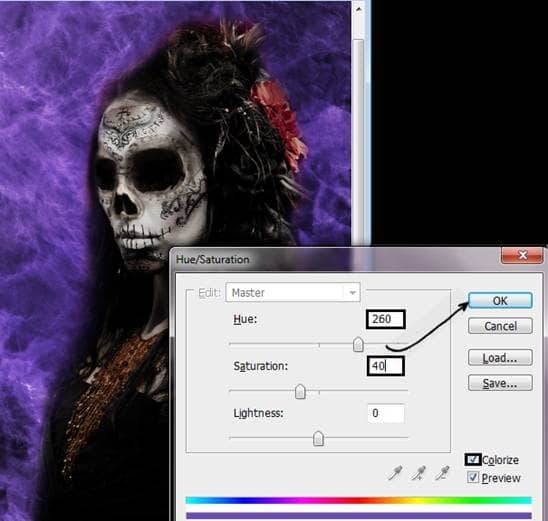
Step 34- change layer mode
Use Layer in soft light mode

Step 35 – Light
Add a new layer (Shift+ Ctrl + N) and use it in soft light mode with 70% of opacity. And paint around the model with a white soft brush.The diameter of the brush in this was 300 pixels.

Step 36 – more lights
Create a new layer (Shift +Ctrl + N) in the top. Then used the paint bucket to apply gray to the layer.

Step 37 – change to overlay and paint with dodge and burn
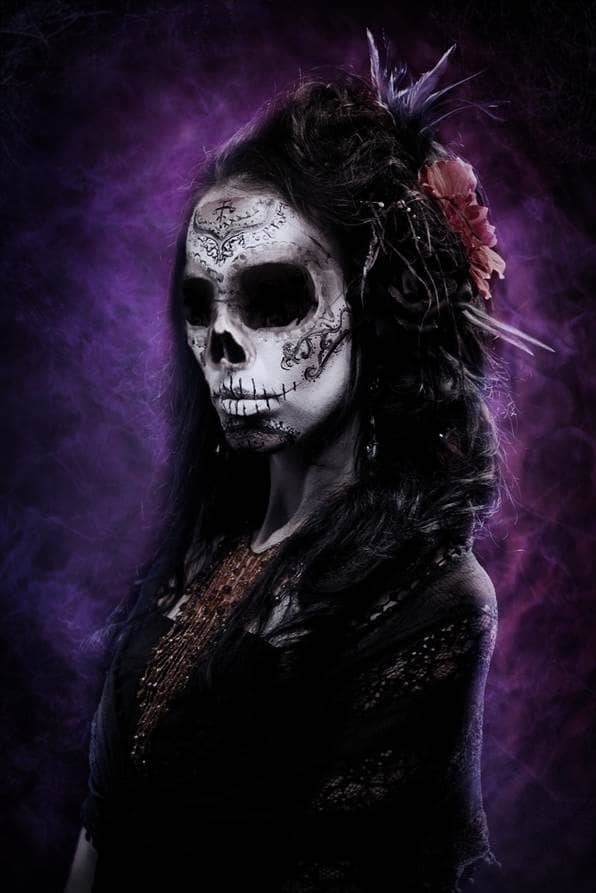
Used layer mode in overlay, and paint with dogde tool to create light and with burn tool to create shadows. In this case use the dodge tool in the righ side and the burn tool in the left side.
10 responses to “How to Create a Chilling Portrait Manipulation for Halloween”
-
Me gusta el tutorial, el efecto es muy bueno. Pero deberías ser un poco mas especifica en ciertos pasos y resumir otros.
En algunos quedaba en la duda de las capas que debía tomar o quedaban lagunas que explicabas mas tarde, de todas maneras gracias por el tutorial y a seguir mejorando siempre. -
because you have YouTube channel ?
Youtuber good and more serious with your tutorials. . Enjoy -
Thank you
-
the “texture” link leads to nothing and i dont know what the texture looks like so i can’t even find an alternative. i do like the final picture it’s interesting. but the tutorial is slightly hard to follow
-
was not impressed with directions and had a hard time following. to make exact, i had to adjust against the directions to properly complete.
-
There is a missing important part you forgot to put in between part 15 and 16. It doesn’t explain how you got the eye sockets to be black, doesn’t explain how you blended the outer skull bits with the skin, doesn’t tell you that you also darkened the forhead
-
I love your all icon sets….and start to bookmark this!!!
-
i really appreciate you struggle in this tutorial…!! loved it so shared it… thanks alot..
-
It´s so cool, thanx for inspiration
-
@Ferobanjo glad you like it!
-

Leave a Reply