Make your artwork look like they're from an alternate universe. These Cyberpunk presets work with Photoshop (via the Camera Raw filter) and Lightroom. Download all 788 presets for 90% off.
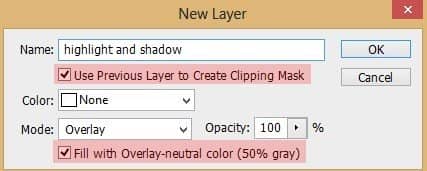
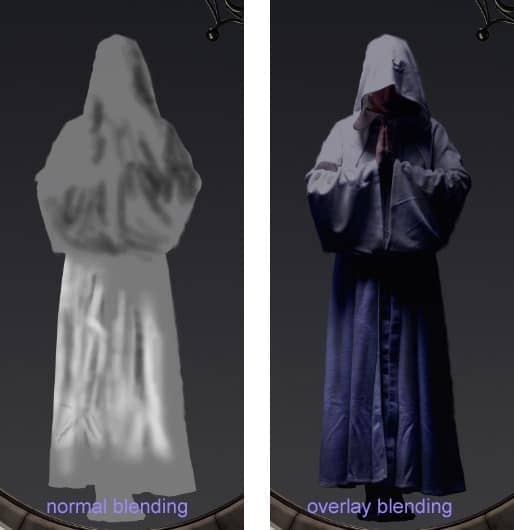
Take a very soft round brush set to 10-20% opacity. Stroke white color on the areas around the lower part of the model’s outfit to give some highlight. On contrary, stroke black color to areas where needed to give some shadow. In the screenshot shows us the normal and overlay blending of this layer I created.
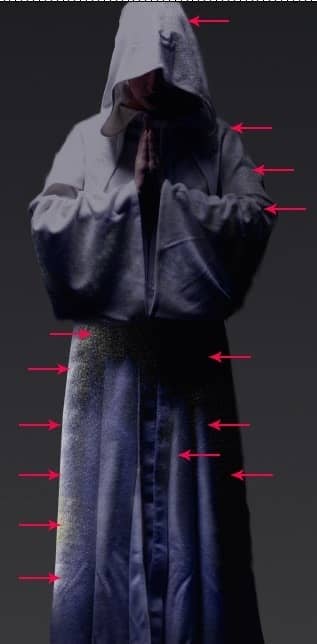
Create another new layer with a clipping mask above the highlight and shadow layer within the model folder. On this new layer we will add some dusk particles on the model. Take the particle brush and paint some white particles around the model as indicated by red arrows.
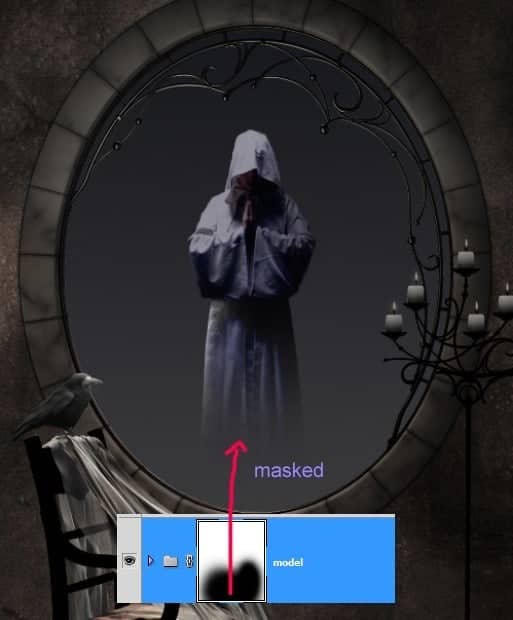
Next, give this model folder a layer mask. Mask the lower part of the model.
Step 8
In this step we will add color to the scene. Create a new layer below the model folder in the layer panel. Take a very soft round brush. Set the color of the foreground to #feef08. Paint the color behind the model. Set this layer to overlay at 100%. I named this layer yellow.
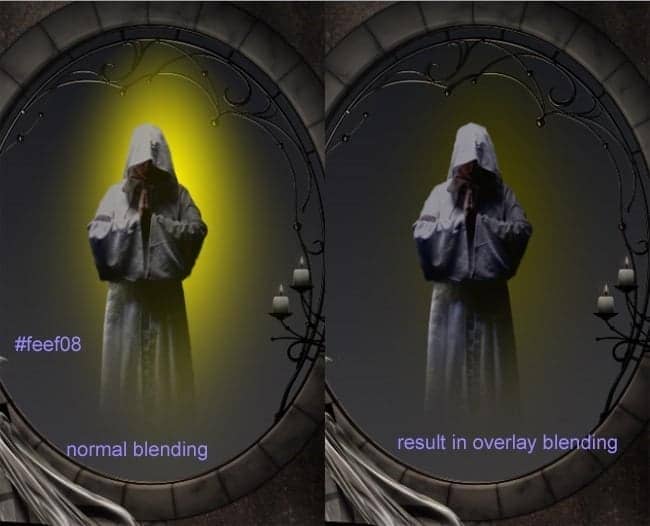
Create two other layers above the yellow layer. With the same color (#feef08), paint more soft yellow color behind the model and on areas above the model head. Set this layer to overlay. Finally, to give more vivid color, paint more yellow on areas behind the model’s waist. Set this layer to pin light. Make sure to adjust the opacity of this layer to get desired glow.
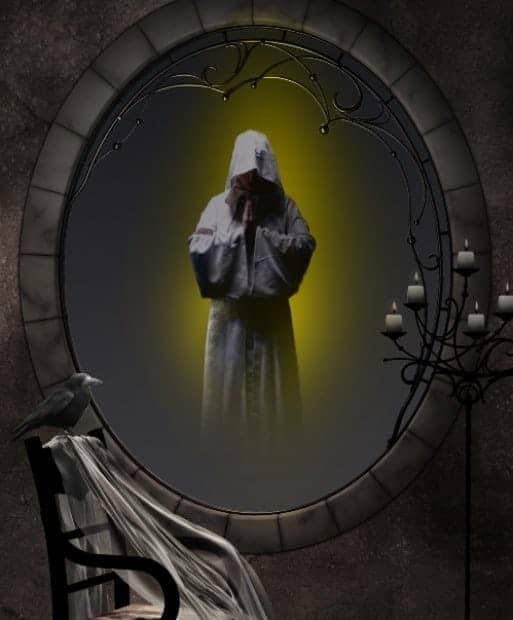
Proceed to paint some smoke around the model. I painted the smoke on a new layer. Select all the yellow layers and the smoke layer. Hit Ctrl+G to group them in a folder. I named this folder yellow.
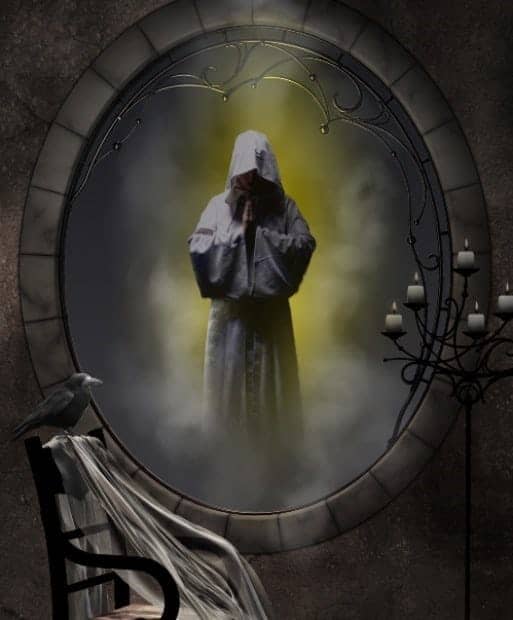
Step 9
I decided to hide the effect of the vibrance adjustment layer (created in step 5) by masking on area around the window.
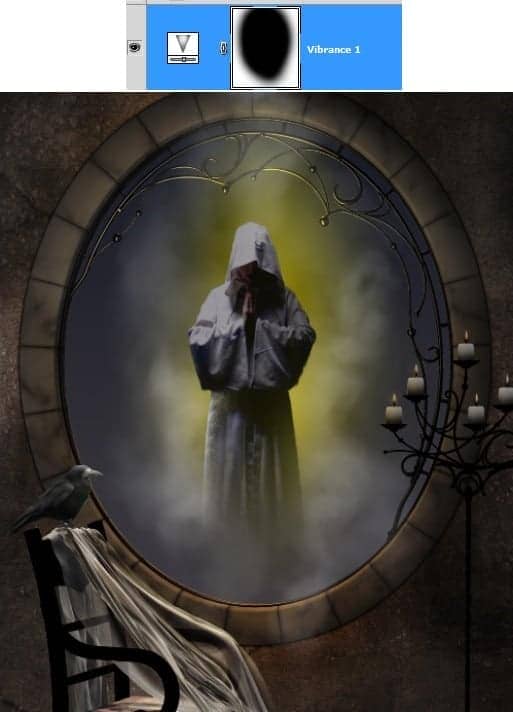
Step 10
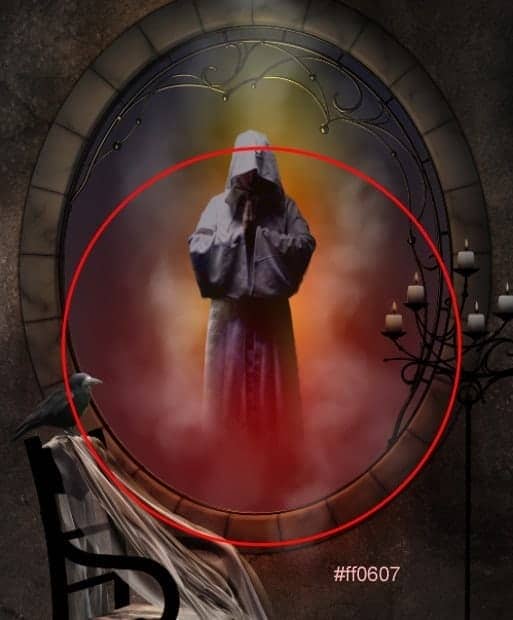
Next, we will give another color to the scene is that red. Set the foreground color to #ff0607. Create a new layer below the wall folder. Take a very soft round brush set to size of about 1900 pixels. On this new layer, click the brush on the area circled in red as shown in the screenshot. Set this layer to overlay blending at 100% opacity. I named this layer red.
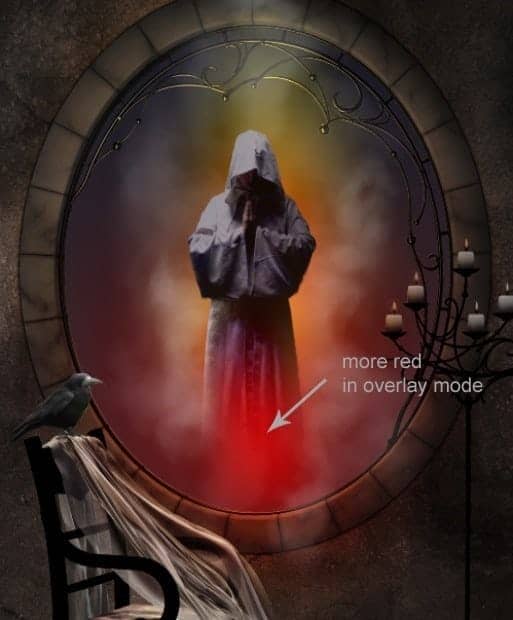
Create a new layer in which we will paint more red (#ff0607) on the lower part of the model. Set this layer to overlay at 100% opacity.
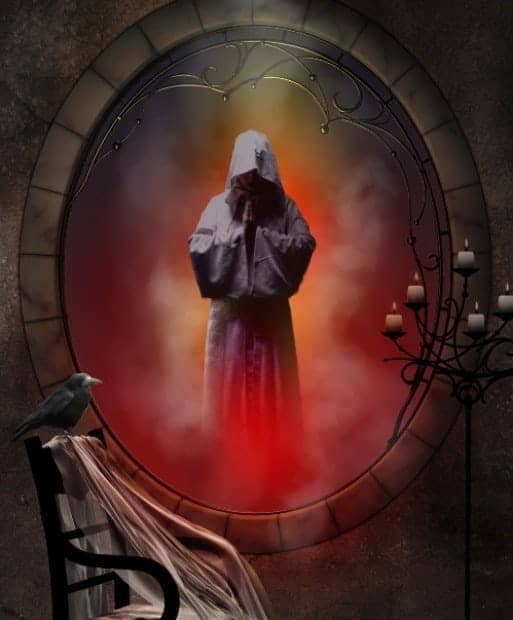
Here is the result I created after adding more soft red on areas behind the shoulder and window. I created it in a new layer set to overlay blending.
Step 11
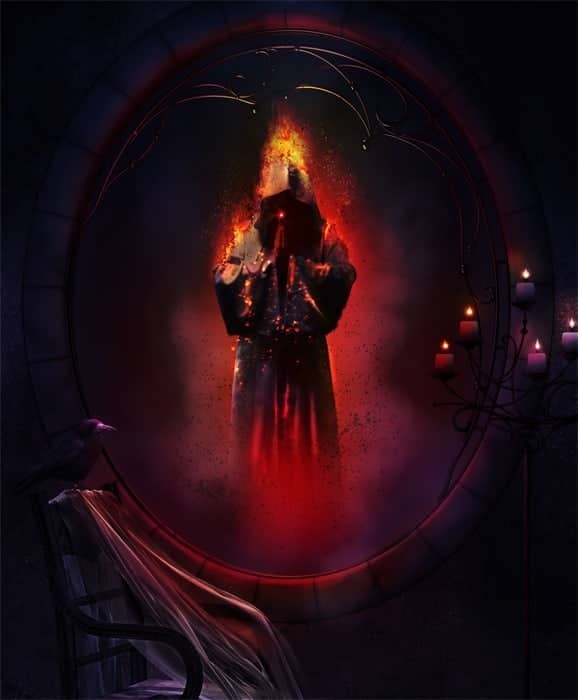
In this step we will add burning effect to the model. Firstly create a new layer above the model folder. Take one of particle brushes and paint some particles on the shoulder of the model. Use color #fc6703 for the particle. I named this layer right shoulder.
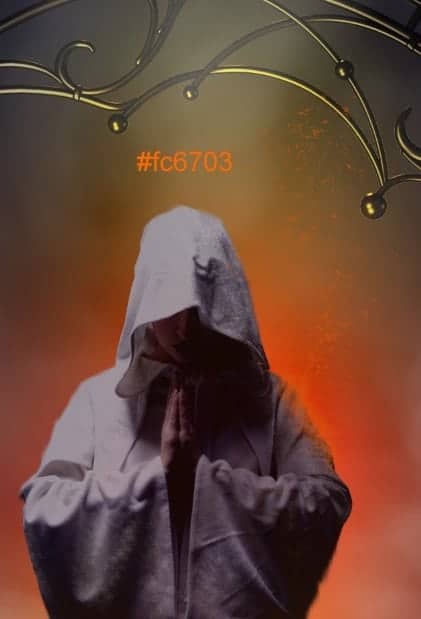
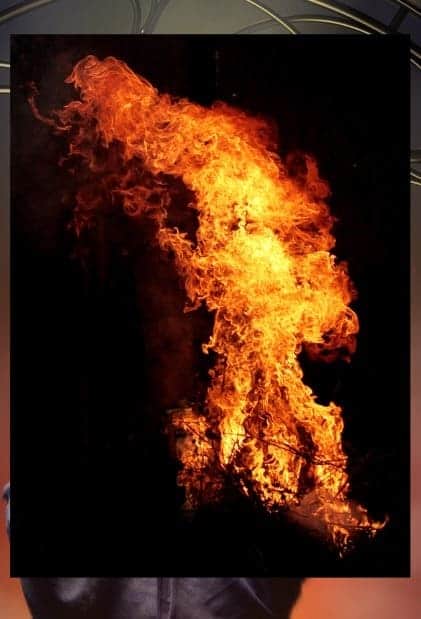
Next open the fire image above the right shoulder layer. Scale the size of the fire and give this image a clipping mask.
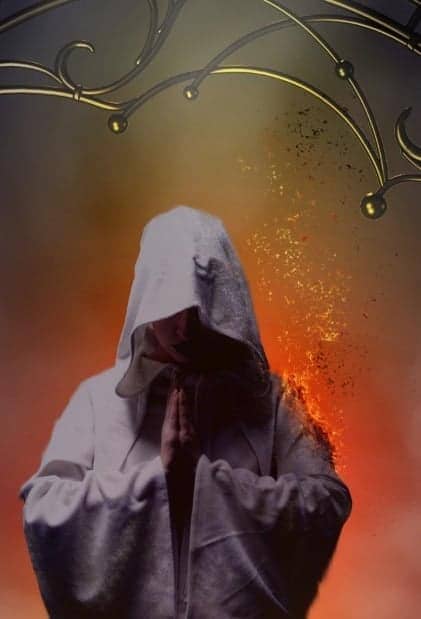
Do the same to the left shoulder to give burning effect on it.
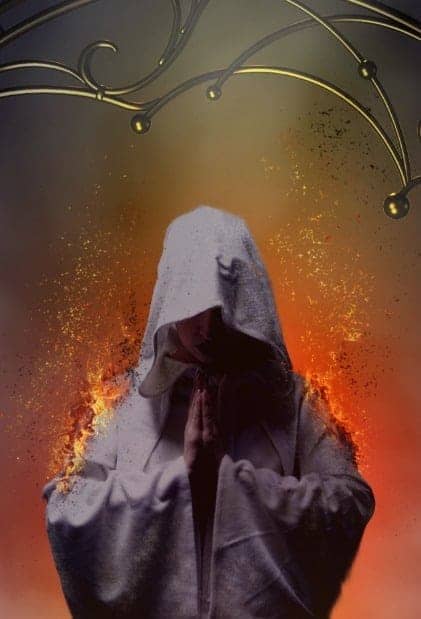
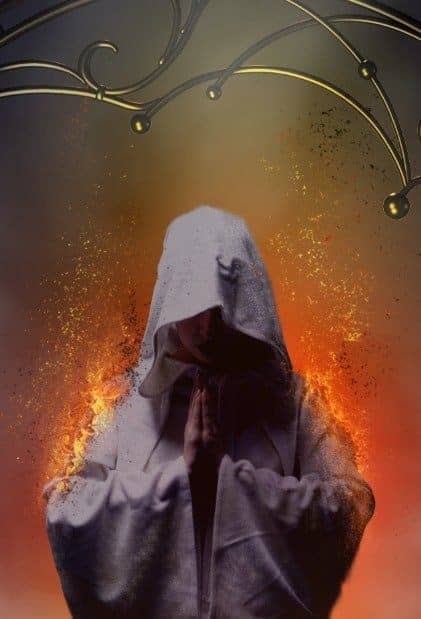
Create another new layer and paint more particles on areas around both shoulder. Use color #fc6703 for the color of the particles. Set this layer to screen at about 77% opacity. Select all the layers and group them in a folder. I named this folder fire on shoulder.
Step 12
Proceed to add fire to the head of the model. Create a new layer above the fire on shoulder folder. On this new layer, paint white particles and fire around the model’s head.

22 comments on “How to Create an Infernal Scene in Photoshop”
Interesting
Thanks a lot for the great tutorials you are providing..but as suggestion..why you are not doing the tutorial in videos on youtube channel...it would be really great and more helpful for trainer and trainee
Thanks agaim for the great effort
amazing tutorial can u share again psd link not working for learning
good work!
I lik dis
I am too retarded to complete dis
Please re uploaded PSD file because when i click on download showing 404 not found error, this is best work for me i want check how did you do this
amazing outstanding fantastic best work master blaster
Can you upload the files again
Elegant, modern, very different..
Beautiful, creative and acutely enjoy able!
Thank you for the tutorial.
Very good lesson but it lacks some details, it will be well to repeat the turoriel with more details
Awesome.
Thank you for sharing
how do u create the smoke
Where is the Raven image?
how do you create the smoke layer
simple usa un pincel de humo lo encuentras en la pagina de Devian art
Amaing work you did there, you are great. I will give it a try
really awesome ad heart touching tutorials,but where is the contact us? how to contact you?
Very nice tutorial..
good tut
Very good tutorial!!
mazen