Tutorial Resources
- Stone1– Adipancawh
- Stone2– Adipancawh
- Stone3– Adipancawh
- Stone4– Adipancawh
- Climber– Adipancawh
- Sky– Adipancawh
- Temple– Adipancawh
- Hawk– the0phrastus
- Bridge– lucieg-stock
- Waterfall– heike09
- Mountain1– meihua-stock
- Mountain2– meihua-stock
- Texture– wojtar-stock
- Ivy– gd08
Step 1
For the first step is skecth your ideas, in this step we will create a sketch of the idea that we have. the purpose of this sketch is to give us a reference for the next steps, so that we can know what kind of photos we will take photos or search.
Step 2
Now, we work with photoshop to combine the photos into a scene that we want. First step, Create a new document, Go to File > New or the short key Cmd /Ctrl+ N. A blank document with size of 3000 pixels wide and 2000 pixels high.
Step 3
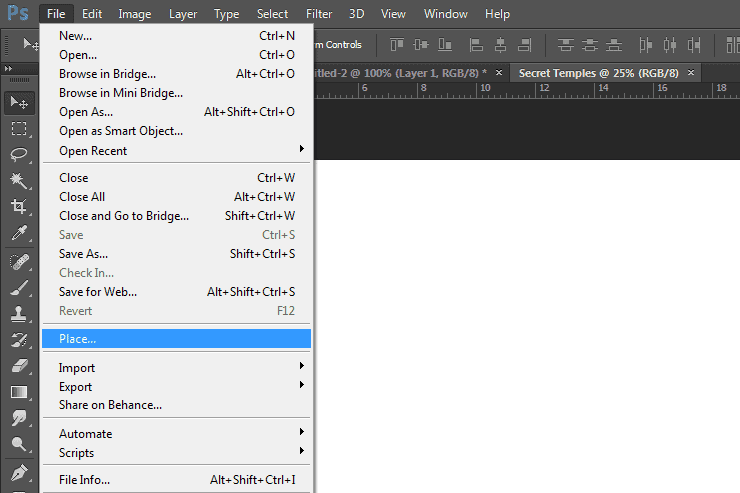
Then, we add the photos. Go to File > Place and select the photos.
Step 4
add the photos “sky” to document.
Step 5
After add the photos, then stretch, like shown in the image below. When you put the picture it automatically in the transformation. But if not, transform the landscape, press the short key Cmd /Ctrl+ T or go to Edit > Transform > Scale. Pull the black cubes in the corners to formed frame.
Step 6
Add adjustment layer with clipping mask to make sky look litle warm. Create a new adjustment layer: Color Balance (Layer > New Adjustment Layer > Color Balance), set the parameters like as shown image below.
Step 7
To make your work neatly, make a grup for each element. Select all the layers. Then, drag all of them to that little folder in the layers panel, which will create a new group with all of them. You could also select them and use the shortcut Ctrl/Cmd+G. Name this new group “Sky”.5 responses to “Create an Otherworldly Scene of a Climber in a Cave in Photoshop”
-
hey! I followed this tutorial thoroughly and I made it exactly like yours and it definitely helped me a lot to improve my PS work and to gain experience. I always wanted to make something like professionals as I’m beginner so keep posting such amazing works but I’ve also a complain as well there are lots of steps you didn’t necessarily mentioned in this tutorial and so that I had to find in the screenshots to make it look correct:))
-
Thanks for this. Mine turned out with slightly different tones to it, just for personal taste really. But I really appreciate the tutorial – I learned a lot, especially the Puppet tool, which I never knew about!
Gunna save me SO much time! haha.
-
amazing! an imaginary place… that only photoshop can create… hahaha… awesome!
-
some 0f images was gone can you please upload them again
-
Amazing work man!!!


Leave a Reply