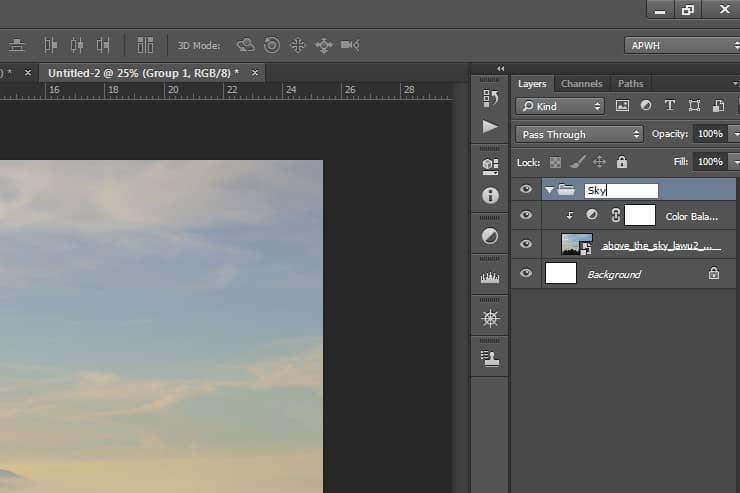
Step 8
Create new layer and give the layer with black color, you can use any way to create this. you can add adjustment or just press the short key Cmd /Ctrl + backspace (make sure your foreground color is black)
Step 9
Pick soft round brush and mask it like as shown image below.
Step 10
Add the photos “stone3” to document. then Use Pen Tool(P) to make selections..
Step 11
After we selection the image, then right click choose make selection and click Ok. it will make only stone areas that selected part as like shown image below.
Step 12
Then Add a layer mask to this image by clicking on the icon mask in the Layers panel.
Step 13
Now, repeat the previous step. add the all stones stock and selections all of them. then use transform tool to transform and put like as image below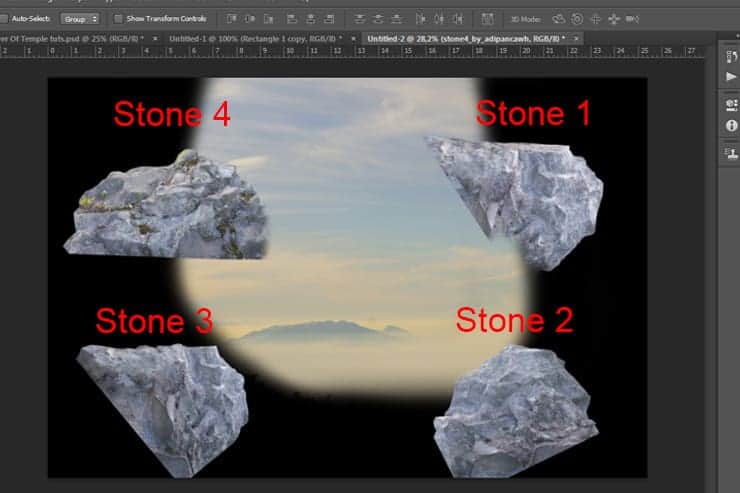
Step 14
Now we’ll make a cave with combine of the stone stock. Use Move tool and Transform tool to put each of stone like as shown image below.
Step 15
Select all the stone layers. Then, drag all of them to that little folder in the layers panel, which will create a new group with all of them. You could also select them and use the shortcut Ctrl/Cmd+G. Name this new group “Cave”.
Step 16
Then add layer mask.
Step 17
Pick soft round brush and mask it like as shown image below.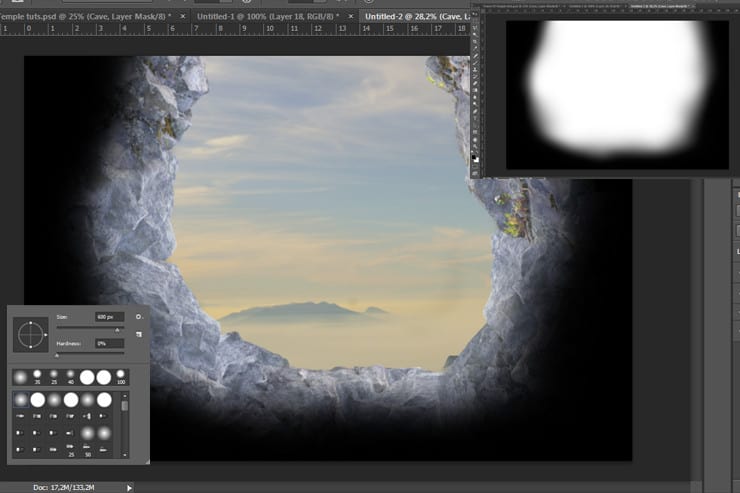
Step 18
Create new layer from background, active “use previous layer to create clipping mask”, color: gray, mode: overlay, active “fill with overlay-neutral color (50% gray)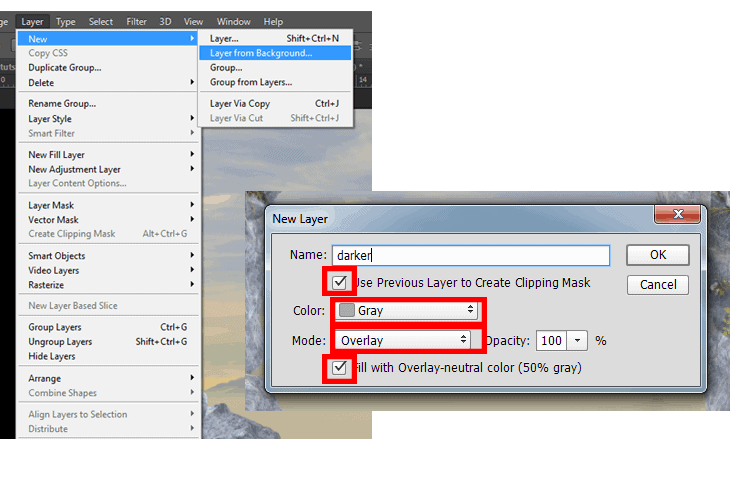
Step 19
Pick soft round brush and draw/paint some shadow like as shown image below.
Step 20
Create a new Hue/Saturation adjustment layer (Layer > New Adjustment Layer > Hue/Saturation), set the parameters like as shown image below, and Create Clipping Mask.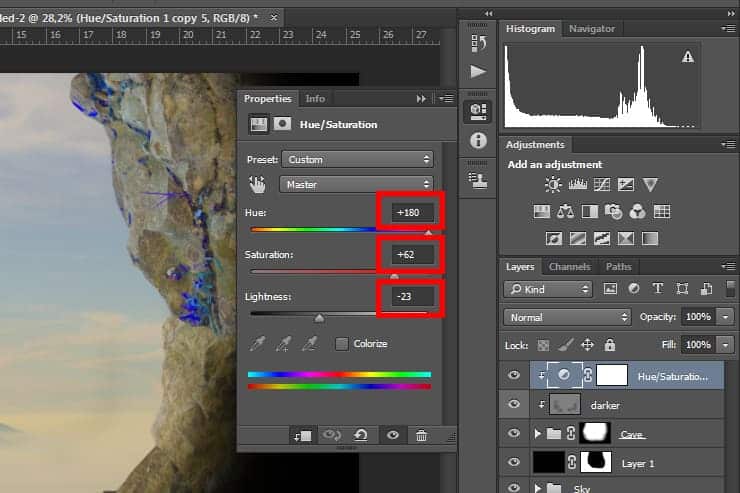
Step 21
Create a new Levels adjustment layer (Layer > New Adjustment Layer > Levels), set the parameters like as shown image below, and Create Clipping Mask.
Step 22
Add the photos “mountain1” to document. place mountain layer between sky layer and cave layer
Step 23
Pick soft round brush and mask it like as shown image below.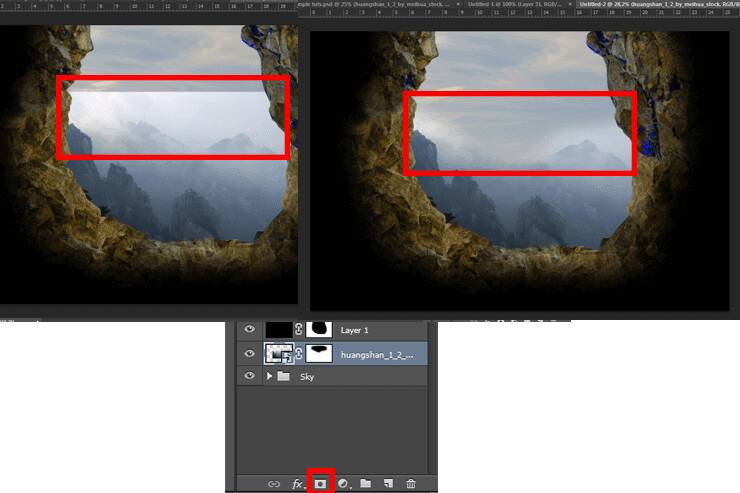
Step 24
Create a new adjustment layer: Color Balance (Layer > New Adjustment Layer > Color Balance), set the parameters like as shown image below and Create Clipping Mask.5 responses to “Create an Otherworldly Scene of a Climber in a Cave in Photoshop”
-
hey! I followed this tutorial thoroughly and I made it exactly like yours and it definitely helped me a lot to improve my PS work and to gain experience. I always wanted to make something like professionals as I’m beginner so keep posting such amazing works but I’ve also a complain as well there are lots of steps you didn’t necessarily mentioned in this tutorial and so that I had to find in the screenshots to make it look correct:))
-
Thanks for this. Mine turned out with slightly different tones to it, just for personal taste really. But I really appreciate the tutorial – I learned a lot, especially the Puppet tool, which I never knew about!
Gunna save me SO much time! haha.
-
amazing! an imaginary place… that only photoshop can create… hahaha… awesome!
-
some 0f images was gone can you please upload them again
-
Amazing work man!!!


Leave a Reply