Luminar AI lets you turn your ideas into reality with powerful, intelligent AI. Download the photo editor and see how you can completely transform your photos in a few clicks.
Step 22
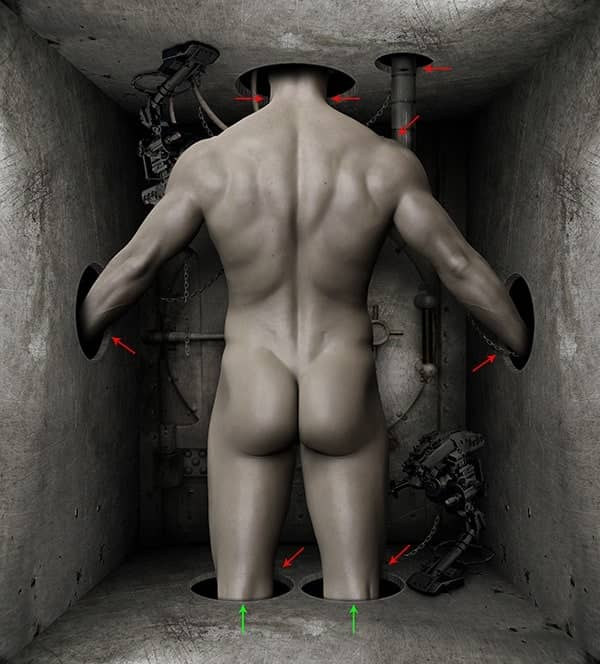
We are going to add more shadows. Add a new layer behind the Sci-Fi Prop layer. Then, hold the Ctrl key and click on the Sci-Fi Prop layer's thumbnail to call the selection. While having this selection active, Go to > Edit > Fill and choose Black from the Contents drop down menu, and set the Blending to Multiply.Select Distort from the Edit > Transform menu and drag the top corner of the handles to skew it a bit. Now Go to > Filter > Blur > Gaussian Blur and set the Radius to 36 Pixels. Grab an Eraser Tool (E) and with soft brush preset, remove unwanted parts of the shadow.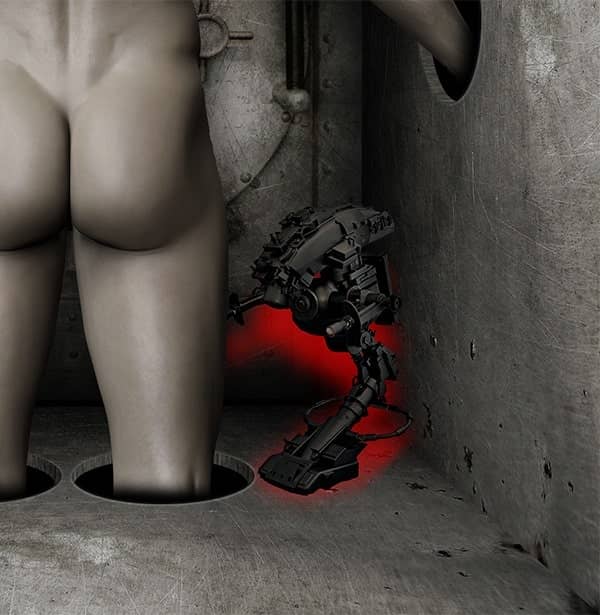
Step 23
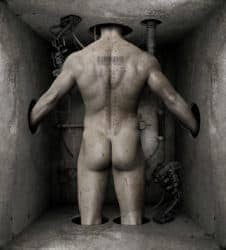
Pay attention to the bottom of Prop, which is the closest object to the ground. The object stick to the surface, means they need strong shadow around them. The theory is simple - the closer the object is to the surface, the stronger and the sharper is its shadow. The further the object is, the softer the shadow.So now, add a new layer behind the Sci-Fi Prop layer and grab a Brush Tool (B). Carefully paint another shadow under the Sci-Fi Prop object with soft brush and reduce the Opacity of the layer to 76%. Do the same process with the other Sci-Fi Prop object. Also add some shadows and fix some parts as shown below.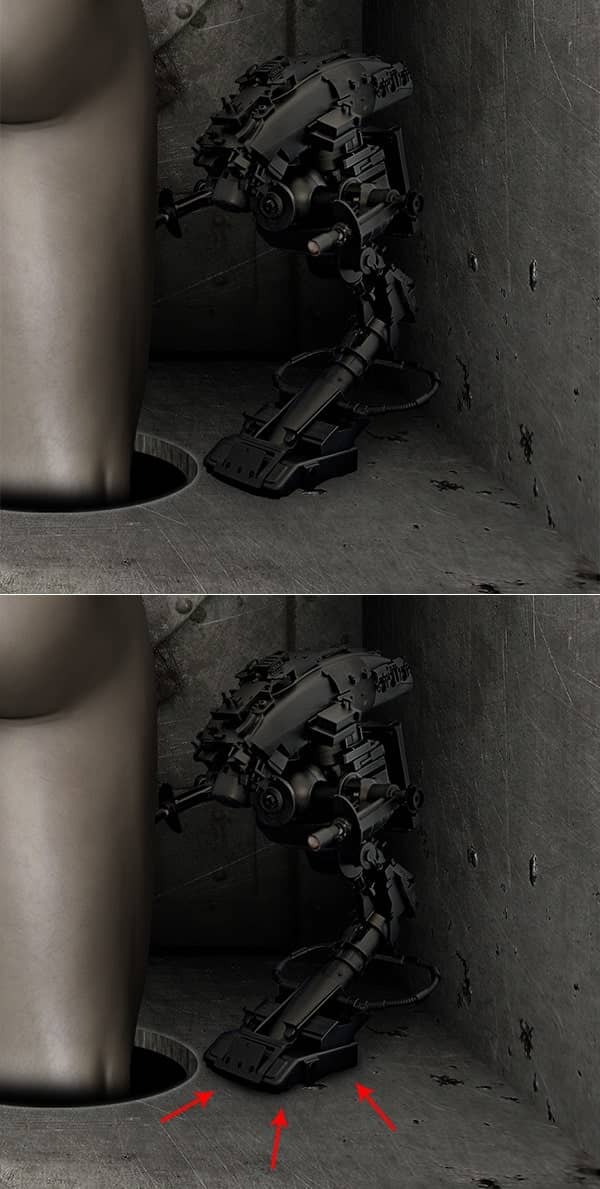
Step 24
Let's move to the other part of this tutorial - Detailing. This time we are going to add some chains to our scene. Open the Chain file, select one of the layers, then drag it to our canvas. In the Layers panel, place the layer below the Man layer, and put the Chain underneath the arm of a Man. You might notice the white halo around the Chain in the darker area. To get rid of that, load the layer as a selection, then Go to > Select > Modify > Contract, and enter the value to 1 pixel. Now Go to > Select > Inverse (Shift+Ctrl+I) to inverse the selection, then press Delete.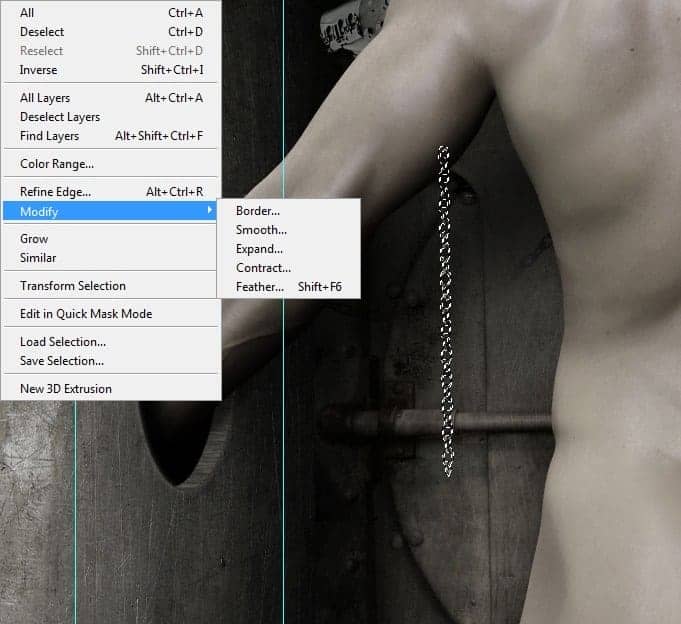
Step 25
Load the selection of the Chain once again. While the selection still active, grab the Gradient Tool (G). In the Option bar, select the Foreground to Transparent from the Gradient picker. Set the Gradient to Linear, and Mode to Multiply. Before we do anything, let's make sure our Foreground and Background colors are set to their defaults. The default color for the foreground is black, and the background is white. If they’re set to other colors, click the small icon labeled or simply press the D key to return the colors to the defaults. Now hold down the Shift key, then click and drag vertically from the top of the selection to about 100-120 pixels below.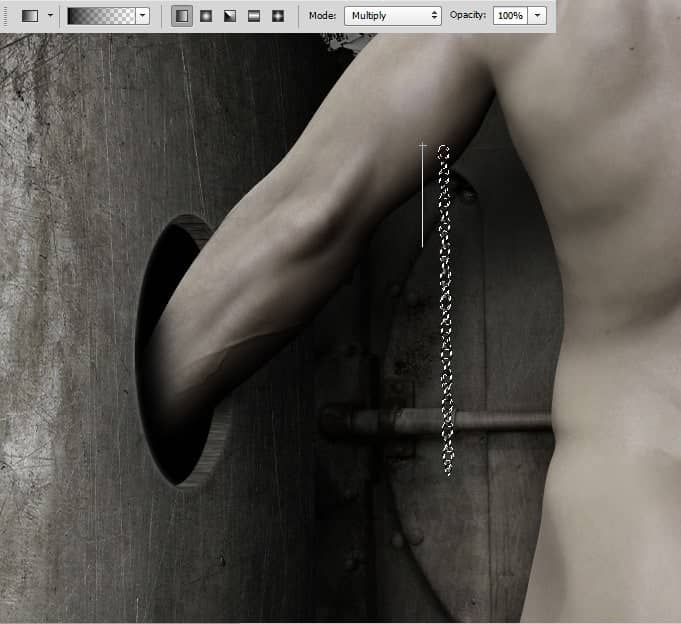

8 comments on “Create an Unnerving Surreal 3D Room Scene in Photoshop”
mas ariga yada. akun sosmed nya apa??? please reply.
i am your fans.
censored
He thick!!!!
Thank you for the creative lesson. I was interested in joining the parts. to get the camera with the robot, and proved very useful both to make the holes. I do not know how to .thank you. It's my pic http://j-p-g.net/if/2015/09/17/0842755001442497686.jpg
Awesome work. Only drawback is, I don't have Shutterstock, so I couldn't get the body.
parece del Siglo 22 en una Gran tribulacón
Que foto tan Cruel
This is CRAZY. Thank you!