Make your artwork look like they're from an alternate universe. These Cyberpunk presets work with Photoshop (via the Camera Raw filter) and Lightroom. Download all 788 presets for 90% off.
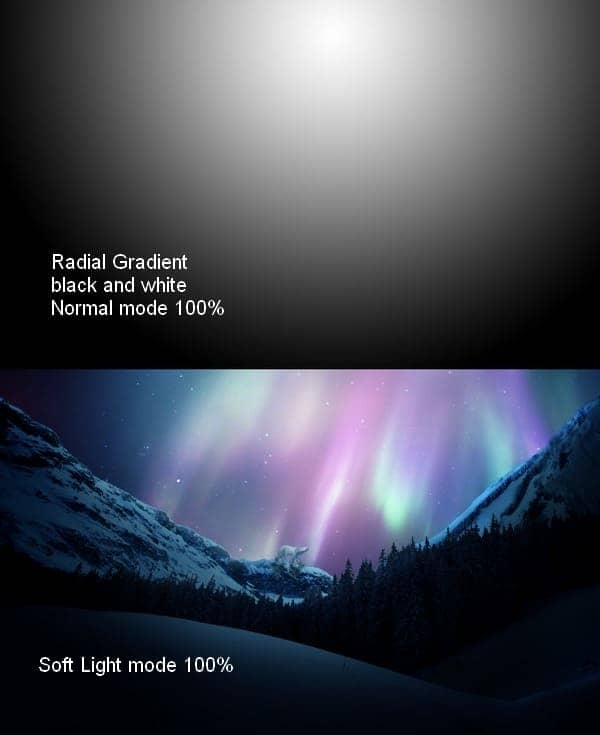
Step 26
To make reflected light from the sky to the scene, I add two layers on the top. On the first I use brush with color #f79ead with opacity from 40% to 80% to paint on the sky, the edges of the mountain, on the bear, ground and trees. Set the mode of this layer to Soft Light 100%:
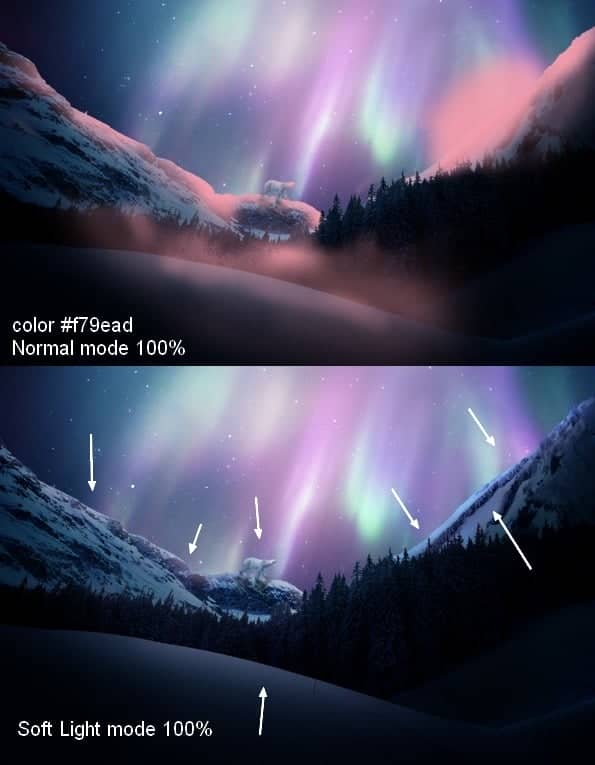
On the second I continue using this brush to paint on parts like on the first layer, remember to vary brush opacity to get more natural result:
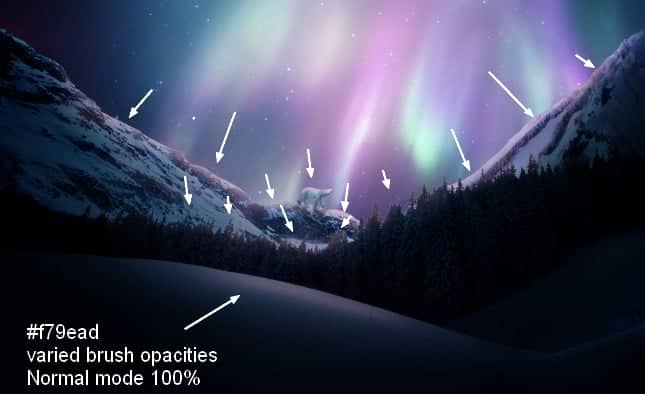
Step 27
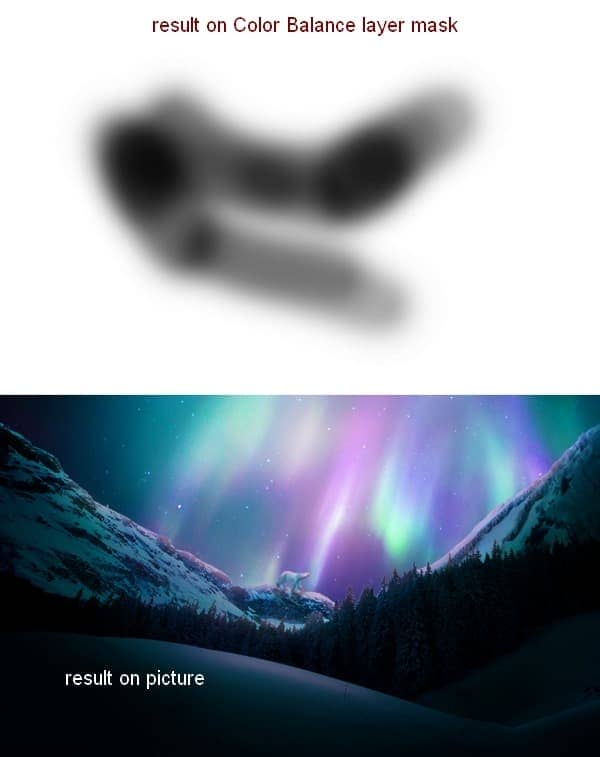
Create some new adjustment layers on the top to enhance color, saturation and increase the vibrance of the whole picture:
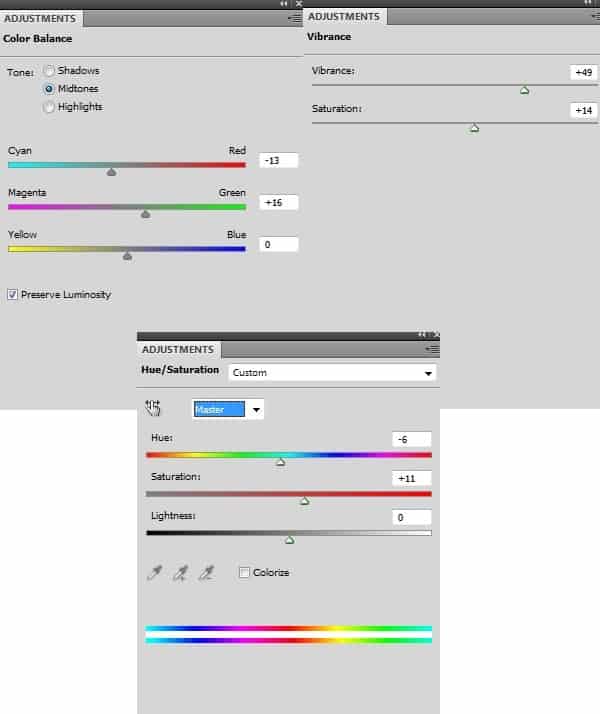
On Color Balance layer mask I use brush to reduce cyan on some parts below:
Step 28
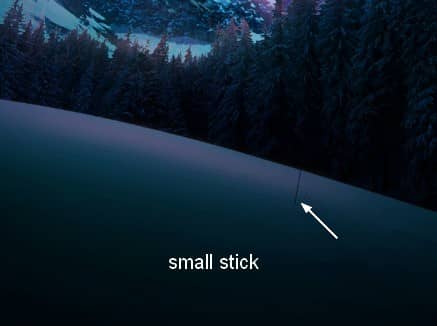
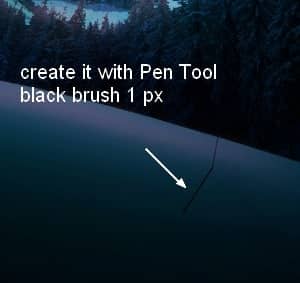
There is a small detail we need to take care of. You may notice that we have a small stick on foreground. I don't want to remove it with Clone Tool as I want to keep more details for this part. It needs a shadow! To do it I make a new layer within foreground group (above 1 and 2), use Pen Tool to make a line on the ground and stroke it with black brush, 1 px:
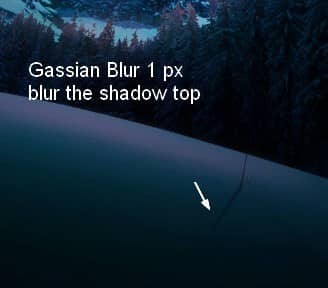
Apply Gaussian Blur with 1 px and blur the top of this shadow with layer mask:
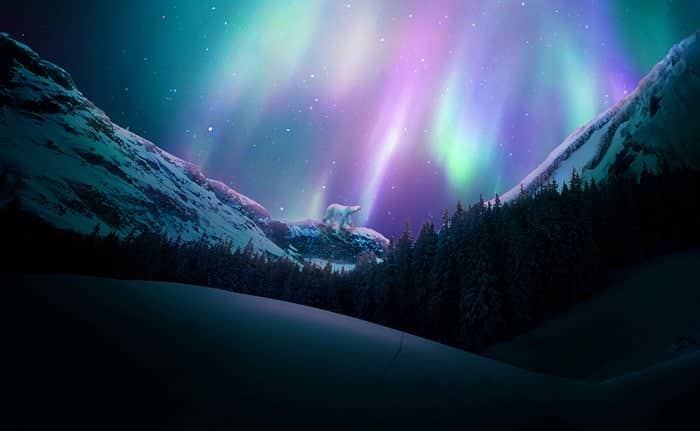
Final Results
![winter28-final[1] winter28-final[1]](https://cdn.photoshoptutorials.ws/wp-content/uploads/2013/12/winter28final1.jpg?strip=all&lossy=1&quality=70&webp=70&avif=70&w=1920&ssl=1)

11 comments on “Create a Vivid Winter Aurora Landscape”
Nice article for those people who wants to learn more about photoshop...
I did it: http://ednasnake.deviantart.com/art/Aurora-bear-453281848
nice....
nice tutorial ... thanks
good.......****
photoshop is amazing =)
just awesome thanks for nice tut.
I did it here: http://anne-wipf.deviantart.com/#/art/Winter-Aurora-426736776?hf=1 Thank you! *hugs*
I agree with Chaser
OMG!! What a humongous polar bear!
Not bad for a tut but you need to learn perspective... unless you intentionally decided to make a dinosaur-sized polar bear.
It's intentional... ?
A polar bear in that distance will be a 1 pixel dot.