Learn how to create your own custom backgrounds in Photoshop! You’ll learn how to combine and blend multiple landscape photos, mask using channel data, and finish it up with a strong gradient color effect.
Preview of Final Results

Tutorial Resources
Step 1
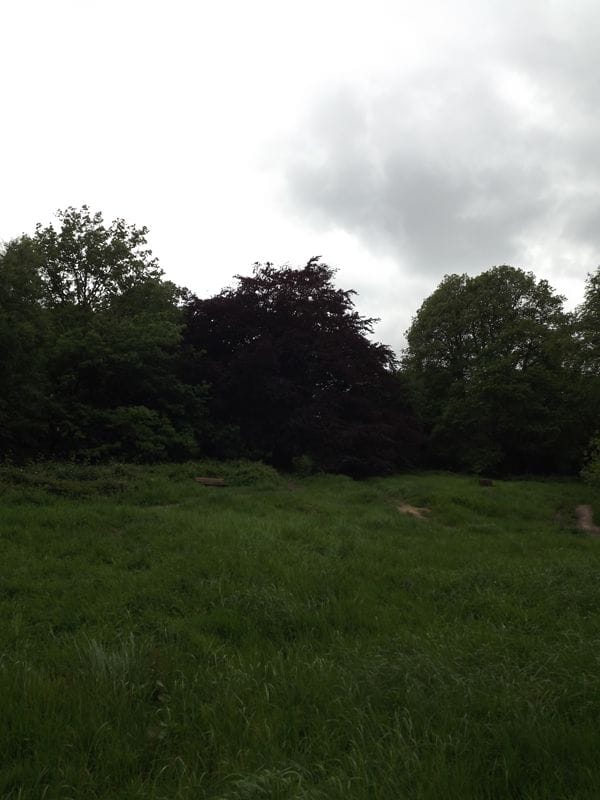
Open the image ‘Landscape 1’.

Step 2
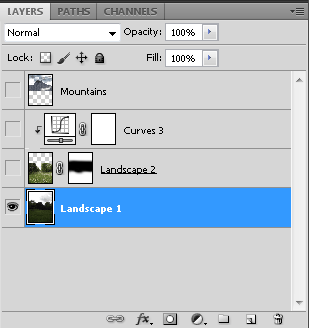
Open the image ‘Lanscape 2’ and place it above the ‘Landscape 1’ like you see below.

Step 3
Place your mouse on the ‘Landscape 2’ image and add a clipping mask by clicking the button I show you below.

Step 4
Now we have to delete the unwanted parts of ‘Landscape 2’ image by painting with black on the clipping mask.
I painted with a big soft brush at 100%. When I was closer to the image below I set the Opacity of the brush at 20% so that the blending is better. We want the effect that it’s only one image!

Step 5
We have now to fix the light of this field. Add a Curves Adjustment Layer only for the ‘Landscape 2’ image and set it like you see below. (Output 110; Input 141).


Step 6
Open the image ‘Mountains’ and place it above everything.

Step 7
Now we have to fit this image with the rest. You have to activate only the first layer (like shown below).

Step 8
Place yourself on ‘Channels’. Check which channel has more contrast between the land and the sky. In this case it’s the blue channel. (Your work will be now in black and white but son’t worry, it’s ok!).

Step 9
Right click on the Blue channel and choose ‘Duplicate Channel’. A pop up window will appear. Click ‘Yes’ and you will have the Blue channel duplicated. Activate only this channel.


Step 10
Let’s add some more contrast. Go to Image > Adjustments > Levels. Give more contrast moving the tree little arrows like you see below. Your images will be more contrasted.


Step 11
As you can see there are some parts that are not covered by black. Just paint over them with black color!

Step 12
Now keep pressed the button CTRL (CMD for mac) and click the Duplicated Blue channel. You will have the top part of the image selected.

Step 13
Delete the Duplicated Blue channel and reactivatee the other channels. Go back to Layers. Below you can see that the colors are back!

Step 14
Go to Select > Inverse. The selection will be inverted.
16 responses to “Create Your Own Custom Landscapes in Photoshop”
-
ahmazing
-
Awesome! :D
-
very impressive ! love this post! keep up!
-
wow.. Fantastic steps.. I really like it. keep up :-)
-
its fake
-
good!
-
good!
-
thanks for the good tutorial.
and i have a question for several step.‘…and with a soft brush and color white paint’
-> in this step, How much value for ‘Opacity’ to brush?
because, i can’t make it like ‘Step.20’. -
thank you so much !!!!!!
-
A simple to follow and interesting tutorial, I knew a lot of it already, but it was insightful to use adjustment layers to change layer properties, normally I’d of just adjusted the layer itself. Thanks for helping me to think about design in a different way.
-
this is nice post. and for learning.
-
Super Gracias por compartirlo
-
This is a wonderful tutorial, thank you so much. There are a couple things that could be improved:
1) Step 18 is a little confusing: why do we need to add a mask to the Hue/Saturation 1 adjustment layer if we are clipping it to Landscape 1? I feel that we are masking the effects of the adjustment layer and allowing to be seen the effects on just the top part, which in that layer is blank.
Also, you forgot to mention the Curves adjustment layer for the Mountains layer (though that is easy to figure out).
2) The tutorial goes from step 20 to step 31.
3) The “About” section at the bottom could be changed too ;)
Thank you again for this tutorial! First one I actually enjoyed doing :)
-
Good catch! Thanks for the tip Gabriela :)
-
-
Holy HDR Batman!
-
Way too contrasty results but still educational


Leave a Reply