The unreal is more powerful than the real because nothing is as perfect as you can imagine it because it’s only intangible ideas, concepts, beliefs, fantasies that last. Stone crumbles, wood rots. People, well, they die. But things as fragile as a thought, a dream, a legend, they can go on and on. In this Photoshop Tutorial, we will learn how to create an unreal scene. First, we added a background, then add a woman and dolphins and blended it together with adjustment layers. Next, added rays brushes and adjustment layers. For the final touch added Camera Raw Filter.
Preview of Final Image

Tutorial Resources
Step 1
Now, let’s start by creating a new image file, go to the Menu bar and click File > New, and then input the following values on their respective fields
- Preset: Custom
- Width: 3894px
- Height: 5841px
- Resolution: 72px
- Color Mode: RGB Color 8 bit
- Background Contents: Transparent

Step 2
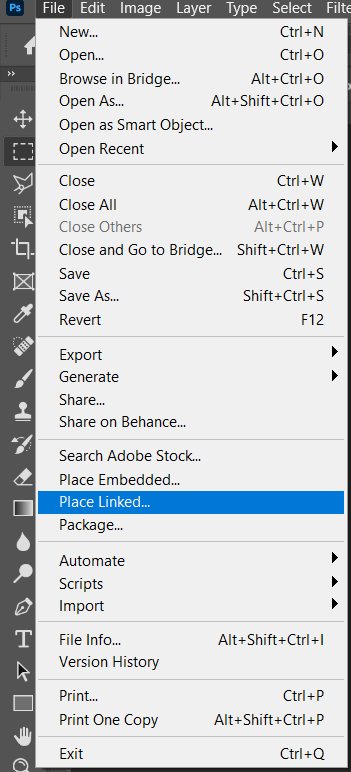
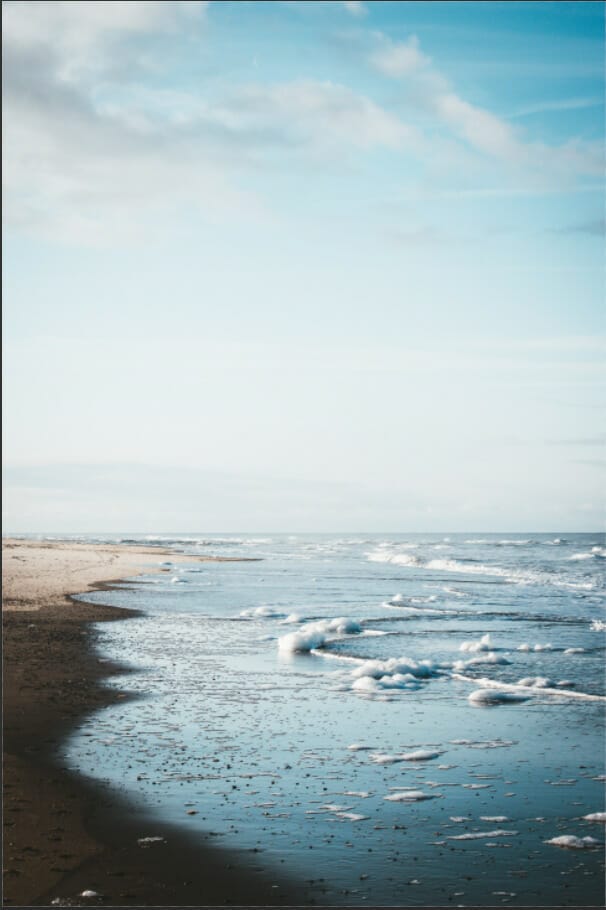
Now, place Background photo Go to File > Place and select background. Then place it on our work canvas. Then position the image with the transform tool (Ctrl / Cmd + T). Hold Alt + Shift and rasterize like the image below. In Photoshop CC only hold Alt to rasterize all sides together.


Step 3
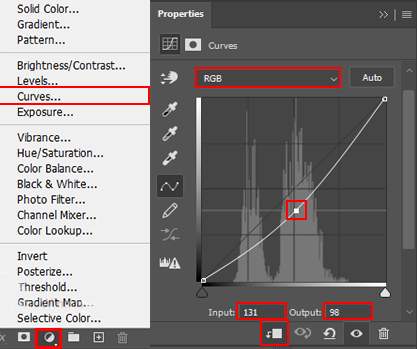
Add Adjustment Layer “Curves” and press Ctrl/Cmd + I to invert and use Brush Tool(B) Soft Round with foreground color white and paint on the sky.


Step 4
Now, place Dolphins Go to File > Place and select Dolphins, then place it to our work canvas and position the image with the transform tool (Ctrl / Cmd + T). Hold Alt + Shift and rasterize like the image below. In Photoshop CC only hold Alt to rasterize all sides together.


Next, select the layer and create a layer mask. Then use brush tool(B) Soft Round with foreground color black and paint from bottom to top. The flow of brush set to 10%.


Step 5
Add Adjustment Layer “Color Balance”

Step 6
Add Adjustment Layer “Curves” and press Ctrl/Cmd + I to invert and use Brush Tool(B) Soft Round with foreground color white and paint dark parts.


Step 7
Next, we will open Woman. After you open the image, use the Quick Selection Tool(W) and start selecting. After the selection area has been created, simply copy (Ctrl / Cmd + C) and Paste (Ctrl / Cmd + V) it to our work canvas. Then position the image with the transform tool (Ctrl / Cmd + T). Hold Alt + Shift and resterize like the image below. In Photoshop CC only hold Alt to resterize all sides together.


Leave a Reply